Categories
Uncategorized

Learn About Gathering Requirements of the Database: Essential Steps and Best Practices

Understanding Requirements Gathering

Requirements gathering is essential for successful database projects.

It involves defining the project scope, identifying key stakeholders, and establishing methods for effective requirements collection.

Defining Project Scope

Defining the project scope is crucial. It sets the boundaries for what the project will achieve and helps avoid scope creep.

A well-defined scope includes the objectives, deliverables, and constraints. This ensures that all team members have a clear understanding of what needs to be accomplished.

A detailed project scope reduces misunderstandings and provides a reference point throughout the project.

It involves creating a scope statement that outlines what the project will and will not include.

Identifying Stakeholders

Identifying stakeholders helps pinpoint who will impact or be impacted by the project.

Stakeholders can be internal team members or external partners and customers. Understanding their needs and expectations is crucial for gathering accurate requirements.

Engaging stakeholders early is important. It ensures their needs are met and helps anticipate and address potential issues.

Effective communication with stakeholders can lead to better project outcomes and stakeholder satisfaction.

Establishing Effective Requirements Gathering

Establishing effective requirements gathering processes ensures that the project’s needs are accurately captured.

This involves using techniques such as interviews, surveys, and workshops to collect information.

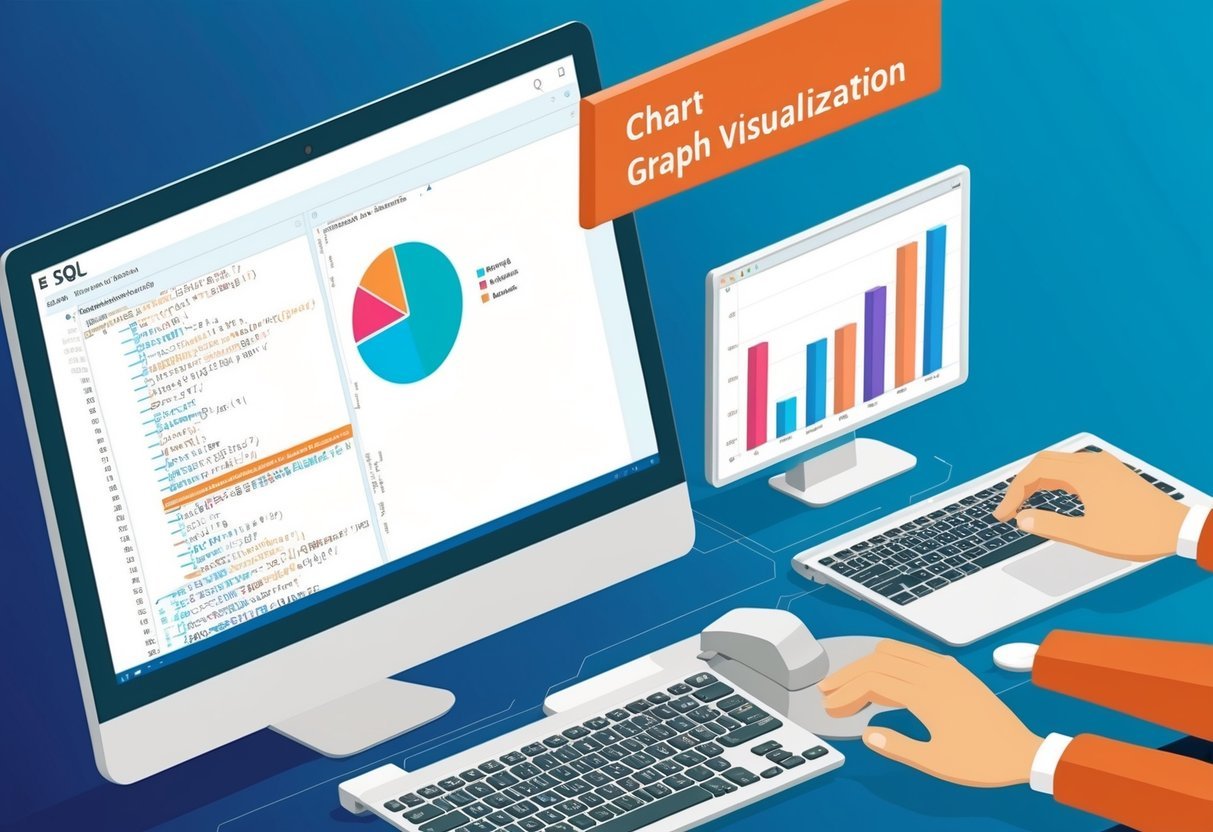
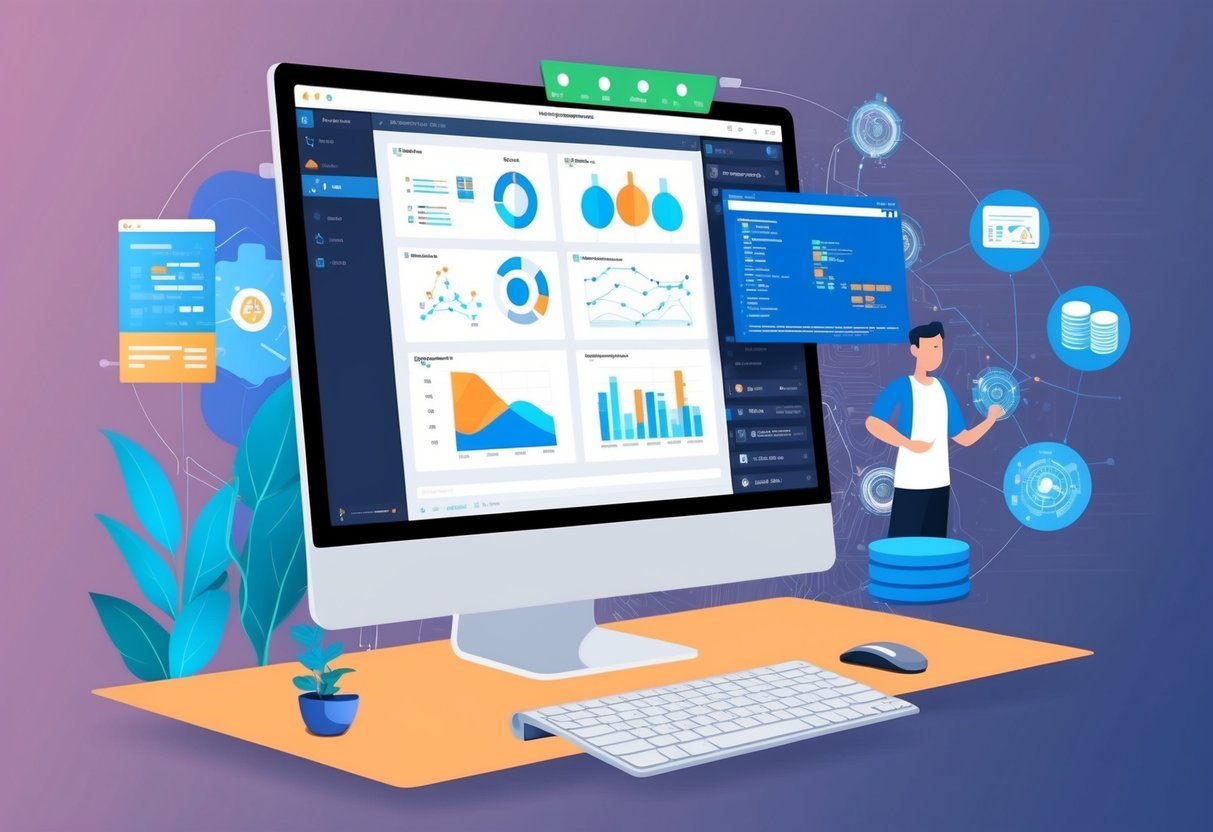
Utilizing tools like flowcharts or software aids in organizing and analyzing the gathered data. This helps create a comprehensive list of requirements that aligns with stakeholder goals and business objectives.

Clear documentation and regular updates to the requirements keep the project on track and aligned with the initial goals.

Eliciting User Needs and Software Requirements

Gathering information on user needs is crucial for successful software development.

It involves various techniques to ensure that requirements are well understood and properly documented. Key methods include conducting interviews, utilizing surveys and questionnaires, and applying observations and document analysis.

Conducting Interviews

Interviews are a direct way to gather detailed information from stakeholders.

By engaging in conversations, analysts can uncover user needs and preferences.

It’s important to prepare open-ended questions that encourage detailed responses. Face-to-face meetings can provide insights into the nuances of user requirements.

Listening actively and asking follow-up questions can reveal underlying issues not initially mentioned.

Interviews also help establish a rapport, which can be beneficial for ongoing collaboration.

For best results, it’s advised to conduct interviews with a variety of stakeholders, such as end-users and project sponsors, to gain a rounded perspective.

Utilizing Surveys and Questionnaires

Surveys and questionnaires are useful for collecting data from a large group of people efficiently.

These tools allow users to provide input on functionality and preferences.

By designing questions carefully, analysts can ensure that they align with project goals and gather relevant information.

Multiple-choice formats help in getting quantitative data, while open-ended questions can provide qualitative insights.

To maximize response rates, it’s helpful to keep surveys concise and provide a clear context about their purpose.

Analysis of survey results can highlight trends and common needs among users, enabling the team to prioritize requirements effectively in software development.

Applying Observations and Document Analysis

Observations involve watching users interact with existing systems to identify usability issues and unmet needs.

This real-world evidence can be particularly valuable when people find it hard to articulate their requirements.

Observing users in their natural environment can uncover tacit requirements that might not come up in interviews or surveys.

Document analysis involves reviewing existing documentation such as manuals, reports, and business plans.

This helps in understanding the current system and any known constraints.

Combining observations with document analysis offers a comprehensive view that informs requirement specifications, ensuring that user needs are accurately captured and communicated to the development team.

Delineating Functional and Non-Functional Requirements

Understanding the differences between functional and non-functional requirements is vital for effective database management. This section explores key aspects such as system behavior, performance, and how these requirements impact scalability and security.

Specifying Functional Requirements

Functional requirements describe what the system will do. They define specific actions and processes, including user authentication and data retrieval.

These requirements focus on the tasks that ensure the database functions correctly, like processing transactions or managing data entries.

Tasks like user login, data validation, and workflow operations are typical examples. The system behavior outlined here lays the groundwork for the database’s core purpose.

Clearly specifying these requirements helps in building a robust database that meets the intended functional needs.

Examples of functional requirements:

  • User Actions: Login, logout
  • Data Management: Read, write, update
  • Task Processing: Transactions, reports

Functional requirements are crucial for maintaining the database’s intended behavior and ensuring user needs are met effectively.

Clarifying Non-Functional Requirements

Non-functional requirements focus on how well the system performs tasks. They address attributes such as speed, scalability, and security.

Unlike functional requirements, which define specific actions, non-functional requirements concern the quality of these actions.

Scalability ensures the system can handle growth in users or data. Performance measures how quickly an operation is completed. Security requirements safeguard data against unauthorized access.

Core non-functional requirements:

  • Performance: Speed, response time
  • Security: Data encryption, authentication
  • Scalability: Capacity handling, adaptability

By clarifying these requirements, the database can achieve high levels of efficiency and reliability, ensuring it meets user expectations in terms of performance and security.

Managing Data Requirements and Database Design

Managing data requirements and database design involves creating a structured framework to ensure data is stored efficiently and securely. It is crucial to focus on both how data is organized and the rules for data relationships to improve database integrity and performance.

Understanding Data Structure and Ownership

Data structure refers to how data is organized within the database. It is essential to understand data types and relationships, such as those managed through primary keys and foreign keys.

These components play a crucial role in ensuring data integrity and enabling efficient queries.

Properly defining data ownership ensures that each piece of data is accurately maintained and protected against unauthorized access.

Organizations must decide who has control over specific data elements. This decision affects how data is updated, accessed, and shared across different systems.

It is important to know who is responsible for updating specific data, as this affects database reliability.

Clearly defining ownership helps maintain consistency and prevents data duplication or loss.

Detailing Database Schema Design

Database schema design involves creating a blueprint for how data will be stored, including its tables and relationships. It ensures the database will meet user needs while being scalable and efficient.

Techniques like normalization help minimize redundancy and improve data consistency. When designing schema, consider the primary keys that uniquely identify records and foreign keys that establish relationships between different tables.

Choosing the right schema design impacts database performance and maintenance efforts.

The design process should account for future growth and changes, ensuring flexibility. This involves anticipating how data requirements might evolve and building a structure that can adapt.

By focusing on these factors, developers create a database that is robust and efficient, meeting both current and future data management needs. For more details, consider reading about database schema design.

Ensuring Data Security and Integrity

In database management, maintaining security and integrity is essential to protect sensitive information and ensure accurate data processing. Key practices include implementing robust security measures and enforcing data integrity methods.

Implementing Security Measures

To protect databases, it’s critical to implement strong security frameworks.

This often starts with encryption, which scrambles data to keep it safe from unauthorized access.

Databases should use both encryption at rest and in transit to maintain confidentiality.

Modern databases, like TiDB, use multiple data encryption techniques to ensure data remains secure.

Access control mechanisms are also key. Users should have access only to the data they need.

Authentication methods like multi-factor authentication add an additional layer of protection, ensuring that only authorized individuals can access sensitive data.

Regular security audits are crucial to identify and fix vulnerabilities. These audits should be complemented with up-to-date security patches.

By following these practices, organizations can mitigate risks and address ethical issues related to data management.

Enforcing Data Integrity Methods

Data integrity focuses on maintaining accurate and consistent data within the database.

A common approach is to enforce validation rules. These rules check the accuracy of data as it is entered into the system.

For instance, validation rules in an e-commerce platform can prevent the acceptance of invalid credit card information, ensuring data accuracy.

Integrity can also be maintained through constraints, which ensure that data abides by certain business rules and relationships.

For example, foreign key constraints maintain relationships between tables, preserving consistency throughout the database.

Regular audits and data cleansing help in identifying discrepancies and correcting errors.

These practices are integral to protecting data integrity from ethical issues and maintaining trustworthiness in data management.

Planning for Database Scalability and Efficiency

Planning for database scalability and efficiency involves preparing systems to handle large volumes of data while maintaining performance. It’s about allocating resources effectively and ensuring quick query responses.

Scaling Database Resources

To handle growing data requirements, databases need to scale effectively.

Scalability in databases ensures systems can manage increasing workloads without compromising performance.

Horizontal scaling, which involves adding more machines, helps distribute the load, making the system more robust.

Vertical scaling, increasing resources like CPU and memory, can also enhance capacity, though it may reach physical limits.

Cloud-based solutions enable flexible scaling, providing resources as needed, thus improving efficiency.

Monitoring and analytics tools can track system performance, helping database administrators make informed scaling decisions at the right time.

Implementing such techniques supports stable and efficient database operations.

Optimizing Query Performance

Optimizing query performance is crucial for database efficiency.

Queries should be structured to retrieve data quickly, minimizing resource use.

Indexing is a key technique, speeding up data retrieval by reducing the need to scan entire tables.

Database administrators should analyze query patterns to identify performance bottlenecks.

Updating outdated queries or restructuring them can enhance efficiency significantly.

Use of caching mechanisms can reduce query load by storing frequently accessed data, making subsequent retrievals faster.

Regularly monitoring query performance can detect inefficiencies and guide improvements.

It’s vital to balance maintaining swift query responses with efficient resource usage to ensure a well-performing database system.

Adapting to Evolving and Changing Requirements

A person at a computer, surrounded by documents and diagrams, capturing evolving requirements for a database

Adapting to changing requirements in database projects is critical for success. Key focus areas include managing scope creep and addressing shifting stakeholder expectations effectively.

Managing Scope Creep

Scope creep occurs when a project slowly expands beyond its original objectives.

To manage this, teams should set clear project goals and maintain an updated project documentation.

Regular communication helps keep everyone aligned.

It is important to prioritize requirements and use tools like change logs to track modifications.

Regular reviews during development phases can identify potential scope creep early.

By catching these changes, the team can make informed decisions about adjustments.

This proactive approach helps in avoiding unnecessary changes that do not add significant value.

Tracking time and resources is also crucial.

When scope changes are documented and reviewed, it allows teams to manage resources effectively and stay on budget.

Monitoring these elements ensures adherence to the original project timeline.

Addressing Changing Stakeholder Expectations

Stakeholder expectations often evolve as projects develop. To address these changes, teams must maintain open lines of communication.

Regular stakeholder meetings and updates help gather feedback and discuss any changing needs. Agile methods, which embrace flexibility, can be useful in adapting to evolving requirements by facilitating iterative development.

Documenting all stakeholder feedback allows the team to evaluate which changes are feasible.

Prioritizing these changes based on impact and resources ensures that the project meets critical needs first. Keeping stakeholders informed about the progress on their concerns builds trust and encourages ongoing collaboration.

Project teams should also set realistic expectations about what can be achieved within the given constraints. By doing so, they can better manage stakeholder interests and ensure alignment with the overall project goals.

Leveraging Modeling Techniques for Precision

A person using a computer to analyze data and create a database model

Modeling techniques play a crucial role in database requirements gathering, ensuring precision in both structure and function.

By focusing on specific methods like use cases and data flow diagrams, developers can effectively translate stakeholder needs into clear and actionable database designs.

Crafting Comprehensive Use Cases

Crafting detailed use cases is essential for accurately capturing requirements. They are narratives that describe how different stakeholders interact with a system to achieve specific goals.

Use cases help in identifying functional requirements by showcasing real-world scenarios. They provide a clear understanding of how users will interact with the database, ensuring all necessary interactions are considered.

Prototyping can be an effective complement to use cases. By building simple models or prototypes, stakeholders can visualize and verify requirements, reducing the risk of miscommunication.

This hands-on approach allows for quick adjustments to align the database design with user needs. Properly developed use cases lead to efficient database architectures that fulfill user expectations and functions precisely as needed.

Constructing Data Flow Diagrams

Data flow diagrams (DFDs) are another powerful tool in database modeling. They visually represent how data moves within a system, detailing inputs, processes, and outputs.

By using DFDs, developers can pinpoint where data is coming from, where it goes, and how it is processed. This clarity helps in defining both data structures and storage needs accurately.

Constructing precise data flow diagrams requires understanding the system’s operational context and data interactions.

By mapping out data flows, it becomes easier to identify potential bottlenecks and ensure data integrity and efficiency. DFDs play a critical role in optimizing database performance by revealing essential pathways and interactions, supporting developers in building a system tailored to meet its intended specifications.

Navigating the Software Development Life Cycle (SDLC)

Understanding the Software Development Life Cycle is crucial for planning and executing a software project efficiently. It involves transforming requirements into functional systems while ensuring each phase is thoroughly addressed.

Logical design plays an integral role in translating these requirements into a detailed structure that guides the development process.

Incorporating Requirements into Logical Design

In the SDLC, requirements are gathered and analyzed to form a clear understanding of what the system needs to achieve. This analysis informs the logical design phase, where the focus is on structuring these requirements into a coherent system architecture.

Logical design involves creating models and diagrams, such as Entity-Relationship Diagrams (ERD), to visualize data flow and interactions. This phase outlines how components interact and depend on one another.

By detailing each element, developers can predict potential challenges and streamline the coding process.

A well-executed logical design acts as a bridge between conceptual ideas and actual coding. It ensures that all parties involved have a unified understanding of the system’s structure, contributing to a smoother development process.

Understanding the Development Life Cycle

The development life cycle is divided into distinct phases that guide the transformation of requirements into a finished product. These stages typically include planning, analysis, design, implementation, testing, and deployment.

During the design phase, requirements are converted into specifications.

Proper documentation is crucial here, as it sets the foundation for subsequent development and testing. Ensuring precision in these documents reduces errors during the development phase.

In the testing phase, the focus is on verifying that the software adheres to specified requirements and is free of defects. Iterative testing helps to uncover issues early, saving time and resources.

This phase ensures the final product is reliable for users and meets the initial project goals. Engaging stakeholders during testing can provide valuable feedback, enhancing the software’s quality and user satisfaction.

Overcoming Communication Barriers in Requirements Gathering

A group of diverse people sit around a table, pointing at a whiteboard filled with diagrams and charts, discussing database requirements

Clear communication is vital in the requirements gathering process. Miscommunication can lead to incomplete or misunderstood requirements. Utilizing visualization and fostering open dialogue with stakeholders are key strategies to tackle these challenges.

Employing Visualization Techniques

Using visualization tools like mind maps and diagrams can help break down complex ideas. These tools provide a clear visual representation of the project, making it easier for everyone to understand different aspects of the requirements.

Mind mapping is especially useful during brainstorming sessions. It allows teams to organize ideas and see connections between concepts. This approach makes abstract ideas concrete, which reduces ambiguity in communication.

Team members can visualize how each requirement fits within the larger system.

Flowcharts and other diagrammatic tools also aid in illustrating workflows and relationships. These visuals ensure that both the development team and stakeholders have a common understanding of the requirements. As a result, it minimizes errors and promotes a shared vision for the project.

Facilitating Effective Stakeholder Communication

Engaging stakeholders early and frequently is essential. Regular meetings and open forums encourage stakeholder communication and participation. This involvement ensures everyone has a voice in the requirements gathering process, reducing potential communication barriers.

Active listening during these discussions is crucial. It helps teams identify the real needs and priorities of the stakeholders.

Using clear language and avoiding technical jargon promote understanding and prevent confusion.

Documenting discussions can also help. Written records of meetings and decisions serve as a reference point, ensuring that everyone stays aligned with the agreed-upon requirements. This practice can significantly decrease misunderstandings and foster a collaborative environment.

Implementing a Robust Requirements Management Process

Implementing a robust requirements management process involves managing changes and ensuring alignment with existing business processes. It’s crucial for effective project management and helps in minimizing risks by keeping everything organized and efficient.

Tracking Requirement Changes

Tracking changes in requirements is essential for maintaining order and consistency in project management. As projects evolve, new requirements may arise, and old ones may change.

Keeping a detailed log of requirement changes allows teams to quickly identify what has been updated, ensuring that all stakeholders are informed.

Using tools like traceability matrices can help track these changes effectively. They link requirements to specific project elements, making it easier to understand their impact. Regular meetings can also facilitate clear communication about changes, further mitigating risks associated with misalignment.

Ensuring Alignment with Business Processes

Ensuring requirements align with business processes helps maintain harmony and efficiency across different departments. This alignment ensures every requirement serves a business purpose and supports overall goals.

Teams should regularly review requirements to ensure they are consistent with business functions and objectives.

Collaborating with stakeholders, including business analysts and process owners, ensures that requirements reflect actual needs. Using process modeling techniques can also visualize how requirements integrate with business operations.

These practices help reduce misunderstandings and foster a collaborative environment where business needs are always at the forefront of decisions.

Frequently Asked Questions

A group of people discussing and brainstorming ideas on a whiteboard, with charts and diagrams related to database requirements displayed around the room

The following sections address important topics related to gathering requirements for database projects. From best practices to effective tools, these points illuminate key aspects of the process.

What are the best practices for collecting requirements in a software development lifecycle?

Best practices include engaging stakeholders throughout the process and validating requirements regularly. It’s also important to prioritize clarity in documentation to prevent misunderstandings.

Can you provide an example of a requirement gathering process for a database project?

A typical process might start with stakeholder interviews to understand business needs. This is followed by drafting requirement documents, soliciting feedback, and making necessary revisions until a consensus is reached.

What tools or templates can aid in the efficient gathering of project requirements?

Tools like Requiment’s requirements gathering software can guide users through the process. They offer structured templates and questions that help define the project scope and capture detailed requirements.

How do you identify and document data-specific requirements for a new database?

Data-specific requirements are identified by closely analyzing the types of data and operations the database will support. Documentation should clearly define data types, sources, and access protocols.

What are the critical stages of requirement gathering, and how do they impact project success?

Critical stages include initial stakeholder interviews, requirement validation, and documentation. Each stage ensures that the final database design meets user needs and prevents costly redesigns later in the project.

What techniques are most effective for eliciting clear and actionable project requirements?

Techniques like workshops, interviews, and surveys can be very effective. These methods involve collaboration and allow for detailed feedback. This is crucial for refining requirements into actionable goals.

Categories
Uncategorized

Learning About Shell Sort and How to Implement in Python: A Comprehensive Guide

Understanding Shell Sort

Shell Sort is a unique sorting algorithm designed to improve the performance of insertion sort by using a sequence of gaps. It reduces the number of shifts required, making it more efficient for medium-sized data sets.

Conceptual Overview

Shell Sort, named after its creator Donald Shell, enhances the insertion sort algorithm by segmenting the list of elements to be sorted into smaller sublists. These sublists are sorted using insertion sort, but the key difference is the use of gaps between elements, which allows for more efficient sorting.

Initially, the gap is large and decreases gradually. As the gap reduces, elements are moved closer to their final position. This method of sorting allows the algorithm to overcome the limitations of simple insertion sort when dealing with larger, unsorted data sets.

Comparing Shell Sort to Other Sorting Algorithms

Shell Sort stands out among sorting algorithms due to its use of variable gaps for sorting, as opposed to comparing adjacent elements used in bubble or insertion sort. Unlike Quick Sort or Merge Sort, which have more predictable time complexity, Shell Sort’s performance can vary based on the gap sequence used.

Shell Sort is more efficient than bubble sort due to fewer comparisons and swaps. It is less efficient than algorithms like Quick Sort in terms of average time complexity, especially for larger data sets. Shell Sort finds its niche in situations where memory usage is more critical than sorting speed.

Algorithm Complexity

The time complexity of Shell Sort is primarily influenced by the choice of gap sequence. The complexity can range from O(n^2) down to O(n log n).

Commonly used sequences, such as the halving method, provide a good balance of efficiency and simplicity.

In terms of space complexity, Shell Sort is quite efficient, using O(1) extra space, as it sorts the list in place. This makes it suitable for systems with limited memory and places it alongside other in-place sorting algorithms, providing a balance between performance and resource usage.

The Mechanics of Shell Sort

Shell Sort is an enhancement of insertion sort that optimizes sorting by allowing the comparison and exchange of elements separated by a gap. This method expeditiously arranges data to bring widely spaced items closer, simplifying the final sorting phase.

Gap Sequence Introduction

In Shell Sort, the gap sequence is crucial. It defines how far apart the elements being compared are. An effective gap sequence can significantly improve the efficiency of the sort.

Typically, the sequence starts large and decreases throughout the process.

Commonly, the sequence may halve each time. For instance, if starting with 8 elements, initial comparisons occur with a gap of 4. Then, it reduces to 2, ultimately leading to a gap of 1. The initial gaps help organize distant elements that insertion sort alone might not handle quickly.

Designing the right gap sequence is key. A popular choice is using Knuth’s sequence, which is calculated as (h = 3h + 1). This sequence optimizes performance for practical use cases, addressing larger datasets effectively by ensuring the elements are gradually brought into order.

Gapped Insertion Sort

Shell Sort uses a variation of insertion sort known as gapped insertion sort. This stage involves sorting elements separated by a specific gap. Instead of comparing adjacent elements, elements are compared based on the current gap value.

Consider using a gap of 3: This involves sorting elements at positions 0, 3, 6, etc., separately from those at 1, 4, 7, etc. This division ensures that elements that are far apart are placed in better positions relative to each other.

Gapped sorting gradually reduces disorder in the data structure. By moving elements closer together within their gaps, a partially sorted structure emerges, paving the way for a simpler final pass of insertion sort. This strategic arrangement increases efficiency as the sort progresses.

Gap Reduction and Final Stages

Reducing the gap size is vital for Shell Sort’s effectiveness. As the gap narrows, the array elements become more ordered. Each reduction in the gap gets the array closer to a sorted array, making final sorting passes quicker.

For example, if the gap sequence is 4, 2, 1, sorting with a gap of 1 resembles a standard insertion sort on an almost-sorted array. This final pass often requires fewer operations within a more organized dataset, boosting efficiency significantly.

Gap reduction fine-tunes the disorder remaining within the array. With smaller gaps, fewer elements remain out of order, allowing the algorithm to zero in on any persistent misplacements and efficiently complete the sort.

Implementing Shell Sort in Python

Shell Sort is a versatile algorithm that enhances the performance of insertion sort by using a sequence of gaps to arrange elements. This section will guide you through setting up your environment, provide a Python code snippet, and walk through its implementation step-by-step.

Setting Up the Environment

To begin coding Shell Sort in Python, you need a Python interpreter. Python 3 is recommended for its advanced features and compatibility. Install Python from the official Python website if not already installed.

Using a text editor or an Integrated Development Environment (IDE) like Visual Studio Code or PyCharm is beneficial. These tools offer features like code highlighting and debugging aids. Ensure your editor or IDE can execute Python scripts.

You may want to set up a virtual environment, especially for larger projects, to manage dependencies and package installations without affecting system-wide settings. This is often done using tools like venv or virtualenv.

Python Shell Sort Code Snippet

Below is a basic implementation of Shell Sort in Python. This snippet demonstrates Shell Sort’s ability to manage gaps effectively:

def shellSort(arr):
    n = len(arr)
    gap = n // 2
    while gap > 0:
        for i in range(gap, n):
            temp = arr[i]
            j = i
            while j >= gap and arr[j - gap] > temp:
                arr[j] = arr[j - gap]
                j -= gap
            arr[j] = temp
        gap //= 2

This function uses a sequence of gaps that reduce with each pass. The array is initially organized by larger intervals, decreasing as sorting progresses. This improves efficiency compared to traditional insertion sort, especially for large datasets.

Walkthrough of the Python Implementation

The Shell Sort algorithm begins by defining a gap, usually half the size of the array, and sorts elements that are gap distance apart.

  • Gap Initialization: The gap is initialized to half the length of the array. This reduces with each iteration, eventually leading to a standard insertion sort.

  • Inner Loop: In each iteration, elements spaced gap apart are compared and sorted. This process is similar to insertion sort but works over larger distances initially.

  • Gap Reduction: The gap is halved after each pass until it becomes zero. This gradual reduction helps in fine-tuning the order of elements, ending with a final pass using a gap of one.

The Python code shown demonstrates how Shell Sort efficiently handles larger data sets by minimizing the distance over which data is moved early in the process, thereby distributing out-of-place elements more intuitively before the final insertion sort pass is needed.

Key Factors in Shell Sort Efficiency

Shell sort’s performance hinges on several critical factors, most notably the selection of an appropriate gap sequence, as well as the algorithm’s behavior in different performance scenarios such as best, worst, and average cases. Understanding these factors can provide insights into optimizing shell sort’s efficiency.

Choosing the Right Gap Sequence

The choice of gap sequence greatly influences shell sort’s efficiency. Gap sequences control how elements are compared and sorted. Common sequences include Pratt’s and Knuth’s formula.

Pratt’s sequence involves powers of 2 and 3, which are less common but can provide optimized performance. Knuth’s sequence, defined as (3^k – 1), ensures elements are evenly distributed, helping boost efficiency in many cases.

Every gap sequence has its trade-offs. Some improve performance for specific data distributions. Testing various sequences on different datasets can help determine the most efficient choice for a given application. The gap directly affects the number of passes and comparisons, impacting the algorithm’s overall speed and workload.

Best Case vs Worst Case Scenarios

In shell sort, the best case occurs when the data is already nearly sorted, requiring minimal passes and movements. In this scenario, shell sort approaches (O(n \log n)) time complexity. The worst case, however, might involve data structured in ways that maximize necessary movements, resulting in a time complexity that can degrade to (O(n^2)).

Understanding these scenarios helps anticipate shell sort’s performance limits. It’s important for developers to recognize data patterns that might impact efficiency. Best-case optimizations can include pre-sorting data or choosing an adaptive gap sequence that minimizes worst-case performance.

Analyzing Average Case Complexity

The average time complexity of shell sort is often more critical for real-world applications. Typically, it ranges between (O(n^{3/2})) to (O(n^{7/6})), heavily dependent on the gap sequence and initial data arrangement.

Balancing between computing resources and desired speed is crucial for achieving optimal average performance.

Practical analysis involves examining how shell sort behaves with different data types and distributions. Testing can help identify how varying conditions affect sorting times, which can guide adjustments in gap sequence choice or implementation strategy to achieve better efficiency across typical use cases.

Comparison of Insertion-Based Sorting Methods

Shell sort, insertion sort, and bubble sort are all important insertion-based sorting algorithms. Each has its unique approach and efficiency level. Below is a detailed look into how these methods compare against each other.

Shell Sort vs Insertion Sort

Shell sort is an extension of insertion sort. It handles larger gaps first to sort elements that are far apart from each other, which reduces the amount of work needed in the final stages. This makes it more efficient than insertion sort for medium to large datasets.

Insertion sort, on the other hand, is simpler. It works well with smaller arrays or arrays that are already partially sorted. While shell sort offers better performance due to its gap sequence, insertion sort is easier to implement and understand for educational purposes. For more details on how shell sort functions, see its implementation explained by the The Research Scientist Pod.

Shell Sort vs Bubble Sort

Bubble sort is another simple algorithm, but it is generally less efficient than shell sort. Bubble sort repeatedly steps through the list, compares adjacent pairs, and swaps them if necessary. This process has a high time complexity, making it less suitable for large arrays.

Shell sort improves on this by allowing the exchange of far-apart elements early in the sorting process. This approach significantly reduces the number of swaps required, leading to improvements in performance. For an overview of bubble sort’s complexities, refer to the GeeksforGeeks analysis.

Advancements in Shellsort

Advancements in shellsort focus mainly on the choice of gap sequences. These sequences determine how elements are haggled during the sorting process and can significantly influence the algorithm’s performance. Various sequences like Hibbard, Sedgewick, and Ciura have been studied, each offering different levels of efficiency.

The choice of sequence can impact how quickly the array is sorted and the complexity of the code’s implementation. Researchers continue exploring optimal gap sequences to enhance shellsort’s capabilities further, making it a preferred choice over insertion-based sorts for particular datasets. For a detailed guide on implementing these sequences, check out this comparative guide.

Advanced Sorting Algorithm Comparisons

In this section, different sorting algorithms like Shell Sort, Quick Sort, Merge Sort, and Heap Sort are compared. Key factors include efficiency, complexity, and ideal use cases.

Shell Sort and Quick Sort

Shell Sort is an in-place comparison-based sorting algorithm. It generalizes insertion sort by allowing exchanges of far-apart elements.

By reducing the gap between compared elements, Shell Sort becomes efficient for medium-sized datasets.

Quick Sort, on the other hand, is a divide-and-conquer algorithm. It selects a pivot element and partitions the array into two halves, sorting each independently.

Quick Sort is known for its efficient average-case performance, making it a popular choice for large datasets.

The main difference between these two is in their approach and performance characteristics. Quick Sort is often faster on average due to its divide-and-conquer method, but it can suffer from poor worst-case performance if a bad pivot is consistently chosen.

Merge Sort and Its Differences with Shell Sort

Merge Sort is another divide-and-conquer algorithm that stands out for its stable sorting nature. It continuously splits the list into halves, sorts them, and then merges them back. This ensures a consistent running time of O(n log n) regardless of data distribution.

Shell Sort is less predictable in performance due to its dependence on the chosen gap sequence. It optimizes insertion sort to handle elements further apart, which can be beneficial for specific datasets.

The primary contrast between Merge Sort and Shell Sort is that Merge Sort’s consistent time complexity makes it ideal for data needing stable sorting, while Shell Sort shines with certain patterns or medium-sized arrays.

Heap Sort and Its Comparison to Shell Sort

Heap Sort transforms an array into a heap data structure, then repeatedly extracts the maximum element to achieve a sorted order. This algorithm is in-place but not stable.

Shell Sort’s efficiency varies with the choice of gap sequence and is typically used for intermediate-sized arrays.

In contrast, Heap Sort is more suited for applications needing O(n log n) performance without requiring additional memory for merging.

The key factor in choosing between these algorithms involves considering whether stability or in-place sorting is more critical, and how sensitive the application is to time complexity variations.

Shell Sort Variants and Enhancements

Shell sort is a versatile sorting algorithm that can be enhanced through different techniques. Variants and optimizations often focus on the properties of h-sorted arrays and choosing efficient gap sequences. Different implementations in languages like C and C++ also showcase unique features.

H-Sorted Arrays and Their Properties

An array is considered h-sorted when it is sorted with a specific gap size, denoted by “h.” Each element in an h-sorted array is in order relative to other elements that are h positions apart.

This property significantly reduces the number of element swaps needed in further sorting stages. H-sorted arrays are key because they simplify the final insertion sort phase, making it more efficient.

Understanding h-sorted arrays helps in grasping why shell sort can be faster on average compared to simple insertion sort.

By breaking down the array into smaller h-sorted sections, large amounts of disorder can quickly be reduced.

Optimized Gap Sequences

The choice of gap sequence is crucial for shell sort’s performance. Traditional shell sort uses a sequence like (N/2, N/4, …, 1), but optimized sequences have been developed to improve efficiency.

Popular sequences include Hibbard’s, Sedgewick’s, and Pratt’s sequences. These alternatives are known for minimizing the total number of comparisons and swaps.

For example, using Hibbard’s sequence offers a balance between simplicity and performance by reducing the gap logarithmically.

In contrast, Sedgewick’s sequence is more complex but offers even fewer swaps and comparisons.

Fine-tuning the gap sequence is essential for optimizing sorting speed and efficiency.

Variations in Shell Sort Implementations

Shell sort can be implemented in many programming languages, including C and C++. The core algorithm remains the same, but syntax and language features can impact performance and ease of implementation.

For instance, creative use of loops and conditionals in C allows for tight control over memory usage and execution speed.

In C++, object-oriented features can provide more modular shell sort function designs. Shell sort in these languages can also be enhanced using arrays or vectors, which are efficient data structures for maintaining sorted elements.

Adapting shell sort to specific languages or use cases includes selecting a suitable data structure and considering the trade-offs of handling larger datasets.

Analyzing Time Complexity

Shell sort’s time complexity can vary based on the sequence and size of the data. Each case provides unique insights into how efficiently the algorithm can sort the array. This section explores best, worst, and average cases to offer a comprehensive understanding.

Understanding Best Case Complexity

In the best-case scenario, shell sort performs very efficiently. This occurs when the array is already sorted.

For shell sort, the time complexity in this case is often close to O(n log n). This efficiency stems from the fact that minimal swaps and comparisons are needed.

The best-case performance is more favorable when using certain gap sequences. For instance, when using smaller gaps earlier in the process, fewer operations are required to finalize the sort.

This efficiency highlights why shell sort can be beneficial for lists already nearing a sorted state.

Delving into Worst Case Complexity

The worst-case complexity of shell sort can be much higher, reaching up to O(n²) according to GeeksforGeeks. This occurs when the array is in reverse order or requires maximum swaps to sort completely.

Shell sort uses varying intervals to rearrange elements, and in a poorly arranged list, many passes are needed. The choice of interval sequences can impact this greatly. Some sequences can help maintain the complexity closer to O(n log n), but generally, the worst case results in less efficiency compared to algorithms like quicksort.

Average Case Complexity Insights

On average, shell sort shows better performance than simple sorts like insertion or bubble sort. The average time complexity usually lies between O(n log² n) and O(n²). This variance results from different sequences and distribution of elements in the list.

Average case performance is highly dependent on the chosen gap sequence, as noted by sources like Programiz. Some sequences allow for fewer comparatives and shifts, improving average performance.

Still, the time complexity remains generally lower than that of simpler sorting methods, making shell sort a compelling choice for mid-sized arrays.

Space Complexity of Shell Sort

Shell Sort is known for its minimal memory usage. This section explores why its space complexity is low and how it compares to other sorting algorithms in terms of memory efficiency.

In-Place Sorting and Memory Usage

Shell Sort operates as an in-place algorithm, meaning it rearranges elements within the initial data structure without needing extra space.

The primary memory consumption comes from the algorithm itself, which is constant and denoted as O(1). This makes Shell Sort particularly efficient for large datasets when memory capacity is a concern.

Because it uses the original array to make swaps and comparisons, it keeps auxiliary space use to a minimum. This aspect of Shell Sort reduces overhead, optimizing performance in memory-limited environments.

Comparing to Other Algorithms

When compared to other sorting algorithms, Shell Sort’s space complexity is more efficient.

Unlike Merge Sort, which requires additional space for merging subarrays, Shell Sort performs all operations within the existing array.

Its space complexity is lower than that of quicksort in its worst-case scenarios, where additional stack space may be required.

This makes Shell Sort suitable for environments where memory usage needs to be minimized.

For datasets where in-place sorting offers a distinct advantage, Shell Sort stands out due to its ability to handle large data efficiently without incurring extra space costs.

Applications of Shell Sort

Shell sort is a versatile sorting algorithm that can be useful in specific scenarios. It optimizes the simple insertion sort by comparing elements that are far apart, gradually reducing the gap between comparisons. This approach can be advantageous when dealing with specific data structures or constraints.

Suitable Use Cases for Shell Sort

Shell sort excels in situations where resources are limited, like embedded systems, due to its in-place sorting with minimal memory use. It is a preferred choice in older systems where recursion limits affect other algorithms.

Additionally, it can be effective when there is a potential of having already partially sorted data, as the algorithm can quickly finish sorting for such datasets.

In applications such as libraries, like the uClibc library, shell sort is utilized due to its balance of complexity and efficiency.

Also, when dealing with data compression tools such as the bzip2 compressor, shell sort helps arrange data efficiently without requiring substantial computational power.

Limitations and Considerations

While useful, shell sort may not be the best for every situation. Its worst-case time complexity is less efficient than more advanced algorithms like quicksort or mergesort for large datasets.

Therefore, in cases requiring guaranteed fast performance on large data sizes, it may not be the first choice.

Shell sort’s performance is also highly influenced by the chosen gap sequence. Different sequences can lead to varied results, and finding an optimal sequence may not be straightforward.

This makes it more challenging when precision performance tuning is needed, as the algorithm’s efficiency could vary greatly with different implementations.

Best Practices in Shell Sort Implementation

Implementing shell sort in Python can significantly improve the performance of sorting tasks. This section covers essential practices for efficient coding and effective debugging to enhance the use of shell sort.

Code Optimization

Optimizing shell sort code involves selecting the appropriate gap sequence and minimizing unnecessary calculations.

One common approach is using the sequence by Donald Knuth, which generates the gap sizes as ( (3^k – 1) / 2 ) to provide balanced performance.

Reducing the use of nested loops is also advantageous. Python’s list comprehensions or built-in functions like enumerate can help replace some of these loops.

Indentation and comments should be used to enhance code readability, ensuring anyone familiar with Python can easily understand the logic.

It’s also beneficial to avoid redundant operations. For instance, store values that need recalculating repeatedly.

This not only makes the code cleaner but also saves on computation time, directly impacting the performance.

Testing and Debugging

Testing is crucial for any code implementation. Shell sort should be tested with various arrays, including edge cases like empty and sorted arrays.

Using the unittest module in Python allows for a systematic approach to testing shell sort code.

In debugging, using the pdb module is effective for stepping through the code.

Break down the code to test individual parts when integrating shell sort into larger systems. Ensure that boundary conditions are well handled, and use assertions to catch potential errors early.

By identifying gaps in logic or performance, the code can then be iteratively improved.

Shell Sort in Different Programming Languages

Shell sort is a versatile sorting algorithm that can be implemented in various programming languages. Each language has its nuances in implementation. The core algorithm remains similar, but language-specific syntax and features lead to some differences.

Shell Sort in C

Shell sort is implemented in C using loops and control statements. It involves setting a gap size, sorting elements using this gap, and then reducing it.

A function is typically defined where an array and its size are passed as parameters.

In C, the control over memory and pointer arithmetic allows efficient use of resources, making the implementation faster.

Developers can leverage C’s procedural style to iteratively update gap values and perform comparisons. The basic loop structure keeps this implementation straightforward, highlighting C’s low-level operations capability.

Translating Shell Sort to C++

Translating shell sort from C to C++ involves a few changes mostly due to C++’s object-oriented features.

While one can still use similar logic with loops and gap reduction, C++ provides advantages like using templates for generic programming. This allows the same code to sort different data types.

Additionally, C++’s Standard Template Library (STL) can be utilized to enhance functionality. For instance, vector data structures can replace arrays for dynamic sizing.

The presence of classes and objects in C++ provides opportunities for encapsulating the sorting logic, making the code more modular and easier to maintain.

Differences Across Languages

Though the fundamental algorithm remains the same across languages, there are important differences.

C provides fine-grained control over resources, making it suitable for performance-critical applications.

C++ extends on this with object-oriented features, allowing developers to implement more reusable and modular code.

In Python, shell sort can be implemented using its high-level constructs, making the code more readable and concise.

Python’s list slicing and dynamic typing offer flexibility in handling data, but may not match C or C++ in performance. Each language’s unique features influence the readability, performance, and complexity of shell sort implementations.

Frequently Asked Questions

Shell Sort is an important algorithm in computer science because it helps organize data more efficiently by sorting elements using a series of gaps. This section addresses specific questions about implementing and understanding Shell Sort.

What are the steps to implement Shell Sort in Python?

To implement Shell Sort in Python, start by choosing an initial gap sequence, usually half the size of the list.

Compare elements spaced by the gap and sort them as smaller gap sizes are used.

Repeat this process by reducing the gap until it becomes zero and the entire list is sorted.

Could you provide an example of a Shell Sort implementation in Python?

Sure, here is a simple implementation:

def shell_sort(arr):
    n = len(arr)
    gap = n // 2

    while gap > 0:
        for i in range(gap, n):
            temp = arr[i]
            j = i
            while j >= gap and arr[j - gap] > temp:
                arr[j] = arr[j - gap]
                j -= gap
            arr[j] = temp
        gap //= 2

What are the advantages and disadvantages of using Shell Sort?

Shell Sort is faster than simple quadratic algorithms like Insertion Sort, especially for larger datasets, due to its use of gaps.

It is a straightforward algorithm that’s easy to understand and implement. However, it does not perform as well as more advanced algorithms like Quick Sort or Merge Sort for extremely large datasets.

How does the efficiency of Shell Sort compare to other sorting algorithms like Heap Sort?

Shell Sort is generally less efficient than Heap Sort in the worst-case scenario.

Heap Sort typically has a time complexity of O(n log n), while Shell Sort’s complexity varies based on the gap sequence. In practice, Shell Sort can be faster for specific data sequences or smaller datasets.

In Python, how does the Shell Sort algorithm differ from the built-in sort function?

Python’s built-in sort function uses Timsort, a hybrid sorting algorithm derived from Merge Sort and Insertion Sort.

Timsort is optimized for various real-world data sets and usually more efficient than Shell Sort, especially for larger lists.

Shell Sort is more educational and manually controlled while Timsort is robust and well-optimized.

Can you explain the concept of ‘gap’ and how it influences the Shell Sort process?

The ‘gap’ is the interval at which adjacent elements in the list are compared and sorted.

Unlike Insertion Sort, Shell Sort allows for comparison and movement of elements that are far apart.

Reducing the gap size throughout the sorting process helps distribute small sections into the correct positions, eventually leading to a fully sorted list when the gap is zero.

Categories
SQL

Retrieving SQL Data: Master the Art of Database Querying

In the realm of database management, retrieving SQL data is an essential skill that can significantly streamline your workflow. You’re likely already familiar with how crucial it is to extract precise and relevant information from your database tables. Whether you’re a seasoned SQL user or just getting started, understanding how to craft an effective SQL query can be the difference between a smooth project operation and hours of frustrating troubleshooting.

Let’s take for instance when you need a particular column value from your ‘patients’ database table or perhaps, the complete file path from an offline cube file in your IBM DB2 database. This necessitates constructing a specific query string with appropriate parameters such as type varchar or segment column aliasing where necessary. Also, imagine needing to execute complex queries involving multiple departments within your PostgreSQL Oracle Teradata Access databases. Here, crafting precise native database queries becomes not only beneficial but paramount.

Don’t forget about security while handling sensitive data like customer table details or accessing JDBC/ODBC connection strings which require proper authentication methods and encryption with customer options enabled for safety reasons. Furthermore, consider situations where you have to handle large collections of items requiring dynamic arrays or implementing advanced connector options for efficient execution time management – all these underscore why mastering SQL data retrieval is invaluable.

Understanding SQL Data Retrieval

Diving into the world of SQL, you’re soon to discover a powerful tool at your fingertips: data retrieval. It’s integral to managing databases effectively and is often the first step when dealing with database management. You’ll find that understanding this process can significantly enhance your ability to manipulate and analyze data stored in various types of databases such as IBM DB2, PostgreSQL, Oracle, or Azure SQL.

Let’s think about a typical scenario. Imagine you have an array of update counts in a “patients” database table; each column value represents specific patient information. With a well-crafted SQL query, you can retrieve any piece of information from this table within no time! The key lies in constructing your query string correctly.

Consider yourself needing details about patients who were admitted after a certain date. Your native database query might begin like this: SELECT * FROM Patients WHERE AdmissionDate > 'specified-date'. Here, ‘SELECT’ is your project operator indicating what data should be retrieved – ‘*’ means all columns in the table. The ‘FROM’ clause specifies which table – ‘Patients’, and the ‘WHERE’ clause sets conditions for retrieval – only patients admitted after a specified date are needed.

You can even go further by adding more advanced options to your SQL filter string for more complex queries. For instance, if you need information on patients from not just one but multiple departments (say Cardiology and Neurology), you could make use of nested queries or join operations.

Mastering these basic steps surely requires practice but it’s worth every effort considering the power and flexibility it brings along. One crucial aspect here involves ensuring secure access through proper authentication method; often using JDBC or ODBC database connections with valid user credentials.

SQL also provides flexibility around column data types (like varchar) and allows setting default column type according to needs. This becomes especially useful when working with large datasets where different columns may hold diverse kinds of data.

In conclusion, understanding how to retrieve SQL data is a fundamental skill that can dramatically improve your efficiency while working with databases. Whether it’s obtaining specific column values from an extensive database table producttable or navigating through intricate layers of complex queries – mastering SQL retrieval will put you ahead in any game involving significant amounts of data.

Essential SQL Commands for Data Retrieval

Diving right into the heart of any database operation, you’ll find SQL commands. They’re like the magic spells that summon data from your tables and present it to you in an organized manner. Now we’ll explore some of these essential SQL commands that you need for retrieving data.

First off, the SELECT command is your go-to tool for pulling data out of a database table. Let’s say you’ve got a column named ‘product’ in your ‘productTable’. To retrieve all values from this column, your SQL query would look something like this:

SELECT product 
FROM productTable;

Easy enough, isn’t it? Now if only one particular row interests you, perhaps where the type is VARCHAR or another specific column value, then WHERE clause comes into play. Here’s how:

SELECT * 
FROM productTable
WHERE type = 'VARCHAR';

For more complex queries involving multiple conditions, AND and OR operators are at your disposal. You can even sort retrieved data using ORDER BY clause as shown below:

SELECT * 
FROM productTable
WHERE type = 'VARCHAR'
AND price > 50
ORDER BY price DESC;

In addition to these fundamental commands, there are advanced options such as JOINs and UNIONs that allow fetching data across multiple tables – truly powerful features when dealing with large databases.

It’s important to note that while crafting these queries might seem daunting at first glance – especially if you’re dealing with native databases like IBM DB2 database or Oracle database – practice makes perfect. The more familiar you become with SQL syntax through hands-on experience, the smoother your journey in mastering data retrieval will be.

Remember to always safeguard sensitive information by securing your database user credentials and employing encryption methods where necessary.

Now armed with knowledge of these vital SQL commands, it’s time for action! Just fire up that JDBC or ODBC database connection and start retrieving!

Retrieving Data Using Select Statement

Let’s dive into the heart of SQL: the SELECT statement. It’s your go-to tool when you need to retrieve data from a database table. This powerful command allows you to specify exactly what information you’re after, right down to the column value.

You might be wondering how it works. Well, imagine your SQL query as a question you’re asking your database. “Could I have all the records from the customer table?” or “What are all the products under $20 in my productTable?” These questions translate into SQL SELECT statements. The answers depend on how well you ask – and that’s where understanding complex queries comes in handy.

Here is an example of a simple SELECT statement:

SELECT columnName1, columnName2 FROM tableName;

This will fetch all rows for columnName1 and columnName2 from the table named tableName.

Now consider working with multiple columns, different data types, or multiple tables at once – things can get tricky fast! You’ll find yourself needing more advanced options like WHERE and JOIN clauses to refine your queries further.

Think about this scenario: You’ve got an IBM DB2 database, a PostgreSQL database, an Oracle Database, and even an Azure SQL Database all housing different parts of your organization’s data. It becomes essential then to use select statements efficiently across these varying environments while considering each native database’s unique syntax and quirks.

But don’t fret! With some practice and patience (and perhaps a bronze badge or two earned along the way), we assure you that navigating through various databases with precise select statements becomes second nature!

Finally, keep security in mind too! Be sure always to handle your database user credentials carefully when running any sort of native database query. Ensuring secure JDBC or ODBC connections should always be part of good database management practices.

In sum? The SQL Select statement is mighty indeed—a true workhorse for retrieving exact collections of items from vast databases quickly and securely.

Advanced Techniques: Join and Union Operations

Diving into the world of SQL, you’ll often find yourself needing to extract data from multiple tables. That’s where ‘Join’ and ‘Union’ operations come in handy. They’re designed to help you manipulate and retrieve data more efficiently.

When dealing with complex queries, ‘join’ operations are your best friend. This technique allows you to combine rows from two or more database tables based on a related column between them. Imagine, for instance, having a customer table and an orders table. With a ‘join’, you can merge these tables using a common identifier like ‘customer id’. Now, instead of running two separate queries, you’ve got all the needed info in one fell swoop.

But what if you want to merge results from different SELECT statements into one result set? That’s when the Union operation steps in. It combines rows from different SQL queries into a single result but doesn’t duplicate any rows even if they’re identical.

Let’s take an example using two database tables named Employees and Departments:

  • Table: Employees
    EmployeeID Name Department
    1 John Doe IT
  • Table: Departments
    DepartmentID Name
    1

Using JOIN operation:

SELECT Employees.Name, Departments.Name 
FROM Employees 
JOIN Departments ON Employees.Department = Departments.DepartmentId;

The above SQL query would return “John Doe, IT”

For UNION operation:

SELECT column_value FROM table1 
UNION 
SELECT column_value FROM table2;

The above query fetches unique column_values from both table1 and table2.

While these advanced techniques might seem daunting at first glance, don’t be discouraged! There’s no denying that mastering JOINs and UNIONs can significantly enhance your database management skills. Also remember that while this article mainly discusses native SQL implementations, similar concepts apply across various DBMS platforms including PostgreSQL Database, Oracle Database or even Azure SQL Database.

Filtering and Sorting Retrieved SQL Data

Diving deeper into the world of SQL, you’ve likely come across the need to filter and sort data. It’s a common task when dealing with databases, whether you’re working with an IBM DB2 database or an Azure SQL database. But how exactly do you go about it? Let’s discuss.

To filter data in your queries, you’ll use a WHERE clause. This allows you to specify conditions that must be met for rows to be included in the results. For example, if you have a patients database table and want to retrieve only those who are over 60 years old, your query string might include “WHERE age > 60”. You can also combine conditions using AND/OR operators for more complex queries.

Sorting is another crucial part of managing your data efficiently. By using the ORDER BY clause in your sql query, you can arrange rows based on one or more columns’ values from your database table. Let’s say we have a productTable with columns including ‘productName’, ‘productPrice’, and ‘productCategory’. If we wanted our output sorted by price in descending order, we’d add “ORDER BY productPrice DESC” at the end of our query.

But what happens when column values are strings and not numbers? Well, by default, sorting treats all column data types as strings unless specified otherwise. So if numbers are stored as type varchar (for instance), they’ll be sorted lexicographically – meaning ‘100’ comes before ’20’. To avoid this issue, ensure numeric data should always stored as numeric types.

SQL also offers flexibility when it comes to case sensitivity during filtering and sorting; however this depends on the default settings of your specific DBMS like PostgreSQL or Oracle Database etc.. If lowercase letters are treated differently than uppercase ones (known as collation), then “WHERE name = ‘john'” will not return rows where name is ‘John’. However most databases offer functions such as LOWER() or UPPER() which allow consistent comparisons regardless.

Finally remember that while SQL gives us amazing power over our data through its native database queries , these techniques can sometimes lead to long execution times especially for larger datasets or complex queries . One way around this could be creating views or indexes tailored towards frequent queries but that is beyond scope of our current discussion.

Implementing Subqueries for Complex Data Retrieval

In the realm of SQL, subqueries serve as an essential tool to solve complex data retrieval problems. These nested queries allow you to retrieve data in a more flexible and efficient manner from your database tables.

Imagine yourself working with a customer table in your PostgreSQL database where each row represents distinct customer information. There might be times when you need to retrieve customers who have spent more than the average expenditure of all customers. In such instances, subqueries can be your silver bullet.

A typical subquery structure would look like this:

SELECT column_value 
FROM customer_table
WHERE column_value > (SELECT AVG(column_value) FROM customer_table);

Here, the inner query calculates the average expenditure while the outer query retrieves customers who exceed that average.

Subqueries can be used not only in WHERE clause but also with other SQL constructs like SELECT and FROM. Consider another scenario where you’re dealing with an item table in your Azure SQL Database, holding data about different product items. You may want to fetch item details along with their respective highest sales price from a productTable. A suitable subquery for this task could look something like:

SELECT item_name, (SELECT MAX(price) FROM productTable WHERE productTable.item_id = item.id) AS highest_price 
FROM item;

In this example, the inner query retrieves the maximum price for each item by matching item_id from both tables and assigns it as highest_price, using column alias feature of SQL.

Remember that executing complex queries involving multiple subqueries might increase execution time due to added computational overheads. Therefore, always ensure your queries are well-optimized and consider indexing common columns utilized frequently in WHERE clauses or JOIN conditions for faster query time.

Bear in mind that implementing subqueries requires careful consideration over simpler methods depending upon factors such as complexity of requirement, size of dataset and native database capabilities among others.

Optimizing Performance in SQL Data Retrieval

You’re knee-deep in the world of SQL, looking to optimize your data retrieval performance. You’re not alone. Database management is a vital part of any business operation, and it’s crucial to know how to retrieve data quickly and efficiently.

Let’s start with the basics: your SQL query. It’s akin to a tailor-made request ticket for your database table, asking for specific column values based on the conditions you set in your query string. But remember, efficiency is key here. Including unnecessary columns or using complex queries can slow down your execution time significantly.

Perhaps you’ve noticed that some database tables are case-sensitive. A column value starting with a lowercase letter might not return results if requested with an uppercase one, especially if the column type is varchar or similar. That’s why it’s important to ensure consistency when dealing with native databases like IBM DB2 database or PostgreSQL database.

When it comes to performance optimization, don’t overlook connection options either – JDBC and ODBC connections have their own pros and cons depending on your specific situation. Maybe you need advanced connector options for an Azure SQL Database or perhaps default connection settings work perfectly fine with an Oracle Database.

Now onto more complex matters: handling large datasets from multiple sources like CSV files or PDF files could be challenging but fret not! Efficient use of array functions and select operators can help streamline data collection from various sources into one coherent dataset without sacrificing speed.

Lastly, let’s talk about authentication – nothing slows down progress like stumbling over user credentials for each database entry point. Whether it’s Windows Authentication mode or another method entirely depends on the security requirements of your organization.

In summary, optimizing SQL data retrieval isn’t just about writing efficient queries—it involves understanding every step of the process from connecting to native databases all the way through handing off secure credentials. By keeping these points in mind as you navigate through this essential task, you’ll be well-equipped to expedite data retrieval while maintaining high-quality results.

Conclusion: Mastering SQL Data Retrieval

You’ve come a long way on your journey to mastering the art of retrieving SQL data. From understanding basic SQL queries to working with complex ones, you’ve unlocked the potential of your database tables and gained control over your column values.

Your grasp on query strings has grown stronger. With each character typed, each lowercase letter used in your type varchar columns, you’ve earned another bronze badge in this realm of data management. You’re no longer merely executing native database queries, you’re crafting them, molding them to suit every demand.

Database user credentials have become more than just keys to access databases like IBM DB2 Database, PostgreSQL Database, Oracle Database, Teradata Database or an Azure SQL Database. They are now tools that empower you to manage any kind of database data type effectively.

In dealing with different types of file details – be it from a CSV file or a PDF file – you have learned how to extract complete file paths and handle content files from their default location. You can now confidently work around various column headers in an SQL table column and understand different column data types.

Your knowledge extends beyond just knowing what a connection string is; it’s about manipulating the string var1 for advanced connector options based on the authentication method required by your external data source.

Through detailed steps and basic steps alike, you’ve learned how arrays function within an SQL context whether they be cell arrays or dynamic arrays which hold an array of update counts. The execution time spent running these queries has given you insight into optimizing their performance through careful consideration of parameters’ values among other things.

From customer tables to department database tables like productTable, every aspect is within reach as long as one remains patient and meticulous during the process. Whether it’s setting up JDBC or ODBC database connections or handling offline cube files from various sources – there’s nothing standing between you and efficient data retrieval anymore.

In essence, by mastering these concepts—from managing credentials options for various authentication modes like feedRequiresWindowsAuthentication down to understanding host variables—you’ve become proficient at navigating any native database environment out there today including those that use IBM Db2 databases all the way down through Teradata databases using JDBC drivers or driver packages as needed during project operations involving select operators for example!

Such mastery doesn’t just make retrieving items from collections easier; it also paves the way towards creating accurate reports that reflect current positions within organizations accurately while ensuring any additional parameters necessary are included appropriately when generating URLs in exact format required by clients—whether they require encryption with customers’ details included specifically upon request only!

Categories
Uncategorized

Learning T-SQL – Window Functions: A Comprehensive Guide for Mastery

Understanding Window Functions

Window functions in SQL are powerful tools that allow users to perform calculations across a set of table rows.

Unlike aggregate functions that collapse data into a single result, window functions maintain the underlying data structure.

The syntax for using window functions usually involves the OVER() clause. This specifies how rows are divided, or partitioned, for the calculation.

For example, the ROW_NUMBER() function gives a unique number to each row based on the order defined in the OVER() clause. This is crucial when you need precise control over data ranking in your SQL queries.

Window functions also include aggregate functions like SUM(), AVG(), or COUNT(). They can calculate cumulative totals or moving averages without grouping rows into one result. This makes them ideal for reporting and dashboards.

In T-SQL, using window functions helps in breaking complex queries into manageable parts.

They are essential in business scenarios to calculate rankings, percentages, or running totals.

Window functions include ranking functions and analytical functions. Functions like RANK(), DENSE_RANK(), and NTILE() help to rank data efficiently. Learn more about T-SQL window functions for further insights.

The versatility and depth of SQL window functions allow data analysts to handle complex data problems with ease, improving both analysis and reporting capabilities significantly.

Fundamentals of SQL Window Functions

SQL window functions are a powerful tool for processing data. They allow users to perform calculations across a set of rows related to the current row within the same query.

Unlike aggregate functions, window functions do not collapse rows into a single output.

Key Concepts:

  • SELECT Statement: Used to define which columns to include in the query result set. The window function is often a part of a larger SELECT statement.
  • OVER() Clause: Critical for window functions. It specifies the window partitions or divides the result set into groups to apply the window function accordingly.

Window functions are ideal for tasks such as ranking, averaging, or calculating running totals. They enable a detailed level of data analysis by showing both individual row data and aggregate results in a single, seamless query.

Common Window Functions:

  • RANK: Provides a unique rank to each row within a partition of a result set.
  • ROW_NUMBER(): Assigns a unique sequential integer to rows within a partition.
  • SUM(), AVG(), COUNT(): Perform aggregations over specific windows of a data set.

Examples:

  • Calculating moving averages.
  • Ranking rows within partitions to determine top performers.

When using window functions, it’s essential to ensure that the database compatibility level supports them.

For example, using the WINDOW clause requires compatibility level 160 or higher in SQL Server 2022.

The Over Clause Explained

The OVER clause in T-SQL is used with window functions to perform calculations across a set of table rows related to the current query row. This clause enhances data analysis by allowing you to define window frames dynamically.

Partition By Usage

The PARTITION BY clause in SQL creates subsets, or partitions, within your data set where window functions operate independently.

This is crucial when you want calculations to restart within these subgroups, giving each partition its distinct results.

For instance, if you have sales data, using PARTITION BY on a sales rep’s ID allows you to calculate totals or averages for each rep separately.

In a window function, PARTITION BY splits the data into segments, ensuring accurate and relevant calculations. Without it, calculations would run over the entire data set, which might not be useful in all cases.

Order By Significance

Using the ORDER BY clause within the OVER clause specifies the order in which the function processes rows.

This order is crucial for functions like ranking or finding running totals because results depend on which record is processed first.

ORDER BY allows you to define direction—ascending or descending—ensuring the sequence suits the analysis.

For example, when calculating running totals, ORDER BY determines the sequence in which totals accumulate. Ignoring ORDER BY would lead to unpredictable results as the calculation could occur in any order.

Implementing ORDER BY ensures a logical progression through data, enabling meaningful output such as cumulative sums over time periods.

By combining PARTITION BY and ORDER BY within the OVER clause, complex analyses on data sets become far more manageable, enabling precise and targeted reporting.

Types of Window Functions

Window functions in T-SQL enhance data analysis by allowing calculations across a set of table rows. They provide detailed insights through aggregate, ranking, and value functions, which are essential for modern data handling and reporting tasks.

Aggregate Window Functions

Aggregate window functions deal with calculations performed over a specified range of rows.

Common functions include SUM, AVG, COUNT, MIN, and MAX. These functions enable summary data calculations such as total sales or average grades while retaining individual row data in the result set.

For example, the SUM function can calculate total sales for each employee in a monthly report. These functions are crucial in scenarios where insights are needed without collapsing group data into single rows.

Ranking Window Functions

Ranking window functions assign a rank or a number to each row within a partition of a result set.

Common ranking functions are ROW_NUMBER(), RANK(), DENSE_RANK(), and NTILE().

The ROW_NUMBER() function helps assign a unique identifier to rows within a partition of a dataset. Unlike RANK(), which can skip numbers if two rows have the same rank, DENSE_RANK() will not, making it more suitable for reports where ties should not affect the subsequent rank numbers.

Thus, ranking functions are essential for order-based tasks.

Value Window Functions

Value window functions return column values from other rows without collapsing the result set.

Functions like LEAD(), LAG(), FIRST_VALUE(), and LAST_VALUE() help provide values based on positions, such as previous or next row within a partition.

LEAD() can show a future row’s value, while LAG() provides a previous one, helping in trend analysis.

These functions are especially useful in scenarios needing comparative data over time, such as financial forecasting or analyzing sequential data patterns.

Row Numbering Functions

Row numbering functions in T-SQL help organize data by assigning numbers to each row based on specific criteria. These functions include ROW_NUMBER(), RANK(), DENSE_RANK(), and NTILE(). Each function provides unique benefits, such as ordering, ranking, or dividing rows into a set number of groups.

Row Number

The ROW_NUMBER() function assigns a unique number to each row within a result set. It orders rows based on a specified column. This is done using the ORDER BY clause inside an OVER() clause.

For example, to number rows by a name column, use:

SELECT ROW_NUMBER() OVER(ORDER BY name ASC) AS RowNumber, name FROM employees;

This assigns sequential numbers, helping identify row positions. It is particularly useful when paging through a large set of results. For example, displaying rows 51-100 when a page size of 50 is applicable.

Rank and Dense Rank

RANK() and DENSE_RANK() are similar but handle ties differently. Both assign rankings to rows based on specified criteria.

  • RANK() assigns the same rank to ties, but leaves gaps in the rank sequence. If two rows are ranked first, the next row is ranked third.
  • DENSE_RANK() also assigns the same rank to ties but continues with the next consecutive rank, so after two first-ranked rows, the next will be second.

These functions help identify the order of items within a partition, such as ranking employees by sales amounts in a company.

NTile Function

The NTILE() function distributes rows into a specified number of approximately equal groups. Each row is assigned a group number.

SELECT NTILE(4) OVER(ORDER BY sales DESC) AS Quartile, name FROM employees;

This divides the result set into four parts, or quartiles, based on sales figures. It’s useful for statistical analysis where distributing data across segments is necessary, such as measuring top 25% performers.

By using NTILE, data is evenly distributed into groups, making it easier to analyze trends and patterns within the set.

Aggregate Window Functions

Aggregate window functions allow calculations such as averages and running totals over a set of data rows. They provide insights into data trends without collapsing rows.

This section focuses on calculating averages and determining sums and running totals.

Calculating Averages

The AVG() function calculates the average of specific column values. When used as a window function, it can find the average within defined partitions of data.

It’s similar to the way other aggregate functions like COUNT() and SUM() can be applied within partitions. This approach is useful in situations like evaluating average sales per month across different store locations.

By using the OVER() clause, one can specify the rows to be included in the calculation, altering the partitioning and ordering.

For example, AVG(salary) OVER (PARTITION BY department ORDER BY employee_id) would compute the average salary for each department while maintaining the order by employee ID.

This helps in understanding variations in averages over categorical divisions.

Sum and Running Totals

The SUM() function, when used in a window context, offers a cumulative total across a set of rows. It helps in analyzing growth over time or monitoring cumulative metrics.

When paired with the OVER() clause, SUM() seamlessly calculates running totals over specified partitions.

For instance, calculating the running total of daily sales provides insights on sales performance trends.

Example: SUM(sales) OVER (ORDER BY date ROWS BETWEEN UNBOUNDED PRECEDING AND CURRENT ROW) determines the total sales up to each point in time.

Other functions like MIN() and MAX() can also be applied similarly to track the smallest or largest values over sequences.

Hence, aggregate window functions extend versatility by providing detailed cumulative and comparative data without disrupting the original dataset structure.

Advanced Ranking Techniques

Advanced ranking functions help arrange data in a meaningful way. These functions are essential for complex data analysis and offer insights that simple queries might miss.

Four key techniques include PERCENT_RANK(), CUME_DIST(), quartiles, and general ranking.

PERCENT_RANK() calculates the relative rank of a row. Its values range from 0 to 1. This function is useful when there’s a need to understand the rank percentage of a specific row within a dataset.

CUME_DIST() gives the cumulative distribution of a row in a set. It reflects the fraction of all rows that are ranked lower or equal. This is helpful for identifying how a particular row compares to the rest in terms of distribution.

Quartiles divide data into four equal parts. Each quartile represents a different segment of the dataset, which can be used to see where data points fall in the range. This method is useful for understanding the spread and central tendency of data.

General Ranking functions like RANK(), DENSE_RANK(), and ROW_NUMBER() are vital. RANK() assigns a rank with possible gaps. DENSE_RANK(), similar to RANK(), doesn’t skip ranks when ties occur. ROW_NUMBER() provides a unique number for each row, which is essential when each entry needs a distinct identifier.

These advanced techniques are crucial tools in the realm of SQL window functions, offering analysts a way to perform refined and precise data ordering.

Window Frame Options

In T-SQL, window functions are powerful tools for performing calculations across a set of table rows related to the current row. One essential aspect is the window frame, which defines the range of rows used for the calculation.

The window frame can be set with different options to suit specific needs. These options include UNBOUNDED PRECEDING, which means the frame starts from the first row of the partition. Use UNBOUNDED FOLLOWING to extend the frame to the last row.

The CURRENT ROW option restricts the frame to only the row being processed. It is a handy choice when each calculation depends solely on the current row without considering others.

Customizing the frame is possible with options like n PRECEDING or n FOLLOWING. These options allow setting the frame to a specific number of rows before or after the current row. This flexibility is useful for creating focused calculations within a specified range.

Example frame definitions:

  • ROWS BETWEEN UNBOUNDED PRECEDING AND CURRENT ROW
  • ROWS BETWEEN 1 PRECEDING AND 1 FOLLOWING

Different frame options affect how window functions process sets of rows. Understanding each choice aids in efficiently writing queries for complex data analysis.

Practical Applications of Window Functions

Window functions in SQL provide essential capabilities for analyzing data across various rows while retaining the row values. They enable efficient data manipulation and facilitate complex calculations that would otherwise require multiple queries or subqueries. These functions enhance insights and streamline processes within database systems.

Data Manipulation Insights

Window functions are pivotal in transforming raw data into meaningful insights. They allow users to perform operations like ranking, partitioning, and calculating running totals directly in the SQL query.

For example, ranking functions like ROW_NUMBER() assign unique ranks to each row based on specified criteria. This can be used in scenarios like creating leaderboards or identifying top performers in datasets.

Moreover, using window aggregates such as SUM() or AVG(), users can compute cumulative totals or moving averages, crucial for time-series analysis. These calculations provide insights on trends and patterns in data.

By partitioning data with PARTITION BY, SQL users can segment datasets into groups, which are essential for comparative analysis, like monitoring performance across different departments or regions.

Complex Calculations in Queries

Window functions simplify complex calculations that involve multiple rows or need data from related subsets. Often reducing the need for cumbersome subqueries, they enhance query performance and readability.

For instance, analytic functions like LAG() and LEAD() help access data from subsequent or previous rows. This is particularly valuable in scenarios requiring a comparison between rows, such as finding the difference in sales between two months.

Additionally, window functions enable analysts to calculate the percentage contribution of each entry relative to the total dataset, aiding in proportional analysis. They provide insightful solutions without repetitive data retrieval, making them indispensable in advanced data processing tasks. For more detailed exploration of window functions, refer to resources like Introduction to T-SQL Window Functions.

Performance Considerations

T-SQL window functions are used to improve the efficiency of SQL queries, making them more precise and often faster. Compared to older methods like self-joins, window functions like LAG and LEAD provide better alternatives. They reduce the complexity of queries by allowing operations on rows related to the current row, without additional self-joins.

To achieve optimal performance, it’s crucial to understand how window functions handle data. These functions require data to be sorted and often grouped before results are calculated. This can sometimes be resource-intensive, especially with large datasets. Using indexes effectively can help mitigate the performance hit from sorting.

The SQL optimizer plays a vital role in improving query performance when using window functions. It decides the best plan to execute a query, considering factors like sorting and data retrieval methods. Analyzing execution plans can provide insights into how the optimizer is interpreting a query.

Another aspect to consider is the clarity of the code. Window functions can make a query more readable by eliminating the need for complex subqueries or temporary table structures. By simplifying the logic, they help developers understand the intended operations better.

When benchmarking performance, tools like test harnesses can help compare window functions against traditional methods. For example, a test harness running a query on 1,000,000 rows can highlight the time difference between window aggregates and traditional aggregations, providing measurable performance data.

Window Functions Cheat Sheet

Window functions in SQL allow users to perform calculations across a set of rows related to the current query row. Unlike aggregate functions, window functions don’t collapse data into a single result. Instead, each row retains its details.

Components of Window Functions:

  • Expression: Determines the calculation performed on the data set.
  • OVER() clause: Defines the window or set of rows for the function.

Here are some common window functions:

  • ROW_NUMBER(): Assigns a unique number to each row within a partition.
  • RANK(): Provides a rank number for each row, with ties receiving the same number.
  • DENSE_RANK(): Similar to RANK() but without gaps for ties.

Example Usage:

SELECT name, 
       score, 
       RANK() OVER (PARTITION BY competition ORDER BY score DESC) AS rank
FROM results;

In this query, the RANK() function calculates the rank of each competitor’s score within their respective competition.

Aggregate vs. Window Functions:

  • Aggregate Functions: Collapse multiple rows into a single value.
  • Window Functions: Retain all rows, only adding calculated output.

Window functions are powerful for analyzing trends and details without losing individual row information. For a comprehensive guide, explore the SQL Window Functions Cheat Sheet.

Working with Sample Databases

When working with T-SQL, sample databases are essential for practice and learning. These databases often include tables with data on customers, sales, and products. T-SQL allows users to explore a variety of data analysis techniques on this data. 

The AdventureWorks2017 database is a popular option. It contains detailed tables for working with complex queries. Users can manipulate tables containing customer information and calculate metrics like total sales amount.

Here’s a helpful breakdown of key tables:

Table Name Purpose
Customers List of all customer data
Sales Information on sales transactions
Products Catalog of product details

Using these tables, users can write queries to extract insights. For example, calculating total sales amount for each customer is a common task in analytics using T-SQL window functions.

Another way to build skills is by running queries to filter specific sales data or generate reports summarizing customer activities. Sample databases provide a controlled environment to test these strategies safely.

Frequently Asked Questions

Window functions in T-SQL are powerful tools for analyzing data sets with high efficiency. They allow users to perform calculations across rows related to the current query row. Understanding how and when to use window functions, along with their types and considerations, enhances the data querying capabilities.

How do I use window functions in T-SQL?

To use window functions in T-SQL, it is important to incorporate the OVER clause, which defines the window or set of rows each function works on. The function can perform operations such as ranking, aggregating, and offsetting relative to other rows.

Can you provide examples of common window functions in T-SQL?

Common functions include ROW_NUMBER(), which assigns a unique number to each row within a partition, and SUM() used with OVER() to calculate running totals. Functions like RANK() and DENSE_RANK() provide ranking capabilities.

When should I use window functions instead of aggregate functions in T-SQL?

Window functions are ideal when calculations need to be performed across a specific set of rows but also require retaining individual row-level detail. Aggregate functions collapse data into a single result set, while window functions allow for more detailed analysis within the data context.

What are the different types of window functions available in T-SQL?

T-SQL offers ranking functions such as NTILE(), windowed aggregates like SUM(), and analytic functions including LEAD() and LAG(). The functions are versatile and designed for a variety of relational data operations.

How can window functions be applied to partitioned data sets in T-SQL?

By using the PARTITION BY clause within a window function, data can be divided into subsets for analysis. This enables performing calculations like averages or ranks independently across different groups, such as by department or region.

What are the performance considerations when using window functions in T-SQL?

Window functions can affect performance, especially on large datasets, due to their computational nature.

It’s crucial to optimize queries using indexing strategies, reviewing execution plans, and limiting the scope of the window to improve efficiency.

Categories
Uncategorized

Learning Power BI – Row-Level Security Explained for Effective Data Management

Understanding Row-Level Security (RLS) in Power BI

Row-Level Security (RLS) in Power BI is a feature designed to protect data access based on user roles. It controls which data a user can view or interact with.

By setting up RLS, organizations can ensure data confidentiality and restrict access to sensitive information.

In Power BI, RLS is configured by defining roles and specifying DAX (Data Analysis Expressions) filters. These filters help ensure only certain rows of data are visible to users in specific roles.

Data security is crucial for businesses handling sensitive information. With RLS, companies can manage data access efficiently, allowing users to see only the data they need, without exposing other critical information.

For example, a sales manager might see all sales records, while a sales representative sees only records related to their clients. This targeted data access can be set up using RLS, ensuring effective data security.

Implementing RLS also improves audit compliance. By restricting data access, businesses can keep track of who accessed what data, helping in regulatory compliance and maintaining data confidentiality.

Setting Up Basic RLS in Power BI Desktop

Setting up Row-Level Security (RLS) in Power BI Desktop involves creating security roles and using DAX expressions to manage data visibility. This ensures users access only the data they are permitted to view.

Defining Security Roles

In Power BI Desktop, defining security roles helps manage who can see specific data within a report. Roles are essentially sets of permissions assigned to users or groups.

To define a role, navigate to the “Modeling” tab and select “Manage Roles.” Here, you can create a new role by clicking “Create” and naming it appropriately.

Once a role is created, specify the tables and filters associated with it. Filters limit the data set a user can view, based on their assigned role.

When defining roles, consider user responsibilities and data sensitivity to set appropriate access levels.

Creating DAX Expressions for Filters

DAX (Data Analysis Expressions) is crucial when creating filters for RLS. DAX expressions define how data is filtered for each role.

For instance, to allow a role to view only sales data for a specific region, use a DAX expression like [Region] = "North America".

Start by opening the “Manage Roles” window. Select a role and apply the necessary DAX formula to the relevant tables.

This expression ensures users with the role see only filtered data.

Mastering DAX expressions allows precise control over data visibility, enhancing security within Power BI Desktop.

Note: Testing your DAX expressions is vital. Use the “View As Role” feature in Power BI Desktop to ensure data is correctly filtered before deployment.

Implementing RLS in Power BI Service

Implementing Row-Level Security (RLS) in Power BI Service involves setting up roles and permissions to control data access. This ensures that different users can view only the data relevant to them.

Publishing Reports with RLS

To apply RLS in Power BI, reports must first be designed with defined roles and rules. These roles are created in Power BI Desktop, where row-level filters limit access to specific data.

Once roles are set, the report can be published to Power BI Service.

In Power BI Service, the RLS settings remain active, managing what data each user can access based on their assigned role.

Importantly, the report’s designer ensures that roles are both relevant and secure, aligning with the organization’s governance policies. This ensures each user sees only the data they’re permitted to view, maintaining data confidentiality.

Managing Roles and Members Online

Managing roles and members in Power BI Service is crucial for maintaining up-to-date security.

Admins can assign and update user roles directly in the Power BI Service interface. This allows for the agile management of permissions as team structures and responsibilities evolve.

By accessing the “Manage Roles” option, admins can view existing roles, add new members, or modify current roles.

This process streamlines how users interact with RLS-protected data, ensuring they have appropriate access.

Effective role management also involves regular reviews and updates to reflect organizational changes, ensuring that data access continues to align with current security requirements.

The roles can be adjusted without needing to re-publish the report, offering flexibility in maintaining data security.

Configuring Dynamic Row-Level Security

Dynamic Row-Level Security (RLS) in Power BI allows data visibility to be tailored to individual users, ensuring they see only what’s relevant to their role. This involves using DAX functions and the USERNAME() function to filter data based on user identity.

Leveraging USERNAME() and DAX Functions

The USERNAME() function is essential in establishing dynamic RLS. It identifies who is accessing the report and enables filtering data accordingly.

This function works seamlessly with DAX to implement security measures.

DAX functions like FILTER and LOOKUPVALUE are pivotal in creating specific row-level permissions.

For instance, if a sales team member needs access to their sales data only, a DAX formula using USERNAME() could filter rows where the sales representative matches the current user’s identity.

Such configurations ensure sensitive information is safeguarded while providing relevant insights.

Dynamic RLS Based on User Roles

Dynamic RLS can also be configured based on user roles, offering a more role-centric approach to data security.

Instead of filtering by individual users, data access is granted based on predefined roles, such as ‘Sales’ or ‘Manager.’

Power BI allows role definitions through DAX functions, associating them with specific data access permissions.

For example, a ‘Manager’ role might have complete access to department data, while a ‘Sales’ role only sees specific sales figures.

This method streamlines access management, reducing manual updates when users change roles.

Advanced RLS Techniques and Best Practices

Advanced Row-Level Security (RLS) in Power BI involves using dynamic roles and DAX expressions to tailor access at a granular level. Two critical areas include maximizing the efficiency of DAX calculations and ensuring the scalable performance of RLS implementations.

Effective Use of DAX for Complex Security Rules

To implement complex security rules, the DAX Editor is essential. DAX allows for the creation of dynamic rules that adjust access based on user roles or data attributes.

Utilizing DAX functions such as USERPRINCIPALNAME and LOOKUPVALUE can enforce rules that change dynamically according to the user’s data access rights.

These functions help in creating flexible security logic, enabling row-level data access under specific conditions.

Organizing DAX expressions to avoid redundancy is crucial for maintaining efficiency.

When setting up dynamic RLS, ensure that the calculations are simplified to reduce processing time.

It’s helpful to test these expressions under different scenarios to validate correctness and optimize performance.

Optimizing RLS for Performance and Scalability

Ensuring that RLS rules do not degrade report performance is vital. Performance can be impacted by complex DAX expressions or large datasets.

First, use efficient RLS designs by minimizing the number of roles within the model. This reduces the processing overhead during data access.

Leverage Power BI’s caching capabilities, which reuse query results to decrease load times for repeat queries.

Additionally, evaluate the scalability of your RLS rules with your dataset size and user load in mind.

Ensure that the Power BI Premium capacity, if used, aligns with your data model’s needs for high concurrency and large data volumes.

This alignment supports maintaining performance and efficiency as the dataset grows.

Implement strategies for managing role-based permissions effectively to increase scalability while preserving performance and security.

Managing Data Security with RLS Filters

Managing data security in Power BI is crucial for organizations handling sensitive information. Row-Level Security (RLS) filters can help control access to data by setting rules on individual rows within a dataset. This ensures that users see only the data they are authorized to view, enhancing security.

Applying Security Filters in Both Directions

RLS filters provide flexibility in managing data security by allowing filters to apply in both directions within a data model.

When security filters are enabled, they can control both the data a user can see and the data the user cannot see. This is essential in scenarios where relationships are bidirectional.

Applying security filters in both directions helps maintain the integrity of the data model. It ensures that no unexpected data is accessible through indirect queries.

Power BI users can apply these filters by configuring the settings in the RLS roles. Clear rule definitions prevent unauthorized access and maintain consistency across datasets.

Engaging this feature can be especially useful in complex models with multiple relationships and dependencies.

Understanding the Impact of RLS on Visualizations

Row-Level Security has a direct impact on how visualizations are displayed in Power BI. RLS determines the scope of data accessible to users, which affects the charts and graphs shown.

Each user may see different results based on their access permissions. This ensures personalized and secure data representation.

Visualizations must be designed with awareness of RLS to function correctly. Developers should test reports under various RLS configurations to ensure accurate representation for all users.

Misconfigurations can lead to incomplete or biased data views.

It’s crucial to understand the interaction between RLS and visualization tools to optimize report performance and data accuracy.

Testing and Validating RLS Configurations

Using ‘Test as Role’ for Accuracy

The “Test as Role” feature in Power BI allows developers to emulate the data access of different user roles. By using this tool, you can see what data is available to a specific user. This ensures that only the appropriate rows are visible based on the RLS rules set up.

This method helps in catching any discrepancies in data visibility early. By doing so, developers can adjust RLS settings before a report is published. It ensures that any unintended data exposure is mitigated, maintaining strict control over who can see what information on Power BI dashboards.

Moreover, the feature is user-friendly, allowing for a seamless testing experience. It plays a vital role in maintaining accurate RLS configurations without data replication, crucial for applications such as medical record segregation in data marts.

Verifying Security with DirectQuery

DirectQuery in Power BI offers a method to keep real-time connections with SQL Server databases. By using DirectQuery, users can ensure that any changes in database roles reflect immediately in Power BI, providing an up-to-date security posture.

This verification method ensures that RLS configurations remain effective even as underlying data changes. It also aids in stress testing the maximum query throughput, as discussed in research on database row level security.

By leveraging DirectQuery, testers can validate the responsiveness and security of RLS setups. Ensuring that performance does not degrade by examining queries in real time is essential for maintaining robust data security.

Incorporating RLS into Data Governance Strategies

Incorporating Row-Level Security (RLS) into data governance strategies enhances data visibility and security. By managing access to data at a granular level, organizations can ensure that users only see what they are authorized to view. This minimizes the risk of data breaches and helps maintain compliance with regulations.

RLS supports data privacy by restricting access to sensitive information. Implementing RLS in data governance frameworks allows organizations to protect information while providing necessary data for decision-making. This balance is crucial for maintaining trust and compliance.

A key advantage of RLS is its ability to enhance data security without duplicating data. For example, the integration of RLS into systems such as i2b2 can segregate medical records into data marts efficiently. Similarly, using RLS in Power BI ensures that users have access only to the data relevant to their roles.

Incorporating RLS also supports compliance initiatives by aligning data practices with legal requirements. By ensuring data access adheres to policies, organizations can demonstrate accountability and transparency. This is especially important in industries with strict regulations, such as healthcare or finance.

RLS with SQL Server Analysis Services and Azure Analysis Services

Row-Level Security (RLS) in SQL Server Analysis Services and Azure Analysis Services provides a method to control access to data. It allows users to see only the information they are permitted to view, which enhances data security.

SQL Server offers robust security features through RLS by defining roles that determine data visibility. This is done within the Semantic Model, ensuring that sensitive information is accessible only to authorized users.

Azure Analysis Services, a cloud-based service, also supports RLS. It utilizes models that manage and control who can see specific data rows. This flexibility helps businesses secure their data in the cloud while maintaining performance.

RLS in both services can be configured using Dynamic Security. This technique adjusts data access rights based on the user’s identity or attributes, allowing for customized security measures.

To implement RLS:

  1. Define security roles and filter expressions.
  2. Assign users to these roles.
  3. Test to ensure data visibility meets requirements.

Both SQL Server and Azure Analysis Services use these steps to apply RLS effectively, enhancing data protection without compromising user experience. Learn more about how RLS impacts SQL Server and Azure Analysis Services by exploring detailed technical guides and examples.

Strategies for Managing User Experience with RLS

A person using a computer to set up row-level security in Power BI, with various data sources and visualizations on the screen

Effective management of Row-Level Security (RLS) in Power BI is crucial for enhancing user experience. When users access data, they should only see what they are permitted to view. Ensuring that RLS is set up correctly is key.

Dynamic RLS allows for a flexible setup. This approach adjusts permissions based on user roles. By using dynamic RLS, businesses can ensure data is easily accessible to the right users without compromising security.

Balancing RLS with Object-Level Security strengthens data protection. This combination restricts access not only to specific rows but also to entire tables or columns. This layered approach can lead to improved user experience by minimizing data overload.

Implementing permissions correctly is vital. Users need access only to the data necessary for their roles. This careful configuration reduces risk and enhances decision-making efficiency.

Providing users with an improved user experience involves clear communication. Offering training and support helps users understand how RLS impacts their data view. When users are informed about these security layers, they navigate the system more confidently.

Regular audits of RLS policies are beneficial. These audits help identify any gaps or outdated rules that might affect user experience. By keeping policies current, organizations maintain a seamless experience for all users.

Finally, considering user feedback is essential. Listening to users’ experiences with RLS can highlight areas for improvement. Adjustments based on feedback ensure that RLS policies both protect data and cater to user needs effectively.

Scaling RLS for Large Organizations

Implementing Row-Level Security (RLS) in large organizations requires careful planning and execution. It’s essential to manage security efficiently, scale the RLS to handle numerous users, and ensure that country-specific regulations are met. This involves strategic use of security groups and thoughtful deployment to accommodate high user volumes.

Handling RLS with Security Groups and Admins

For large organizations, managing RLS effectively often involves using security groups. Security groups streamline the management of user access by grouping employees with similar access needs. This reduces the need for individual security adjustments, making the system more scalable.

Admins play a crucial role in RLS implementation. They are responsible for setting up and maintaining security settings. By clearly defining roles and access levels, admins can ensure that users can only view data relevant to their position or region.

Deploying RLS with security groups minimizes administrative overhead while maximizing security. In addition, using existing organizational structures helps in aligning security protocols with company policies, thereby enhancing overall data security.

Deployment Considerations for High Volume Users

When deploying RLS for many users, consider the organization’s data access needs. High-volume environments require robust systems that handle multiple access requests simultaneously without compromising performance.

Integrating RLS smoothly involves balancing server load and ensuring fast data retrieval. Configuring servers to manage this efficiently can be done by optimizing resources based on the number of users and their access patterns.

It’s also important to consider potential country-specific regulations. Different countries may have varied data privacy laws, so RLS settings should comply with these. This ensures both compliance and security across different regions. Properly organizing data and access by region can simplify this process and maintain adherence to regulations.

Frequently Asked Questions

Row-level security (RLS) in Power BI helps control access to data at a fine level by restricting data based on the user’s identity. It involves setting up filters so that different users can see only the data relevant to them.

How do you implement row-level security in Power BI?

Implementing RLS involves creating roles within Power BI Desktop. To set up RLS, use the “Manage roles” feature to define filters that limit data visibility. These roles are later published to the Power BI service, ensuring users see only the data they are authorized to view.

Can you use USERPRINCIPALNAME to filter data in Power BI’s row-level security?

Yes, the USERPRINCIPALNAME function can be used to filter data based on the current user’s email or username. This function is helpful for creating dynamic RLS filters, allowing data visibility based on user identity, as retrieved from the service.

What are some examples of dynamic row-level security setups in Power BI?

Dynamic RLS setups can include creating relationships between user tables and data tables. For instance, using a mapping table that links users to specific rows allows dynamic filtering based on user identity. This setup can adjust automatically as user data changes.

How do multiple conditions affect row-level security in Power BI?

Multiple conditions can be implemented using logical operators like AND or OR to create complex filters. For example, providing access to certain data based on both department and region can achieve more precise control over what data users can see.

What’s the difference between row-level and object-level security in Power BI?

Row-level security focuses on data within a table, restricting row access based on defined roles. In contrast, object-level security involves hiding or showing entire tables, columns, or measures from the dataset. Object-level security encompasses more significant data structures, while RLS targets individual rows.

How can page-level security be configured alongside row-level security in Power BI?

Page-level security is not directly supported like RLS. However, it can be mimicked by careful design and linking of report filters. By applying filters at the report level or leveraging bookmarks and buttons, visibility of specific report pages can be controlled based on user roles in combination with RLS implementations.

Categories
Uncategorized

Integrating SQL with Visualization Tools: Enhancing Data Insights

Understanding SQL and Its Role in Data Analysis

A computer screen showing SQL code and a data visualization tool side by side

SQL, or Structured Query Language, is essential in the world of data analysis. It is primarily used to manage and manipulate relational databases.

Analysts use SQL to extract, organize, and process data in a structured manner.

SQL queries are at the heart of data retrieval. The SELECT statement allows users to specify the exact columns they need. It is often combined with clauses such as WHERE to filter rows based on specific conditions.

Example:

SELECT name, age FROM users WHERE age > 18;

To further refine results, the ORDER BY clause can be used to sort data.

For more complex operations, JOIN statements merge data from multiple tables, allowing analysts to combine information efficiently.

Grouping data is achieved through GROUP BY, which helps in summarizing information like averages or counts. The HAVING clause refines results further after grouping, offering control over aggregated data.

Example:

SELECT department, COUNT(*) FROM employees GROUP BY department HAVING COUNT(*) > 10;

Subqueries, or nested queries, provide additional flexibility. They allow for filtering based on results from another query, making complex data manipulations more manageable.

Fundamentals of Data Visualization

Data visualization involves converting data into graphical formats, such as charts and graphs, to make it easier to spot patterns, trends, and outliers.

By selecting the right visualization techniques, data professionals can effectively interpret and communicate complex datasets.

Choosing the Right Chart Types

Selecting the appropriate chart type is crucial to convey the data’s message accurately.

Bar charts are best for comparing quantities across different categories. They are simple yet powerful, highlighting differences effectively.

Line charts excel in showing trends over time. They illustrate changes and patterns, helping to reveal ongoing trends and forecasts.

Pie charts are used to show proportions and percentages. They are ideal for presenting a part-to-whole relationship in a clear visual format.

Knowing when to use each type ensures the data’s story is told clearly and accurately. By understanding the strengths and weaknesses of each chart type, data visualization becomes more meaningful and insightful.

Identifying Data Patterns and Trends

Uncovering data patterns and trends is a key aspect of effective visualization. Trends reveal the general direction in which data points move over time, such as upward or downward shifts.

Patterns can include cycles, seasonal variations, or other recurring movements in the data.

Using tools like line charts helps identify long-term trends and short-term patterns, making it easier to draw insights.

Spotting these trends and patterns can be crucial for data analysts looking to forecast future behavior or outcomes.

Visual cues provided in well-chosen charts enable quick comprehension and support data-driven decision-making.

Addressing Outliers and Data Anomalies

Outliers are data points that stand significantly apart from others in a dataset. They can skew results and may indicate errors, anomalies, or novel phenomena worth investigating.

Handling outliers correctly is essential for accurate data interpretation.

Visualization techniques like scatter plots can help identify these outliers quickly, highlighting any unusual data patterns.

Recognizing and addressing outliers involve assessing whether they result from data errors or represent significant new insights.

By visualizing outliers clearly, analysts can decide how to treat them effectively—either by investigating further or adjusting analyses accordingly.

Integrating SQL with Data Visualization Tools

Seamless integration between SQL and data visualization tools is crucial for optimizing data exploration and analysis. Key aspects include establishing connections with data sources and managing real-time data transformations.

SQL Queries and Data Source Connectivity

To start with data visualization, establishing a robust connection between SQL databases and visualization tools is essential.

These tools can extract real-time data through SQL queries, which allows analysts to work with live data. Understanding how to configure these connections improves data accessibility and analysis speed.

Flexible connectivity options are important.

Many tools, such as Looker Studio, offer built-in connections to popular databases like SQL Server. Ensuring compatibility with existing data infrastructure enhances performance and reduces the setup time for data analysts.

Real-Time Data Transformation and Management

Real-time data management is vital for accurate and timely insights.

SQL helps in transforming data before visualization, playing a crucial role in data preparation.

Transformation capabilities include data filtering, aggregation, and joining tables to prepare datasets that are ready for visualization.

Data visualization tools often provide customization features that can handle real-time data updates.

Tools like Power BI allow users to create dynamic dashboards that reflect the latest data. This capability ensures that users can interact with real-time data, making quick decisions based on current information.

Exploration of Popular Visualization Tools

A person using SQL to connect and visualize data with popular visualization tools

In the realm of data visualization, several tools stand out for their unique capabilities and features. These tools offer powerful options for creating interactive dashboards, customizing reports, and performing advanced data analysis.

Tableau: Interactive Dashboards and Security Features

Tableau excels in creating visually engaging and interactive dashboards. It allows users to connect with a wide array of data sources, making it a versatile choice for data professionals.

Security is a priority in Tableau, with options for role-based permissions and user authentication.

Users can track performance metrics and generate detailed visual reports. The tool’s ability to handle large data sets efficiently makes it ideal for organizations that require scalable solutions.

The interface is designed to be intuitive, encouraging users to explore data insights freely.

Power BI: Business Intelligence and Customization

Power BI is known for its robust business intelligence capabilities and extensive customization options.

It integrates seamlessly with SQL databases and other data platforms, allowing users to create dynamic and interactive visualizations.

Customization is a highlight of Power BI. Users can tailor dashboards to fit specific business needs, incorporating branding elements and personalized layouts.

The tool provides real-time analytics for immediate decision-making, making it a powerful ally in business strategy. Its cloud-based service ensures accessibility, enabling teams to collaborate on data projects efficiently.

Looker and QlikView: Advanced Analysis Capabilities

Looker and QlikView provide advanced data analysis features, catering to professionals who need in-depth analysis capabilities.

Looker integrates well with SQL databases, offering real-time data modeling and visual reporting. It helps teams gain insights by sharing interactive dashboards across the organization.

QlikView focuses on in-memory data processing, allowing rapid analysis of large datasets. Its associative data model encourages exploration without predefined hierarchies.

This unique approach facilitates quick insights, making it suitable for businesses that require agile data analysis.

Both tools offer strong data visualization capabilities, ensuring that users can present complex data in a comprehensible format.

Enhancing BI with SQL-Based Data Manipulation

A person using a computer to manipulate data in SQL and integrate it with visualization tools

SQL plays a vital role in boosting business intelligence by offering advanced data manipulation capabilities. It allows for efficient handling of complex datasets through operations such as filtering and sorting. These operations refine data, making it more suitable for analysis.

Joining Tables
A powerful feature of SQL is the ability to join tables. This can merge data from different sources and provide a more complete picture.

By using tables from multiple sources, businesses can uncover insights that might otherwise remain hidden.

Improving Data Quality
Data quality is crucial for meaningful analysis. SQL excels at cleaning and transforming data to ensure its accuracy and consistency.

Tasks such as removing duplicates and correcting inconsistencies help improve the reliable use of data in BI tools like Power BI.

Integrating SQL with BI tools enhances visualization by providing cleaned and well-structured data.

Tools such as Power BI and Tableau can easily connect with SQL databases, simplifying the process of creating dynamic reports and dashboards.

Integrating SQL with Bi tools like Power BI adds value to BI processes.

Interactive Reports and User-Friendly Design

A computer screen displaying a dynamic visualization of SQL data with user-friendly design elements

Creating interactive reports involves balancing user engagement with straightforward design. Tools like Looker Studio and Power BI emphasize a user-friendly interface through features like drag-and-drop mechanisms and customizable reports which benefit data analysts. The importance of a smooth learning curve and engaging interactive elements ensures effective data visualization.

Designing for a Smooth Learning Curve

When adopting new visualization tools, a critical factor is how easily users can learn and operate them.

Tools with a drag-and-drop interface are especially beneficial, allowing users to arrange data intuitively without coding skills. This usability is vital for both beginners and experienced analysts, making the transition seamless.

Power BI and Looker Studio excel in this area by offering pre-built templates and intuitive layouts. Templates guide users in designing reports efficiently, reducing the time needed to adapt.

Moreover, these interfaces focus on providing all necessary visualization options without overwhelming the user, enabling quick adaptation and improved productivity.

Interactive Elements: Tooltips and Drill-Down Features

Interactive elements in reports elevate the user experience by providing deeper insights without clutter. These include tooltips, which give users additional information on hover, and drill-down features that allow users to explore data points in detail. Such interactivity makes reports dynamic and informative.

For example, tooltips reveal detailed metrics when a user points over a chart element, enhancing data comprehension. The drill-down feature allows navigation from general to specific data layers, which is crucial for thorough analysis.

SQL visualization tools like Tableau and Power BI integrate these elements, helping analysts uncover trends and insights effectively.

These features not only make reports more engaging but also support thorough and interactive data exploration.

Data Security and Privacy in SQL and Visualization

A computer screen displaying a secure SQL database connected to visualization tools, with a lock icon symbolizing data security and privacy

Data security and privacy are crucial when integrating SQL with visualization tools. Data encryption plays a vital role in protecting sensitive information. By encrypting data, organizations can ensure that even if unauthorized access occurs, the information remains unreadable.

Access control is essential for maintaining data privacy. It involves setting permissions to restrict who can view or modify specific data. This ensures that only authorized personnel can access sensitive information, reducing the risk of data breaches.

Governance ensures that data handling complies with regulations. Organizations implement governance policies to manage how data is used, shared, and stored. This helps maintain data integrity and trust among stakeholders.

It’s important to address data privacy concerns, especially with increasing data collection. Visualization tools must integrate privacy-preserving techniques to minimize risks.

For example, using anonymized datasets can help protect individual identities.

To combine SQL and visualization, businesses must prioritize security measures. Secure integration methods should be adopted to safeguard databases and visualizations.

This includes implementing robust security protocols to prevent unauthorized access to both SQL servers and visualization platforms.

Focusing on these security aspects can help businesses effectively protect their data while benefiting from the powerful insights provided by SQL and visualization tools.

SQL for Aggregating and Analyzing Complex Data

A computer screen displaying SQL code alongside a chart and graph visualization tool

SQL plays a vital role in the manipulation and analysis of complex datasets. It offers tools like GROUP BY and ORDER BY to sort and categorize data efficiently.

These commands help transform raw data into meaningful insights.

When dealing with aggregating data, SQL’s ability to perform calculations such as sums or averages helps in summarizing data effectively. Commands like SUM, AVG, COUNT, and MAX are crucial for this purpose.

Window functions are a powerful feature in SQL, allowing analysts to perform calculations across a set of table rows related to the current row. These functions are useful for tasks like calculating running totals or moving averages.

A CASE statement in SQL provides flexibility in data analysis by allowing users to create conditional logic in queries. It can be used for categorizing or transforming data based on certain criteria.

These SQL tools are essential for processing, analyzing, and extracting insights from complex data. This makes it easier for analysts to deliver clear, data-driven conclusions.

Advanced SQL Techniques for Data Exploration

A computer screen displaying a complex SQL query alongside a dynamic visualization tool, with various data points and charts

Advanced SQL techniques can significantly boost data exploration capabilities. By using Common Table Expressions (CTEs), analysts can break complex queries into simpler parts. This makes it easier to read, debug, and maintain code.

CTEs are especially useful when dealing with recursive queries or when a subquery is used multiple times.

Another powerful tool is the WHERE clause, which allows for precise data filtering. By using logical operators like AND, OR, and NOT, complex conditions can be set.

This makes it possible to focus on specific data subsets that meet certain criteria, enabling a more targeted exploration process.

Data cleaning is a critical step in data exploration. SQL offers several functions and expressions to facilitate this process. Techniques such as using TRIM() to remove whitespace or employing CASE statements for data standardization can make datasets more manageable and easier to analyze.

Lists are useful for outlining concepts:

  • Common Table Expressions simplify complex queries.
  • WHERE clause helps filter datasets.
  • Functions like TRIM() aid in data cleaning.

By mastering these techniques, analysts enhance their ability to extract meaningful insights efficiently. This contributes to better decision-making and more accurate conclusions drawn from data.

Reporting and Sharing Insights with Decision Makers

A computer screen displaying a dashboard with charts and graphs, while a person points to key insights during a presentation

Effective reporting is key to communicating data insights to decision-makers. Using SQL with visualization tools allows data teams to create clear and understandable reports.

These reports help in data-driven decision-making by highlighting trends and patterns.

Interactive dashboards play a crucial role in this process. They offer a dynamic way to view data, enabling users to explore the information through filters and drill-downs.

This interactivity aids in better analysis and supports more informed decisions.

Sharing insights across teams helps foster collaboration. By making reports accessible to different departments, everyone can align their strategies based on shared data insights.

This improves cooperation and ensures that decisions are backed by comprehensive data.

A strong collaboration between IT and data departments ensures that the right tools and data sets are available for the users. Together, they can create and maintain effective dashboards that adapt to the evolving needs of the organization.

In today’s data-centric world, having well-designed dashboards and reports ensures that decision-makers have the necessary tools to make informed choices. This not only enhances efficiency but also supports the overall business strategy.

Some SQL visualization tools provide real-time insights, which are crucial for swift decision-making in fast-paced environments. For instance, Seek offers real-time insights with natural language queries. This allows decision-makers to get timely updates and act accordingly.

By integrating SQL data into visualization tools, organizations can transform raw data into actionable insights, streamlining the decision-making process. This approach fosters a culture of continuous learning and adaptability within teams.

Artificial Intelligence and Machine Learning Integration

A computer screen displaying data visualization tools connected to a database through SQL, with artificial intelligence and machine learning algorithms running in the background

AI and ML technologies are revolutionizing data workflows by offering new levels of automation and insight. They enhance the power of SQL and visualization tools, providing predictive analytics and simplifying data analysis tasks.

Predictive Analytics and Visualization

Predictive analytics transforms raw data into valuable insights using AI and machine learning. Python and R, programming languages well-suited for data tasks, are integral in building models to predict future trends and outcomes.

These models use historical SQL data to identify patterns and project future scenarios.

Visualization of these predictive insights helps in understanding complex data at a glance. AI and ML enhance dashboards by embedding model outputs directly, making it easier to view predicted trends through intuitive charts and graphs.

The combination of SQL’s data management capabilities with AI-powered analytics creates a comprehensive system for exploring and forecasting data-driven insights. More information can be found here.

Automating Data Analysis with AI and ML

Using AI and ML automates various stages of data analysis, speeding up processes that typically require significant human effort. For example, machine learning algorithms can handle tasks like data preparation, cleaning, and sorting.

This automation lets analysts focus on interpreting data instead of getting bogged down with manual tasks.

SQL can be enhanced with AI and ML by embedding code that processes large datasets quickly. Stored procedures using machine learning models can, for example, classify or predict data trends seamlessly.

Integrating these technologies into an SQL environment reduces the time spent on routine data handling, making the analysis quicker and more efficient. Learn more about how AI and ML streamline operations.

Scalability and Performance Optimization

A server room with multiple interconnected computers and data visualization tools

Scalability is a key factor when integrating SQL with visualization tools. A system that scales well can handle growing amounts of data efficiently.

When planning for scalability, it’s important to consider how the system will perform as data volumes increase. SQL editors and business intelligence platforms must support this growth without sacrificing speed or functionality.

Performance optimization is crucial for fast data processing. Techniques such as query rewriting and using execution plans can enhance SQL query performance.

These methods help identify and eliminate bottlenecks, which is essential for maintaining a responsive system.

Optimizing SQL queries can significantly reduce costs associated with data processing.

Key Aspects of Optimization:

  • Execution Plans: Understanding query performance.
  • Query Rewriting: Avoid unnecessary joins.
  • Indexing: Consider column cardinality and data types.

Business intelligence platforms benefit from optimized data pipelines. These tools enable organizations to make data-driven decisions quickly.

By ensuring scalability and performance optimization, businesses can better leverage their SQL databases for real-time analytics.

Incorporating real-time analytics into SQL environments also relies on the systems’ ability to handle rapid data changes. The integration of SQL with visualization tools should support seamless data flow and analysis, ensuring users always have access to the latest insights.

Frequently Asked Questions

Integrating SQL with visualization tools involves using specific methods and technologies to enhance data analysis and presentation. Various SQL databases support direct visualization, and numerous tools help in leveraging SQL data effectively.

How can data visualization be achieved directly within SQL databases?

Some SQL databases offer built-in tools for visualization. For instance, a data grid can display database tables in a user-friendly format. This feature allows users to visualize data without exporting it to another platform, providing a straightforward way to view and analyze data.

Which tools are considered most efficient for visualizing data from SQL databases?

Tools such as Tableau, Power BI, and Looker stand out for their efficiency. They provide powerful visualization capabilities and integrate well with SQL databases, allowing users to create dynamic and interactive reports.

What techniques are available for embedding SQL query visualizations in Databricks dashboards?

In Databricks, SQL query visualizations can be embedded using custom widgets and display functions available in the platform. These techniques help integrate SQL query results directly into dashboards, making it easy to present data insights.

Can artificial intelligence assist in generating SQL queries for data analysis tasks?

AI can significantly assist in generating SQL queries. By using AI-driven tools, users can automate the creation of complex queries, thus streamlining the data analysis process and reducing the need for deep technical expertise.

How does BlazeSQL enhance the integration of SQL databases with visualization capabilities?

BlazeSQL enhances integration by simplifying the data workflow between SQL databases and visualization tools. It optimizes query execution and provides seamless connectivity, allowing users to focus on data insights rather than technical challenges.

What are the advantages of using tools like Tableau or Power BI for SQL database visualizations?

Tableau and Power BI provide interactive and aesthetically pleasing visualizations.

These tools allow for real-time data updates and are highly customizable, giving users flexibility in presenting their SQL database data effectively.

Categories
Uncategorized

Learning Lead and Lag Functions in SQL: Mastering Data Analysis Techniques

Understanding Lead and Lag Functions

The LEAD and LAG functions in SQL are important tools for accessing data from subsequent or previous rows. Both functions belong to the family of window functions.

These functions help in analyzing sequential or time-series data without needing complex joins.

LEAD retrieves data from a row that follows the current row, while LAG accesses data from a row preceding the current one.

Syntax Examples:

  • LEAD:

    LEAD(column_name, offset, default_value) OVER (ORDER BY column_name)
    
  • LAG:

    LAG(column_name, offset, default_value) OVER (ORDER BY column_name)
    

Components Explained:

  • column_name: The column to retrieve data from.
  • offset: The number of rows forward or backward from the current row.
  • default_value: A value to return if no lead or lag value exists.
  • ORDER BY: Specifies the order of data for determining lead or lag.

Use Cases:

  • Comparing Row Values: Identify trends by comparing sales figures from month to month.
  • Time-Series Analysis: Evaluate changes in data points over time.

By allowing users to grab values from different rows within a partition, LEAD and LAG simplify queries and enhance data insight without self-joins.

These functions are versatile and can be combined with other SQL functions for more dynamic data analysis. For more comprehensive insight into SQL’s usage of these functions, consult resources on LEAD and LAG functions.

Exploring Window Functions in SQL

Window functions in SQL offer powerful tools for analyzing and processing data. They let users perform calculations across a set of rows related to the current row, based on conditions defined within the query.

Defining Window Functions

Window functions are a special type of SQL function that performs calculations across a range of rows related to the current query row. Unlike aggregate functions, they don’t group the results into single output values but instead partition the results as defined by the user. This capability is especially useful for tasks like ranking, calculating running totals, or comparing row-wise data.

Each window function operates within a specified “window” determined by the PARTITION BY clause, if present. Without this clause, the function is applied to all rows in the result.

Functions like LAG and LEAD allow users to fetch data from rows that are outside of the current row’s immediate dataset, which proves beneficial for analyses involving trends over time.

Window Function Syntax and Parameters

The typical syntax of window functions includes the function name, an OVER clause, and optionally PARTITION BY and ORDER BY clauses. Here’s a basic format:

function_name() OVER (PARTITION BY column_name ORDER BY column_name)
  • PARTITION BY divides the result set into partitions and performs the function on each partition. Without this, the function applies to the entire dataset.
  • ORDER BY specifies how the rows are ordered in each partition. This is crucial because some functions, like RANK and ROW_NUMBER, require specific ordering to work correctly.

The OVER clause is mandatory for all window functions. It defines the borders for each function to operate within.

These syntaxes are essential for ensuring accurate and efficient data processing using window functions in SQL.

The Basics of Lead Function

A computer screen displaying SQL code with lead and lag functions

The LEAD function in SQL is a window function that allows you to access subsequent rows within a specific dataset without the need for a self-join. It helps analysts identify trends and patterns by comparing current and future data points.

Syntax of Lead Function

The syntax of the LEAD function is straightforward, yet powerful. It typically uses the format:

LEAD(column_name, offset, default_value) OVER (PARTITION BY partition_column ORDER BY order_column)

Parameters:

  • column_name: This is the column from which you want future values.
  • offset: Specifies how many rows ahead the function should look. By default, this is 1 if not specified.
  • default_value: Optional. This is the value returned when no future row exists.
  • PARTITION BY: Divides the results into partitions to which the function is applied.
  • ORDER BY: Determines the order in which rows are processed in each partition.

Each part plays a significant role in how data is analyzed, allowing for precise control over the calculations.

Using Lead() in Data Analysis

Using the LEAD function can greatly enhance data analysis efforts by offering insights into sequential data changes.

For instance, it can be useful in tracking sales trends where the next sale amount can be compared to the current one.

Consider a sales table where each row represents a transaction. By applying LEAD to the sales amount, an analyst can see if sales increased, decreased, or stayed the same for the following transaction.

SQL query examples help illustrate this further by showing practical applications, such as:

SELECT sale_date, sale_amount, LEAD(sale_amount) OVER (ORDER BY sale_date) AS next_sale_amount FROM sales;

In this example, analysts can observe how sales change over time, offering valuable business insights.

The Fundamentals of Lag Function

A computer screen displaying SQL code with lead and lag functions, surrounded by reference books and notes

The Lag function in SQL is a window function that accesses data from a previous row in the same result set without using self-joins. It is especially useful in data analysis for observing trends over time.

Syntax of Lag Function

The Lag function has a straightforward syntax that makes it easy to use in SQL queries. The basic structure is LAG(column_name, [offset], [default_value]) OVER (PARTITION BY column ORDER BY column).

  • column_name: Specifies the column from which data is retrieved.
  • offset: The number of rows back from the current row. The default is 1.
  • default_value: Optional. Used if there is no previous row.

Examples illustrate syntax usage by pulling data from previous rows.

For instance, using LAG(sale_value, 1) OVER (ORDER BY date) returns the sale_value of the prior row, helping track day-to-day changes.

The presence of offset and default_value parameters allows customization based on query needs.

Applying Lag() in Data Analysis

In data analysis, the Lag() function is instrumental for observing temporal patterns and comparing current and previous data values.

For instance, companies can use it for sales analysis to examine periodic performances against past cycles.

Consider a table of sales data: by applying Lag(), one can easily calculate differences in sales transactions over time. This function aids in discovering trends, such as monthly or yearly growth rates.

For example, using LAG(total_sales, 1) OVER (ORDER BY month) reveals each month’s change compared to the previous one’s total.

Practical applications in businesses and analytics may involve tracking user activity, financial trends, and other datasets where historical comparison is crucial. This turns the Lag function into a powerful tool for deriving meaningful insights from sequential data.

Ordering Data with Order By

A computer screen displaying a SQL query with the "ORDER BY" clause, alongside a chart illustrating the use of lead and lag functions

In SQL, the ORDER BY clause is crucial for organizing data in a meaningful way. It allows you to sort query results by one or more columns, making the data easier to read and analyze.

The syntax is simple: ORDER BY column_name [ASC|DESC];. By default, the sorting is in ascending order (ASC), but descending (DESC) can also be specified.

When using ORDER BY, multiple columns can be listed, and the sorting will be applied in sequence.

For example, ORDER BY column1, column2 DESC will first sort by column1 in ascending order and then sort by column2 in descending order if there are duplicate values in column1.

Using Offset in Lead and Lag Functions

A computer screen displaying SQL code with lead and lag functions

The LEAD() and LAG() functions in SQL are used to access data in a different row from the current one. The concept of offset is key to both functions.

Offset determines how many rows forward (LEAD) or backward (LAG) the function will look. By default, the offset is 1, meaning the function looks at the next or previous row.

Here is a quick example:

Employee Salary Next Salary Previous Salary
Alice 50000 52000 NULL
Bob 52000 53000 50000
Charlie 53000 NULL 52000

In this table, Next Salary is found using LEAD(Salary, 1). Similarly, Previous Salary is determined using LAG(Salary, 1).

Custom Offsets can also be used:

  • LEAD(Salary, 2) would skip the next row and take the value from two rows ahead.
  • LAG(Salary, 2) would pull from two rows back.

These functions were introduced in SQL Server 2012, enhancing query capabilities by eliminating complex joins.

Using offset with LEAD and LAG simplifies data analysis, allowing users to easily compare values across rows without creating extra joins or subqueries.

Partitioning Data with Partition By

A computer screen displaying SQL code with partition by, lead, and lag functions

When using SQL, dividing data into sections or groups is often necessary. The PARTITION BY clause helps achieve this. It’s used with window functions like LEAD() and LAG() to process rows in specific partitions of a data set.

Tables can be partitioned by one or more columns. For example, partitioning sales data by region helps analyze sales performance in each area separately.

Column Name Data Type
Region String
Sales Decimal

When combined with the ORDER BY clause, PARTITION BY ensures data is not just grouped but also ordered within each group. This is essential for functions that depend on row sequence, such as ROW_NUMBER() and RANK().

Using PARTITION BY improves query performance. By breaking down large data sets into smaller, more manageable pieces, it allows for more efficient querying and analysis.

An example is analyzing employee salaries by department. Here, each department is its own partition, and functions can compare salary figures within each department.

The use of PARTITION BY is important in window functions to focus analysis on relevant data subsets, aiding in precise and meaningful data insights. Take a look at how partitioning data can improve performance.

Understanding the structure of the data set, including how partitions are defined, plays a vital role in leveraging PARTITION BY effectively, enabling clear and targeted data analysis.

Analyzing Time-Series Data

A computer screen showing a SQL query with time-series data and lead/lag functions

Analyzing time-series data is crucial for understanding trends and making forecasts.

Time-series data points are collected or recorded at specific intervals, allowing for an analysis of how values change over time.

Stock prices, weather temperatures, and sales figures are common examples.

SQL’s LEAD() and LAG() functions are invaluable tools for this type of analysis. They allow users to access data from previous or upcoming rows without complicated queries.

This makes it easier to spot patterns, such as an increase or decrease in values over time.

LEAD() accesses data from the upcoming row. For instance, it can help forecast future trends by showing what the next data point might look like based on current patterns.

This is particularly useful in financial and sales data analysis where predicting future outcomes is essential.

LAG() provides data from the previous row. This helps identify past trends and see how they relate to current values.

It’s especially handy when assessing how past events influence present performance, such as analyzing historical sales performance.

A simple example in SQL could be:

SELECT 
    date,
    sales,
    LEAD(sales, 1) OVER (ORDER BY date) AS next_sales,
    LAG(sales, 1) OVER (ORDER BY date) AS previous_sales
FROM 
    daily_sales;

This query helps extract insights into how sales figures trend over time. Window functions like LAG() and LEAD() make such analyses more efficient and informative. They’re important in time-series data analysis for both recognizing past patterns and predicting future trends.

Default Values in Lead and Lag Functions

A database diagram with lead and lag functions in SQL

In SQL, the LEAD() and LAG() functions are used to compare rows within a dataset. These functions can access data from a subsequent or previous row, respectively.

When there is no row to reference, a default value can be provided. This ensures that no data is missing from the output.

For example, LEAD(column_name, 1, 0) sets 0 as the default when there is no next row.

Using a default value helps maintain data integrity and avoids null entries.

By specifying a default, analysts ensure clarity in results, especially when the dataset has gaps or the number of entries varies.

Here’s a simple illustration:

Function Behavior
LEAD() Accesses the next row’s value
LAG() Accesses the previous row’s value

Understanding default values in the context of LEAD() and LAG() functions can aid in constructing more reliable SQL queries. With these defaults, users can handle data efficiently without worrying about missing values.

Lead and Lag Functions in SQL Server

A computer screen displaying SQL code with lead and lag functions

SQL Server introduced the LEAD and LAG functions in SQL Server 2012. These functions are useful for accessing data from a row at a specified physical offset from the current row within the same result set.

LAG allows you to access data from a previous row. It is helpful for comparing current values with the previous ones without using complex operations like self-joins.

LEAD fetches data from the next row, which can be handy for forward-looking calculations in reports or analytics.

Both functions are window functions, and their syntax includes the OVER clause, which defines the data partition and order.

Here’s a simple syntax example:

LAG (scalar_expression [, offset] [, default]) 
OVER ( [ partition_by_clause ] order_by_clause )

Practical Example: Suppose there is a table Sales with data on daily sales amounts. Using LAG and LEAD, you can calculate differences between consecutive days to track sales trends.

These functions simplify queries by removing the need for complex subqueries or self-joins. They help make code more readable and efficient while analyzing data that requires information from adjacent rows. More information on how these functions work can be found in articles like the one on LearnSQL.com.

Working with Lead and Lag in MySQL

A MySQL database diagram with lead and lag functions being used in SQL queries

MySQL provides two powerful functions, LEAD() and LAG(), that help in accessing data from other rows in a result set. These functions simplify tasks that require examining sequential data.

LEAD() retrieves values from the next row in a dataset. This is particularly useful for making comparisons or finding trends between consecutive entries. For example, tracking year-over-year sales growth can be simplified using LEAD().

LAG() allows access to the data from the previous row. This can be helpful when there is a need to look back at earlier records to compare results or find differences.

These functions are commonly used in MySQL’s window functions. They provide a more efficient way to analyze sequential data without needing complex subqueries or self-joins.

Usage Example:

Consider a sales table with columns for employee ID and sales amount.

Employee Sales Current Leads Previous Lags
Alice 5000 5500 NULL
Bob 5500 7000 5000
Carol 7000 NULL 5500

LEAD() extracts future sales data, while LAG() retrieves past sales data.

For those interested in practical applications, detailed guides for using these functions in MySQL can be found at resources such as GeeksforGeeks and Sling Academy.

Real-World Examples and Analysis

A computer screen displaying SQL code with lead and lag functions, surrounded by data analysis charts and graphs

In the realm of data analysis, SQL’s LEAD and LAG functions are pivotal. They allow for insights across adjacent rows without complex joins. These functions simplify data examination, enabling users to analyze trends or patterns efficiently.

E-commerce Transactions
In an e-commerce dataset, the LEAD function can anticipate future sales. For example, if a particular product sells for $20 on Monday, LEAD can show Tuesday’s sale price next to it. This helps predict price trends or demand changes.

Stock Market Analysis
Analyzing stock trends is another area where these functions shine. Analysts use the LAG function to compare a stock’s current price with its previous day’s price. This approach helps in understanding market fluctuations and spotting investment opportunities.

Performance Tracking
For monitoring employee performance, both functions are beneficial. By using LAG, a manager could compare an employee’s current performance metrics to their previous results, identifying improvements or declines over time.

Here’s a simple table illustrating how LEAD and LAG function:

Employee Current Score Previous Score (LAG) Next Score (LEAD)
Alice 85 82 88
Bob 78 85 80

This table makes it easy to track progress or identify areas that may need attention. Using these functions ensures that data evaluation is both streamlined and effective.

Frequently Asked Questions

SQL users often have questions about utilizing the LEAD and LAG functions. These functions are critical for accessing data from different rows without complex joins. Here, common questions cover their differences, practical uses, and how they function in various SQL environments.

How do you use the LEAD function in conjunction with PARTITION BY in SQL?

The LEAD function can be combined with PARTITION BY to divide the data into sections before applying the LEAD operation. This makes it possible to access the next row’s data within each partition, facilitating comparisons or calculations within a specific group of records.

What are the differences between the LEAD and LAG functions in SQL?

LEAD and LAG functions both access values from other rows. The LEAD function fetches data from rows following the current one, while the LAG function retrieves data from rows that precede it. This makes the functions particularly suitable for analyzing trends over time or sequential records.

Can you provide an example of using the LAG function to find differences between rows in SQL?

Yes, the LAG function can calculate differences between rows by comparing current and previous row values. For instance, in a sales table, LAG can compare sales figures between consecutive days, allowing analysis of daily changes.

How do LEAD and LAG functions work in SQL Server?

In SQL Server, LEAD and LAG are implemented as window functions. They help perform calculations across a set of table rows related to the current row. These functions require an ORDER BY clause to define the sequence for accessing other row data.

What are some practical applications of LEAD and LAG functions in data analysis with SQL?

LEAD and LAG functions are widely used in time-series analysis and trend monitoring. They are instrumental in financial calculations, inventory tracking, and any scenario where changes over a sequence must be calculated or visualized. They simplify analyzing data progression over time or categories.

How are LEAD and LAG functions implemented in MySQL compared to Oracle SQL?

In MySQL, LEAD and LAG functions are similar to those in Oracle SQL but vary slightly in implementation syntax.

They offer seamless access to adjacent row data in both systems, enhancing analysis efficiency and reducing the need for complex query-building.

Categories
Uncategorized

Learning About PCA: Understanding Principal Component Analysis Basics

Understanding Principal Component Analysis (PCA)

Principal Component Analysis (PCA) is a technique used in statistics and machine learning to simplify complex datasets. It is particularly valuable when dealing with high-dimensional data.

The Concept of Dimensionality Reduction

Dimensionality reduction is a key concept in data analysis, especially when dealing with high-dimensional data. By reducing the number of dimensions, analysts can simplify datasets while preserving essential patterns and trends.

PCA is a popular method for achieving this because it transforms data into a new coordinate system, keeping the most critical information.

When data has too many features, it becomes hard to analyze because of its complexity, a problem often referred to as the curse of dimensionality. By focusing on the components that explain the data’s variance, PCA helps in tackling this issue.

PCA in Machine Learning

In machine learning, PCA is used to preprocess data, making models more efficient and easier to train.

By focusing on a few principal components, PCA can remove noise and redundant features, allowing algorithms to process data more effectively.

PCA also helps in situations where datasets contain a large number of interrelated variables. It uncovers the internal structure of data, highlighting directions where the data varies the most. This simplifies the data, revealing important relationships among variables, which can be critical for building robust models.

PCA is widely used in applications ranging from image recognition to genomic data analysis, demonstrating its versatility in machine learning. For a more detailed look into its applications, you can explore how it works through tutorials available on Built In and GeeksforGeeks.

Mathematical Foundations of PCA

Principal Component Analysis (PCA) relies on mathematical concepts to simplify complex datasets. It reduces dimensions using key aspects of linear algebra and statistics. Essential components include covariance matrices, eigenvalues, and eigenvectors.

Covariance Matrix and Its Importance

A covariance matrix is a table that sums up how much two variables vary together. It shows the covariance (how two variables change together) of each variable pair in a dataset.

In PCA, the covariance matrix helps identify the directions where data spread is greatest.

Variance, found on the diagonal of the covariance matrix, shows how much each variable varies from its mean. The non-diagonal elements reveal how much the variables change together. High variance directions can show significant underlying data structures. This matrix is crucial as it determines how data dimensions relate to each other. Understanding the spread of data is essential for dimensionality reduction in PCA.

Eigenvalues and Eigenvectors

Eigenvalues and eigenvectors are central in PCA for understanding data transformations. When multiplied by a matrix, an eigenvector maintains its direction. However, its length changes depending on the eigenvalue.

In PCA, eigenvectors point in the directions where data varies most, while eigenvalues measure the magnitude of this variance.

By organizing data along eigenvectors associated with largest eigenvalues, PCA captures the most important aspects of variation. This allows PCA to reduce the dataset to fewer dimensions without losing essential information.

Eigenvalues also help in determining which components should be kept or discarded, making them essential for decision-making in PCA to ensure efficiency and data accuracy.

The Role of Linear Algebra in PCA

Linear algebra is a foundation of PCA, providing tools to manipulate and understand data in multiple dimensions. It involves operations that transform datasets into principal components using matrices and vectors.

Important concepts from linear algebra, like eigen decomposition, make it possible to find eigenvectors and eigenvalues.

These operations allow transformation of data into a new set of axes, aligning with maximum variance. This reduces the dimensionality while preserving essential patterns in the data.

Linear algebra’s role in PCA means handling matrix calculations that project original data into a lower-dimensional space, focusing on significant information. Its principles enable PCA to distill complex data into manageable and insightful forms.

Step-by-Step PCA Algorithm

The Principal Component Analysis (PCA) algorithm is a method used for reducing the dimensions of a data set. It involves several steps, including standardizing the data and calculating the covariance matrix, before identifying eigenvectors and eigenvalues. This process helps determine the principal components and explained variance which are crucial for analysis.

Standardization of the Data Set

Before performing PCA, it is essential to standardize the data set. This step ensures that each feature contributes equally to the analysis.

Standardization involves scaling the data so that each feature has a mean of zero and a standard deviation of one. This is important because features measured in different units can have varying impacts on the results.

For example, if one feature is in kilograms and another in meters, without standardization, their differences could skew the results. This step transforms the data into a comparable scale, making it suitable for further analysis.

Calculating the Covariance Matrix

The next step is to calculate the covariance matrix. This matrix captures how much the dimensions vary from the mean with respect to each other.

If the variables are standardized, the covariance matrix becomes the identity matrix. It’s used to identify patterns and correlations between different features in the data set.

A matrix with positive covariances suggests that the features increase or decrease together, while negative covariances indicate that when one feature increases, the other decreases. This matrix forms the basis for deriving eigenvectors and eigenvalues, which are fundamental to PCA.

Deriving Eigenvectors and Eigenvalues

Eigenvectors and eigenvalues are derived from the covariance matrix.

Eigenvectors represent directions in the data space, while eigenvalues indicate the magnitude of these directions.

In PCA, eigenvectors help identify the axes along which the data has the most variance. Larger eigenvalues mean greater variance along their corresponding eigenvector. Thus, the first principal component has the highest variance and is the direction of maximum spread in the data set.

The eigenvectors become principal components, which are essential for transforming the data into a new reduced-dimension set.

Feature Vector and Explained Variance

Once the eigenvectors and eigenvalues are obtained, they are used to form the feature vector. This vector is a matrix composed of the top eigenvectors that capture the most variance.

The concept of explained variance is key here. It quantifies how much information can be attributed to each principal component.

By selecting the principal components with the highest variance, one retains as much information while reducing data dimensions. This selection process helps maintain data integrity while simplifying models for further analysis.

Applications of PCA in Data Analysis

Principal Component Analysis (PCA) plays a vital role in data analysis by simplifying datasets while preserving essential trends and patterns. It is widely used in various applications like data visualization and feature selection.

Data Visualization Through Dimensionality Reduction

PCA helps transform large datasets into a lower-dimensional space, making it easier to understand and interpret data. By reducing dimensions, researchers can visualize complex data in 2D or 3D plots, highlighting key structures and trends.

This is useful in methods like regression analysis where visual insights can guide model development and result interpretation.

In computer vision, PCA is employed to compress images while maintaining significant features, aiding in tasks such as facial recognition and image classification. This dimensionality reduction is crucial for simplifying datasets and focusing on the most informative components.

Feature Selection and Extraction for Predictive Models

Using PCA for feature selection ensures that only the most significant variables are considered for predictive models, thus enhancing model performance.

By extracting key features, PCA helps improve the accuracy of classification and prediction tasks. It reduces noise and redundancy, leading to more efficient machine learning algorithms.

For predictive modeling, especially in fields like quantitative finance and healthcare, PCA assists in identifying patterns and trends by providing a condensed version of the data. This promotes more reliable predictions and better insights into the underlying relationships within data.

PCA in Machine Learning Algorithms

Principal Component Analysis (PCA) serves multiple roles in machine learning, acting as a vital tool for dimensionality reduction, enhancing classification efficiency, and refining regression models while also finding applications in signal processing. Each application tailors PCA’s capabilities to achieve better model performance and more informative data analysis.

Unsupervised Learning with PCA

In unsupervised learning, PCA is used to identify patterns in data without predefined labels. It reduces the complexity of datasets by converting original variables into new, uncorrelated variables called principal components. This transformation retains data variability, making it easier to visualize and analyze large datasets.

PCA is popular for clustering tasks, where datasets are often high-dimensional. By reducing dimensionality, PCA simplifies the computational process and highlights natural groupings. This process is crucial for algorithms like k-means, which benefit from the noise reduction that PCA offers. Additionally, it aids in capturing essential structures, facilitating a more efficient pattern discovery.

Integrating PCA with Classification Algorithms

When integrating PCA with classification algorithms, the goal is to boost the performance of classifiers by reducing feature space dimensionality.

PCA helps eliminate redundant data, which can lead to faster and more accurate model training.

Classification algorithms, including support vector machines and neural networks, can benefit from this dimensionality reduction.

By focusing only on the principal components, these algorithms can avoid the curse of dimensionality, which often leads to overfitting. Important features are highlighted, allowing classifiers to generalize well to new data. This approach enhances the classifier’s ability to differentiate between classes by focusing on the most significant patterns.

PCA for Regression Analysis and Signal Processing

In regression analysis, PCA addresses multicollinearity by transforming correlated predictors into a set of independent variables. This transformation can enhance the stability and interpretability of regression models. With fewer features, models become less complex and more robust to overfitting.

Signal processing also benefits from PCA’s dimensionality reduction capabilities. In this field, PCA is employed to compress the signals and remove noise, improving the signal quality for further analysis.

By focusing on signals’ most impactful features, PCA allows for clearer, more concise processing, playing a role in applications like image compression and noise reduction in audio signals.

The Importance of Data Preprocessing

Data preprocessing is crucial for effective data analysis, especially when using techniques like Principal Component Analysis (PCA). Standardization of features often greatly improves the accuracy of PCA, while dealing with correlated and independent features ensures that the PCA process captures the most significant data patterns.

The Impact of Standardization on PCA

Standardization is a key step in data preprocessing to ensure that each feature contributes equally to the analysis.

PCA is sensitive to the scale of the data; larger-scaled features may dominate the analysis. By scaling data using techniques like the StandardScaler, each feature is adjusted to have a mean of zero and a standard deviation of one. This process reduces the impact of initial differences between features, leading to better extraction of patterns.

An example from recent studies shows that standardized data with PCA achieved a test accuracy of 96.30% compared to a much lower accuracy of 35.19% without scaling. Consistently, standardized data also achieve lower log-loss values, indicating more accurate probability estimates. These improvements highlight the importance of using scaling processes to enhance model performance.

Dealing with Correlated and Independent Features

Addressing correlated and independent features ensures that PCA focuses on informative aspects of the dataset.

When features are highly correlated, they can skew PCA results by attributing undue importance to those features. To manage this, correlation matrices are often used to identify and address redundancy.

For instance, if two features are found to be highly correlated, it might be beneficial to combine them or remove one to avoid duplication of information in the PCA process. On the other hand, independent features can provide unique information that enriches the analysis.

By carefully identifying and managing these features, PCA can more accurately reflect the underlying structure of the data.

PCA for Exploratory Data Analysis (EDA)

Principal Component Analysis (PCA) is a method often used in Exploratory Data Analysis (EDA) to identify patterns and reduce the dimensionality of datasets while retaining most of the variance. This technique helps in simplifying complex data and uncovering the most significant relationships.

Identifying Patterns with PCA in EDA

PCA is valuable for identifying patterns in large datasets by transforming correlated variables into a smaller number of uncorrelated components. These components represent the data’s main features, allowing analysts to focus on the most important patterns.

For example, in a dataset with multiple variables, PCA can reveal hidden structures by highlighting the principal components that capture the essential variance. The components act as a simplified version of the data, making it easier to interpret and visualize patterns that might not be obvious from the raw data alone.

It’s effective for visualizing data in fewer dimensions, such as 2D or 3D plots, helping analysts detect clusters, outliers, or trends efficiently.

Understanding Variance Captured by Components

The core of PCA is capturing the maximum variance in fewer components, which involve calculating eigenvectors and eigenvalues from the data’s covariance matrix.

The first principal component captures the most variance, and each subsequent component captures less.

By examining the percentage of total variance captured by each component, analysts can decide how many components to keep for effective data interpretation. Typically, components that capture the majority of variance (often more than 70% to 90%) are retained.

This process allows for reducing the dataset’s complexity while maintaining crucial information, aiding in tasks like data compression and visualization.

Dealing with High-Dimensional Datasets

High-dimensional datasets, often hard to visualize, pose unique challenges. Methods like Principal Component Analysis (PCA) help in reducing dimensions, making data easier to handle and interpret.

Overcoming the Curse of Dimensionality

The curse of dimensionality refers to the increasing complexity in analyzing data as the number of dimensions grows. High-dimensional data can make patterns hard to spot and computations more resource-intensive. PCA addresses these issues by lowering the number of dimensions while retaining vital information. This simplifies data analysis and visualization.

By focusing on key features of the dataset, PCA helps identify important patterns without losing significant details. This reduction in complexity aids in improving the performance of machine learning models by making the datasets more manageable.

PCA’s Role in Data Compression and Reconstruction

PCA is effective in compressing high-dimensional datasets, turning them into a simpler form. This process reduces storage space and computational power needed for data analysis. The technique transforms data into principal components, which are smaller yet meaningful representations.

Data reconstruction is part of PCA’s ability, where original data is approximated from the reduced components. This ensures minimal loss of information during compression.

When applied correctly, PCA maintains the dataset’s integrity, making it a valuable tool for efficient data management and analysis.

Advanced Techniques Related to PCA

Principal Component Analysis (PCA) is often enhanced or supplemented by other techniques. These include methods like Factor Analysis, which serves distinct purposes, Linear Discriminant Analysis as an alternative for classification tasks, and Eigen Decomposition, which aids in understanding the mathematical underpinnings of PCA.

Factor Analysis Versus PCA

Factor Analysis and PCA are both used for dimensionality reduction, but they serve different goals. While PCA focuses on capturing maximum variance, Factor Analysis aims to model data based on underlying factors.

Factor Analysis assumes that observed variables are influenced by fewer unobserved factors and that the residual variances are due to error. This makes it useful for identifying underlying relationships between observed variables, especially in psychometrics and social sciences.

In contrast, PCA constructs linear combinations of variables without assuming any underlying structure. It is often used in data preprocessing to reduce dimensionality before other analyses. The distinction between these techniques lies in their assumptions about the data and the goals of transformation.

For more insights, explore this Principal Component Analysis resource.

Linear Discriminant Analysis as an Alternative

Linear Discriminant Analysis (LDA) is another dimensionality reduction technique, but it is primarily used for classification purposes rather than simply reducing variance. LDA works by finding a linear combination of features that best separates classes in a dataset. It is especially effective when the classes are well-separated and the data is relatively normally distributed.

Unlike PCA, which is unsupervised and doesn’t consider class labels, LDA uses these labels to maximize the distance between class means while minimizing within-class variance. This makes LDA particularly suitable for developing predictive models where class distinction is crucial.

More details on LDA are available in the LDA and PCA article.

Eigen Decomposition and Its Use Cases

Eigen Decomposition is a mathematical concept that plays a critical role in PCA. The process involves breaking down a matrix into its eigenvalues and eigenvectors.

In the context of PCA, eigenvectors indicate the directions of maximum variance in the data, while eigenvalues indicate the magnitude of these directions.

This technique helps simplify complex linear transformations to better understand data structures and improve computation efficiency.

Eigen Decomposition finds prominent applications in different fields including signal processing and quantum mechanics, alongside PCA. It provides a foundation for comprehending how PCA optimally rotates the data space. The relationship between these concepts is further elaborated in the PCA methods article.

PCA in Multivariate Statistics

Principal Component Analysis (PCA) plays a crucial role in multivariate statistics, especially in handling data with multiple variables. It helps simplify data by focusing on key aspects like multicollinearity and measures such as standard deviation and variance.

Understanding Multicollinearity in Regression

Multicollinearity occurs when two or more independent variables in a regression model are highly correlated. This can distort the results of statistical analyses, making it difficult to determine the effect of each predictor.

PCA can effectively address multicollinearity by transforming original variables into a set of uncorrelated variables called principal components. Each principal component captures the maximum possible variance, reducing complexity while retaining the data’s essential structure.

By using PCA, analysts can derive a clearer picture of how variables interact without the interference caused by multicollinearity. This approach is particularly effective in simplifying complex datasets commonly found in fields like finance or bioinformatics.

Analysts often rely on the principal components to explore the fundamental underlying patterns in the data. These patterns are crucial for making informed conclusions and decisions based on the analysis.

Analyzing Standard Deviation and Variance

Standard deviation and variance are vital concepts in statistics that measure the spread of data around the mean. They indicate how much the data points differ from the average.

In the context of PCA, these measures are used to assess how much information each principal component retains.

Variance in PCA is important because it helps determine the number of principal components to use. Components with higher variance capture more of the data’s essence. The total variance in the dataset is redistributed among the principal components, with the first component usually capturing the most variance.

Understanding these concepts aids in deciding which components to retain.

PCA helps to efficiently reduce the dimensionality of the data while maintaining the integrity of the information. By evaluating standard deviation and variance among principal components, researchers ensure they capture the most significant patterns in the data, making the analysis both effective and accurate.

Practical Implementation of PCA

Principal Component Analysis (PCA) reduces the dimensionality of data while preserving most variance. This section outlines how to implement PCA using Python libraries NumPy and Matplotlib. It also covers how to interpret results using scatter plots.

PCA with NumPy and Matplotlib Libraries

To implement PCA with NumPy and Matplotlib, start by importing the necessary libraries. NumPy performs linear algebra operations needed for PCA, like calculating covariance matrices and eigenvalues. Matplotlib helps visualize the results.

First, standardize your data to have a mean of zero. Then compute the covariance matrix of the dataset using NumPy. This step measures how different variables change together.

Eigenvectors and eigenvalues of this covariance matrix are then calculated. These guide how data can be represented in lower dimensions with minimal loss of information.

Once you have the eigenvectors, select those associated with the largest eigenvalues. These form the principal components.

You can reduce the data to a lower dimension using these components.

Plot results with Matplotlib to visualize the data distribution and separation into principal components. This visualization helps to understand variance along these components and the effectiveness of PCA in dimensionality reduction.

Interpreting PCA Results and Scatter Plots

Interpreting PCA results often involves scatter plots, which visualize the principal components. These plots reveal how much variance each principal component captures.

Look for clusters in the scatter plots, as they indicate patterns in the data. The spread along each axis shows the explained variance by the principal components. A wide spread means more variance is captured along that axis, showing a significant reduction of dimensionality without much loss of data.

Evaluate the computational complexity of PCA, which depends on the size of the data and the number of components calculated. While PCA is powerful, its computational cost can be high for large datasets. Therefore, it’s essential to balance the number of components against the computational resources available.

In what ways does PCA impact the field of medical data analysis?

PCA plays a crucial role in medical data analysis by reducing the complexity of datasets, such as patient records or genetic data.

It helps in extracting significant patterns that could indicate disease markers or treatment outcomes.

By focusing on key components, PCA aids in improving the accuracy and speed of medical data interpretation, as seen in applications involving datasets like Breast Cancer.

Categories
Uncategorized

Machine Learning – Classification: Support Vector Machines Explained

Basics of Support Vector Machines

Support Vector Machines (SVM) are powerful tools in machine learning for classification tasks. They are known for their ability to handle high-dimensional data and their use in various applications, from image recognition to bioinformatics.

Definition of SVM

A Support Vector Machine is a type of supervised learning model used for classification and regression. Its main idea is to find a hyperplane that best separates data points into different classes.

The SVM aims to maximize the margin between the classes, which is the distance between the closest data points to the hyperplane from each class. These closest points are called support vectors.

Using kernel functions, an SVM can handle both linear and non-linear classification tasks, making it versatile in its applications. SVMs are also robust against overfitting, especially in cases with high-dimensional input space, because they focus on the points that are the most difficult to classify.

History and Evolution

The concept of SVMs emerged from statistical learning theory, initially developed by Vladimir Vapnik and Alexey Chervonenkis in the 1960s. Their work laid the foundation for contemporary machine learning models.

The SVM gained popularity in the 1990s when it was further refined and adopted for practical machine learning tasks. Over the years, advancements included the development of kernel methods, which allow the SVM to classify data that is not linearly separable.

Today, SVMs are widely used in various fields, such as text classification and image recognition, due to their accuracy and efficiency. They continue to evolve with ongoing research, leading to new variations and enhancements like support vector regression and one-class SVM for outlier detection.

Mathematical Foundations

Support Vector Machines (SVMs) are built on several important mathematical concepts that help them classify data effectively. These include the use of vectors and hyperplanes to separate data points, defining the margin that separates classes, and optimizing this separation using techniques like convex optimization and hinge loss.

Vectors and Hyperplanes

In SVMs, data points are represented as vectors in a multidimensional space. A hyperplane is a flat affine subspace that divides the space into two half-spaces.

In classification tasks, the goal is to find the optimal hyperplane that separates different classes of data.

For a simple example, consider a 2D space where the hyperplane is a line. In higher dimensions, this line becomes a plane or hyperplane. The equation of a hyperplane can be written as w · x + b = 0, where w is the weight vector, and b is the bias.

Margin and Support Vectors

The margin is the distance between the hyperplane and the closest data points from each class. SVMs aim to maximize this margin to create a robust classifier.

The larger the margin, the lower the chance of misclassification.

Support vectors are the data points that lie on the boundary of the margin. These points are critical as they define the position and orientation of the hyperplane. Therefore, even small changes or movements in these points can shift the hyperplane.

Convex Optimization and Hinge Loss

SVMs use convex optimization to find the best hyperplane. Convex optimization ensures that there is a global minimum, making the problem solvable efficiently. The optimization problem is generally formulated as a quadratic programming problem.

To ensure accurate classification, SVMs often employ hinge loss, which is used to penalize misclassifications.

The hinge loss function is defined as max(0, 1 – y(w · x + b)), where y is the class label. This function is advantageous for its simplicity and ability to differentiate between correct and incorrect classifications efficiently.

SVM Classification and Regression

Support Vector Machines (SVM) are used in machine learning for both classification and regression tasks. They can handle linear and non-linear data by using a technique known as the kernel trick. This section explores their application in binary classification, multi-class classification, and support vector regression.

Binary Classification

In binary classification, SVMs are designed to separate data into two distinct classes. The main goal is to find the optimal hyperplane that maximizes the margin between the classes.

This is achieved by using support vectors, which are the data points closest to the hyperplane, ensuring the highest accuracy.

The hyperplane is determined by solving an optimization problem that focuses on minimizing classification errors while maximizing margin width. Binary classification with SVMs is effective in various applications such as email filtering and image recognition.

Multi-class Classification

Multi-class classification extends the binary approach to handle multiple classes. The most common methods are one-vs-one and one-vs-all strategies.

In one-vs-one, SVMs are trained to distinguish between every pair of classes, while in one-vs-all, an SVM is trained for each class against all other classes.

These strategies allow SVMs to perform well in situations where the data have more than two categories. Although computationally more demanding, SVMs are widely used in areas like document classification and handwriting recognition because of their precision and reliability.

Support Vector Regression

Support Vector Regression (SVR) adapts SVM for regression problems, which involve predicting a continuous output variable. Unlike SVM in classification, SVR seeks to fit the best line within a margin of tolerance, aiming to minimize the error within the specified threshold.

SVR uses a similar optimization process but focuses on finding a function that deviates from actual values within the allowable margin. This makes SVR suitable for financial forecasting and real estate valuation, where predicting continuous values precisely is crucial.

Kernel Methods in SVM

Kernel methods in Support Vector Machines (SVMs) allow the algorithm to solve non-linear classification problems efficiently. By using kernel functions, SVMs transform data into a higher-dimensional space where it becomes easier to separate with a hyperplane.

Understanding the Kernel Trick

The kernel trick is a key concept in SVMs that enables the transformation of data. Instead of calculating coordinates directly, the trick uses kernel functions to compute the inner products in this new space.

This is computationally efficient and allows SVMs to perform in high-dimensional spaces without explicitly computing the coordinates, thereby saving on both memory and computation time.

The kernel trick supports SVM’s flexibility in handling complex data distributions. It effectively manages features’ interactions, allowing SVMs to generalize better to unseen data.

Types of SVM Kernels

SVMs commonly use several types of kernels, each suited to different kinds of data.

  1. Linear Kernel: Ideal for linearly separable data. It is straightforward and computationally cheap.

  2. Polynomial Kernel: Extends linear models to account for interactions among features. The polynomial degree controls the flexibility, allowing SVMs to capture relationships of varying complexity.

  3. Radial Basis Function (RBF) Kernel: Popular due to its ability to model intricate patterns. It maps points into an infinite-dimensional space, providing a high degree of flexibility.

SVM users select these kernels based on the problem’s requirements, ensuring that the model fits the data well.

Custom Kernels

Beyond standard kernels, custom kernels can be designed to handle specific types of data or domain-specific problems. These kernels are tailored to incorporate unique properties of the data that standard kernels might miss.

By using domain knowledge, practitioners define custom kernels to emphasize relevant features while suppressing noise. This results in more accurate and efficient models. Custom kernels provide the flexibility to adapt SVMs for specialized tasks and enhance performance beyond the capabilities of generic kernels.

Feature Space and Dimensionality

A colorful 3D graph with multiple data points, showing the separation of classes using a hyperplane in a support vector machine

Understanding feature space and dimensionality is key to effective classification using support vector machines (SVMs). These elements determine how data is represented and processed and can significantly impact the accuracy of the classification model.

Working with High-Dimensional Spaces

In many applications, the feature space can be high-dimensional, meaning that it includes a vast number of features or variables. This is common in fields like neuroimaging, where data often involves many variables.

High-dimensional spaces allow SVMs to separate data more easily because they offer more flexibility in how data points can be arranged. However, having too many dimensions can introduce challenges, like the curse of dimensionality.

This issue can make it harder to find patterns because the data becomes sparse.

Regularization techniques are often used to manage high-dimensional spaces by reducing their complexity while maintaining model performance. This helps prevent overfitting, where the model performs well on training data but poorly on new data.

Selecting important features through dimension reduction can also improve model accuracy and efficiency in classifying data.

Feature Transformation

The transformation of features into a new space can significantly enhance the performance of SVMs. By mapping data into a higher-dimensional feature space, SVMs can find a hyperplane that separates classes more effectively.

Techniques like kernel functions are essential in this process, allowing SVMs to perform well even when the feature space is initially non-linear.

Kernel functions, such as polynomial or radial basis function (RBF) kernels, enable this transformation without explicitly computing in high dimensions. This results in efficient computation while maintaining the ability to handle complex data structures.

The transformation ensures that the data becomes more linearly separable, which is crucial for the SVM to perform accurate classification.

Careful choice and application of these transformations lead to improved performance and more accurate predictions in a variety of classification tasks.

Regularization and Overfitting

Regularization helps control overfitting by making adjustments to the learning process. Overfitting occurs when a model performs well on training data but poorly on new data. Regularization aims to improve the model’s ability to generalize its findings. This section explores how regularization is applied through the soft margin method and the role of the C parameter.

Understanding Regularization

In machine learning, regularization is a technique used to prevent overfitting by adding a penalty to the loss function. This penalty discourages extreme values in model parameters, which can make the model fit too closely to the training data.

By adjusting these parameters, the model learns to balance fitting the training data with maintaining the ability to perform well on unseen data.

Regularization methods include L1 (Lasso) and L2 (Ridge) regularization. L1 regularization can lead to sparse models by eliminating some coefficients, while L2 regularization shrinks the coefficients but retains them all.

The choice between L1 and L2 depends on the specific needs of the model and the nature of the data. Different types of problems may benefit from one method over the other.

Soft Margin and C Parameter

The soft margin concept in support vector machines introduces the idea of allowing some misclassifications to achieve better overall model performance. This is crucial for non-linearly separable data where a perfect separation might not be possible.

Instead of forcing a strict decision boundary, soft margins allow for some flexibility.

The C parameter is a regularization parameter that controls the trade-off between achieving a low error on the training data and maintaining a simpler decision boundary.

A high value of C prioritizes low training errors, potentially leading to overfitting. Conversely, a low value may increase the training error but lead to better generalization. Adjusting this parameter helps find the right balance for accurate predictions.

Implementing SVM with Python Libraries

Support Vector Machines (SVM) are powerful tools in machine learning used for classification tasks. Python libraries provide efficient ways to implement SVM, making it accessible for various applications. This section explores how to use Scikit-learn’s SVM modules and techniques for parameter tuning and optimization.

Scikit-learn’s SVM Modules

Scikit-learn is a popular Python library that offers accessible tools for implementing SVM.

The SVC module is widely used for creating SVM classifiers. It provides flexibility with parameters like kernel.

The kernel parameter can be set to linear, polynomial, or RBF, depending on the data’s nature.

Using sklearn, one can declare an SVM model using a few lines of code:

from sklearn.svm import SVC
model = SVC(kernel='linear')

Scikit-learn also supports various pre-processing and validation techniques, ensuring your SVM model is well-rounded.

The library integrates seamlessly with other data processing tools, allowing users to build a comprehensive machine learning pipeline efficiently.

Parameter Tuning and Optimization

Parameter tuning is critical in improving the performance of an SVM model. In Scikit-learn, this is often achieved using techniques like grid search and cross-validation.

Grid search allows for the exploration of different parameter combinations, while cross-validation tests the model’s accuracy on various data splits.

For example, using GridSearchCV in Scikit-learn:

from sklearn.model_selection import GridSearchCV
parameters = {'kernel':('linear', 'rbf'), 'C':[1, 10]}
svc = SVC()
grid_search = GridSearchCV(svc, parameters)
grid_search.fit(X_train, y_train)

Adjusting parameters such as C and the kernel type can significantly impact the classification results. Effective parameter tuning ensures that the SVM model generalizes well and maintains high accuracy across unseen data.

Model Evaluation and Parameter Tuning

Evaluating models and fine-tuning parameters are crucial steps in maximizing the performance of Support Vector Machines (SVM). These processes ensure models are both accurate and efficient, leading to better classification results.

Cross-Validation Techniques

Cross-validation is an essential method used to evaluate the performance of SVMs. It involves dividing the dataset into training and testing subsets.

The goal is to measure how well the model generalizes to new data.

K-fold cross-validation is a popular approach where the dataset is split into k equal parts. The model trains on k-1 parts and tests on the remaining part, rotating these parts until every subset is used as a test set.

This technique helps in identifying potential overfitting. Overfitting occurs when a model learns the training data too well, including noise, making it perform poorly on new data.

Strategies like stratified k-fold cross-validation further ensure that each subset is a good representative of the whole dataset by maintaining the class distribution.

Hyperparameter Optimization

Hyperparameters significantly influence SVM performance. These parameters include the kernel type, regularization parameter (C), and kernel-specific parameters such as the degree for polynomial kernels.

Choosing the right hyperparameters involves optimization techniques.

Grid search is a common method where a predefined range of parameters is tested to find the best combination. This exhaustive search can be computationally expensive but provides precise results.

Alternatively, random search randomly selects parameter combinations, offering a more efficient exploration of the parameter space with less computational cost.

Both methods rely on cross-validation to evaluate each combination, ensuring that the best hyperparameters not only fit the training data but also perform well on unseen data.

Practical Applications of SVM

Support Vector Machines (SVM) are powerful tools for various practical applications, especially in classification tasks. This section explores SVM’s applications in text classification, image and face detection, as well as biological and medical fields.

Text Classification

SVMs are highly effective for text classification tasks. This includes activities like spam detection and topic categorization. They work well with high-dimensional data, such as text, due to their ability to find optimal boundaries between classes.

In spam detection, SVMs help identify whether an email is spam or not by using a trained model that examines word patterns and their frequency. Outlier detection is another area where SVMs are applied to find abnormal data points that do not fit the usual patterns.

Image and Face Detection

In image analysis, SVMs are often used for image categorization and face detection tasks. They can classify images by learning from image data features and distinguishing between different objects or categories.

Face detection is a crucial application where SVMs excel by identifying and classifying facial structures effectively. They play a significant role in security and personal identification systems, making it easier to manage and verify identities efficiently.

Biological and Medical Applications

SVMs have important applications in the biological and medical fields. They are used for gene expression analysis, which involves classifying genes based on their contribution to various conditions.

These machines can also assist in diagnosing diseases by analyzing medical images or patient data to predict health outcomes. SVMs are essential in developing personalized medicine approaches by classifying patients based on their genetic data, leading to more effective treatments. Their ability to handle complex and vast datasets makes them suitable for these sensitive and critical applications.

Advanced Topics in SVM

Support Vector Machines (SVM) can tackle challenging problems using advanced techniques. This section explores SVM’s capabilities in non-linear classification and handling noisy and imbalanced data.

Non-linear Classification

SVMs can handle non-linear classification using kernel methods. Kernels allow SVMs to create a flexible decision boundary by transforming the data into a higher-dimensional space.

Common kernels include polynomial, radial basis function (RBF), and sigmoid. These kernels enable the SVM to find a hyperplane that can effectively separate data points that are not linearly separable in their original space.

In non-linear separation, choosing the correct kernel and its parameters is crucial. The RBF kernel is very popular due to its ability to fit complex data patterns. However, using a kernel function that is overly complex can lead to overfitting. Therefore, careful parameter tuning and cross-validation are necessary to balance the model’s complexity.

Working with Noisy and Imbalanced Data

Handling noisy data is another challenge SVMs can address using techniques like regularization. Regularization helps prevent overfitting by adding a penalty for large coefficients in the model.

C-SVM and ν-SVM are variations that incorporate such penalties. This technique aids in maintaining the model’s robustness against noise.

For imbalanced data, SVMs can use methods such as cost-sensitive learning. By assigning different weights to classes, the SVM can focus more on the minority class.

Strategies like resampling or synthetic data generation (e.g., SMOTE) are also effective. These methods adjust the training data to create a more balanced dataset, improving the model’s ability to recognize less frequent classes.

Comparative Analysis

SVMs are a popular choice in machine learning. This section compares SVM with other algorithms and discusses linear versus nonlinear SVM.

SVM vs. Other Machine Learning Algorithms

SVMs are known for their effectiveness in high-dimensional spaces and their use of a hyperplane to separate data into classes. They can outperform algorithms like logistic regression in handling datasets with clear margins.

Logistic regression, another machine learning algorithm, models binary outcomes based on a linear predictor function. While logistic regression works well for linearly separable data, SVMs have the edge in complex data with nonlinear relationships.

Misclassification is an important aspect to consider. SVMs aim to minimize this by finding a decision boundary with maximum margin. This makes them robust against overfitting, especially in high-dimensional space. Decision trees, in contrast, might struggle with variance in noisy data.

Linear SVM vs. Nonlinear SVM

Linear SVM is best suited for linear classification tasks. It identifies the hyperplane that separates data into distinct classes. This type is ideal when data can be divided with a straight line.

Nonlinear SVM uses kernel tricks to transform data into higher dimensions, making it capable of handling more intricate patterns. This flexibility allows handling data that isn’t linearly separable.

The choice between linear and nonlinear comes down to the nature of the data. Linear SVM is efficient and less computationally demanding. Nonlinear SVM, while more powerful in certain scenarios, requires more resources. Proper selection ensures better model performance and resource use.

Frequently Asked Questions

Support Vector Machines (SVMs) are a powerful tool for classification. This section answers common questions about SVMs, including their core principles, advantages, and use cases.

What are the core principles behind Support Vector Machines in classification tasks?

Support Vector Machines focus on finding the best hyperplane that separates classes in the data. The idea is to maximize the margin between data points of different classes. This leads to better classification by ensuring that future data points can be classified with confidence.

How does kernel selection affect the performance of a Support Vector Machine?

Kernel selection can greatly impact SVM performance. It determines how the input data is transformed into the required format. Choices like linear, polynomial, or radial basis function kernels can allow SVMs to handle different kinds of data patterns, ultimately affecting accuracy and efficiency.

What are the advantages of using Support Vector Machines for classification over other algorithms?

Support Vector Machines often excel at classification tasks with high-dimensional spaces. They are effective even when the number of dimensions is greater than the number of samples. SVMs also offer robust performance due to their margin maximization strategy, which reduces the risk of overfitting.

In what scenarios is a Support Vector Machine preferable for classification tasks?

SVMs are particularly useful in scenarios where data needs clear boundaries between classes. They are often chosen when the dataset is high-dimensional or when the relationships within the data are complex and non-linear. Their effectiveness shines in scenarios requiring heightened accuracy.

Can Support Vector Machines be effectively used for multi-class classification, and if so, how?

Yes, SVMs can handle multi-class classification through methods like “one-vs-one” or “one-vs-all.” These techniques involve breaking down a multi-class problem into multiple binary classifications, which the SVM can manage more effectively given its inherent binary nature.

What are some common methods for optimizing the parameters of a Support Vector Machine?

Common parameter optimization techniques include grid search and cross-validation.

Grid search systematically evaluates combinations of parameters to find the best settings. Meanwhile, cross-validation helps in assessing how the results of a model will generalize to an independent dataset. These approaches help in tuning SVMs for better performance.

Categories
Uncategorized

Learning about SQL Correlated Subqueries: A Comprehensive Guide

Understanding SQL and Subqueries

Learning SQL involves grasping how Structured Query Language (SQL) enables effective data management in databases.

One crucial concept is the subquery, which performs operations within another query to handle complex data retrieval tasks efficiently.

Introduction to SQL

Structured Query Language (SQL) is a standard language used to communicate with databases. It allows users to create, read, update, and delete data stored in a database.

SQL is known for its powerful capabilities in managing structured data and is used by various database systems like MySQL, PostgreSQL, and SQL Server.

This language supports various commands such as SELECT, INSERT, and UPDATE, each serving specific purposes.

Creating tables with defined columns and types is one fundamental task. SQL also supports querying for data retrieval, which is essential for applications and reporting.

SQL’s ability to handle large datasets and perform complex queries makes it a staple in data-driven environments.

It’s both user-friendly and powerful, presenting an accessible entry point for beginners while offering advanced features for more experienced users.

Defining Subqueries

Subqueries are queries nested inside another query, often used to perform calculations or filter results.

A simple subquery returns data to be used in a main query, helping achieve tasks that might be complex with a single query alone.

Correlated subqueries are a type of subquery that uses values from the outer query, making them dynamic. These subqueries can efficiently solve intricate SQL problems by executing row by row and are discussed extensively in guides for SQL beginners.

Subqueries are employed in various operations, such as filtering results, where their use of the EXISTS and NOT EXISTS operators becomes critical.

They enhance SQL’s capability to manage and retrieve data effectively, making them a valuable tool in any SQL user’s toolkit.

Essentials of Correlated Subqueries

Correlated subqueries in SQL rely on data from a related outer query to filter results. Unlike simple subqueries, these dynamic queries adapt to each row in the outer query, providing powerful solutions for complex data tasks.

Correlated vs. Simple Subqueries

Correlated subqueries differ from simple subqueries in significant ways.

A simple subquery is independent and executed only once for the entire outer query. In contrast, a correlated subquery is dependent on the outer query, evaluating each row individually.

This means the inner query uses values from the outer query, which can lead to varied results for each row processed.

Consider a scenario where a database needs to list employees earning more than their department’s average salary. A simple subquery calculates the department’s average salary once, while a correlated subquery recalculates it per employee.

This adaptability makes correlated subqueries essential for precise data filtering. They process row-by-row, seamlessly integrating with dynamic datasets and handling complex queries with ease.

Understanding the Correlation

The key to SQL correlated subqueries lies in their ability to incorporate outer query data.

The process involves an inner query that refers to columns in the outer query, creating a link between them. This interaction provides the subquery context, allowing it to filter results based on each outer query row.

Syntax differences highlight these relationships. In a correlated subquery, it’s common to see references from the outer query used in the inner query’s WHERE clause. This enables the inner query to adjust its criteria dynamically.

Understanding this relational structure is crucial for building effective correlated subqueries, as it directly influences their functionality and outcome.

SQL Correlated Subquery Syntax

A SQL correlated subquery is a type of subquery that references columns from an outer query. This interaction means that the subquery depends on the outer query for its operation.

Basic Structure

The basic syntax often involves a SELECT statement combined with a WHERE clause. This allows the correlated subquery to filter results based on values from the outer query.

SELECT column1
FROM table1
WHERE column2 = (
    SELECT column2
    FROM table2
    WHERE table1.column = table2.column
);

Considerations for INNER JOIN

While both INNER JOINs and correlated subqueries can be used to match rows, their purpose and performance characteristics differ.

Correlated subqueries are often used when you want to implement more complex filtering criteria that wouldn’t be as straightforward with a standard JOIN.

Key Points

  • Row-by-Row Execution: Correlated subqueries execute once for each row processed by the outer query.
  • Reference to Outer Query: They typically have a condition in the WHERE clause that allows them to connect to the outer query’s current row.
  • Performance Impacts: They can be slower than INNER JOINs because of the row-by-row execution method. Optimization often requires understanding when a direct JOIN might be more efficient.

Example with SELECT

An example of a correlated subquery in action might look like this:

SELECT employee_id, name
FROM employees e
WHERE salary > (
    SELECT AVG(salary)
    FROM employees
    WHERE department = e.department
);

In this example, only employees with a salary higher than the average salary of their department are selected.

Implementations of Correlated Subqueries

Correlated subqueries are used to handle dynamic data retrieval by referencing columns from the outer query. These subqueries can be particularly useful in certain SQL clauses to refine and optimize queries.

Using Correlated Subqueries in WHERE Clause

In SQL, the WHERE clause can benefit greatly from correlated subqueries. These subqueries use values from the outer query to filter results dynamically.

Each row processed by the outer query is evaluated by the subquery, which helps in applying precise conditions to the data.

Consider a scenario where one needs to find employees who earn more than the average salary of their department.

The correlated subquery computes the average salary for each department on the fly, making the operation efficient and context-specific. This technique is powerful when filtering data based on aggregates or relative comparisons.

The outer query runs, and for each row, the subquery executes, leading to tailored results.

The Roles of EXISTS and IN Clauses

The EXISTS operator is often used with correlated subqueries to determine if a condition is met within the data set. It checks for the presence of rows meeting the criteria defined in the subquery.

For example, determining if any records meet a specific condition, such as orders placed by VIP customers, can be efficiently handled using EXISTS.

The IN clause, on the other hand, allows for set comparisons. Although less common with correlated subqueries, it can sometimes achieve the desired result by listing possible values.

Both EXISTS and IN help in crafting robust queries to handle various logical conditions. They offer different approaches to checking data presence, with EXISTS often preferred for efficiency in correlated subqueries.

Aggregation in Correlated Subqueries

Correlated subqueries play a crucial role when dealing with complex queries, especially when aggregation functions are involved. These subqueries allow you to calculate results such as counts, maximum values, and averages by referencing columns from the outer query.

This section explores how to effectively use these functions and implement grouping in correlated subqueries.

Utilizing COUNT, MAX, and AVERAGE

Using aggregation functions like COUNT, MAX, and AVERAGE within correlated subqueries can greatly enhance data analysis.

The correlated subquery references columns from the outer query, allowing aggregation to be dynamically based on related data.

For example, finding employees with salaries greater than the average salary involves a correlated subquery that calculates the average salary.

The subquery dynamically uses the AVERAGE function, comparing each employee’s salary against this computed average.

Similarly, using COUNT can help determine the number of entries meeting a specific condition linked to each row in the outer query. The MAX function is useful for identifying the maximum value of a column related to each row.

Group By with Correlated Subqueries

The GROUP BY clause is vital when summarizing data from correlated subqueries. It allows results to be organized meaningfully, making it easier to handle grouped data analysis tasks.

For instance, if a user wants to group employees by department and find the highest salary in each, a correlated subquery with a MAX function provides a solution.

The subquery considers each group’s context to dynamically calculate maximum salaries. Similarly, using COUNT with GROUP BY helps determine how many employees meet specific criteria within each department.

This enhances the ability to aggregate and categorize data effectively, providing more detailed insights into grouped datasets.

Advanced SQL Query Techniques

A complex web of interconnected data tables with SQL queries weaving through them

Advanced SQL queries often involve optimizing data retrieval and improving performance. Explore how to use joins to efficiently connect tables and employ the DISTINCT keyword to filter unique records in complex datasets.

Optimizing with Joins

Using joins in an SQL query allows linking multiple tables through a common attribute, enhancing data retrieval efficiency.

The inner join is the most commonly used type, fetching only the records that have matching values in both tables, thus reducing unnecessary data load.

Joins help streamline complex queries by minimizing redundancy and speeding up query execution. They enable data from related tables to be combined, offering a comprehensive view without requiring multiple separate queries.

Properly indexed tables can further optimize the performance of join operations, making the query process faster.

There’s a balance in choosing the right type of join depending on the data and the results needed. Inner joins are chosen for precise matching, while outer joins can fetch both matching and non-matching data for broader insights.

Joins are foundational in structuring queries that need to connect disparate sources of information.

Incorporating DISTINCT Keyword

The DISTINCT keyword is crucial for filtering out duplicate records in SQL query results. This ensures that each entry in the output is unique, enhancing data quality and accuracy.

By using DISTINCT, complex queries can be made more efficient by minimizing redundant data processing.

The DISTINCT keyword is often used in combination with SELECT statements to sort through large datasets.

It can operate across one or or more columns, removing duplicates based on the entire row content or just certain fields. This is essential in situations where unique records are required, such as in reports or analytics.

Incorporating DISTINCT is straightforward but requires attention to what fields are selected.

It can be applied to a single column or across multiple columns, which affects the uniqueness criteria. Understanding how DISTINCT applies to dataset structure is important for avoiding unintentional data loss.

Practical Usage Scenarios

A person at a computer, studying SQL correlated subqueries with books and notes scattered around

SQL correlated subqueries are invaluable in complex data retrieval tasks. They allow users to perform context-aware filtering and dynamic data analysis.

These subqueries are particularly useful for data analysts and developers looking to refine their SQL skills for real-world applications.

Correlated Subqueries in Data Analysis

Correlated subqueries are essential tools for data analysts focusing on nuanced analysis. Unlike regular subqueries, these depend on external queries for their execution, thus allowing detailed insight into datasets.

Analysts can use them to compute values like averages or sums based on dynamic conditions.

For example, finding employees earning more than the employee with the lowest salary showcases how correlated subqueries provide depth and dimension to problem-solving.

SQL subqueries exercises allow analysts to practice these techniques in realistic scenarios.

When dealing with large databases, such queries offer the ability to extract meaningful patterns by combining multiple conditions.

Their implementation can help in filtering and organizing massive datasets, making them an indispensable part of a data analyst’s toolkit.

SQL for Data Analysts and Developers

For SQL developers, mastering correlated subqueries is a key to advancing their database management capabilities. These subqueries enable complex joins and condition-based filtering, empowering developers to construct highly efficient queries.

By using correlated subqueries, developers can optimize query performance and manage resources effectively. This is vital in applications where data retrieval speed impacts user experiences.

Examples are applications where quick updates or real-time data processing is necessary.

Practicing exercises like those found in correlated subquery examples can boost these skills.

Ultimately, developing proficiency with correlated subqueries can lead to advanced SQL skill sets, enabling both analysts and developers to tackle intricate data challenges confidently. This ensures more robust applications and smarter data-driven decisions.

Common SQL Correlated Subquery Challenges

A database schema with interconnected tables and SQL queries on a computer screen

Understanding the challenges in using SQL correlated subqueries helps in writing efficient and accurate SQL queries. These challenges often involve recognizing repeating subqueries and addressing performance issues.

Identifying Repeating Subqueries

A correlated subquery is executed once for each row considered by the outer query. This can lead to inefficiencies, especially when the same subquery is repeated multiple times across different rows. Identifying such repetition is crucial.

Developers can sometimes overlook how often a correlated subquery runs within a larger query. By carefully checking query execution plans or using profiling tools, they can see these repetitions and adjust their approach.

Rewriting a correlated subquery as a join might help reduce or eliminate redundancy, leading to better performance.

Understanding the nature of how subqueries operate within the outer query context is critical for optimization. This insight helps in crafting queries that avoid unnecessary repetitions and can significantly improve efficiency.

SQL Performance Considerations

Correlated subqueries might make SQL queries slower because each subquery must run for every row processed by the outer query. Thus, performance becomes a major concern, especially with large datasets. Monitoring and optimizing these queries is important.

One approach to mitigate performance issues is to minimize the number of repeated executions. Using indexes on the columns involved in the subquery’s conditions can speed up execution.

However, for large datasets, converting correlated subqueries into joins may offer a better solution. This can enhance query execution time by reducing overhead.

Optimization becomes essential when dealing with complex SQL problems caused by correlated subqueries, as it helps maintain efficient database performance.

Working with Specific SQL Clauses

A database diagram with tables connected by arrows, showing correlated subqueries within specific SQL clauses

Working with SQL subqueries involves understanding different clauses and how they control data retrieval. Two key clauses include the HAVING clause in filtering query results and the SELECT clause in specifying what data is retrieved.

Leveraging the HAVING Clause

The HAVING clause is used to filter query results based on aggregate functions. While the WHERE clause filters rows before aggregation, the HAVING clause filters after the aggregation has taken place. This makes it essential for queries that group data.

For example, if one wants to find all departments with an average salary over $50,000, the HAVING clause would be used to filter out departments that do not meet this condition.

HAVING is often combined with the GROUP BY clause to restrict the result set of aggregate functions. It allows for refined control over the data output.

This clause is particularly helpful for analysis-focused queries when summary statistics are needed, allowing for more precise insights without modifying the main data set.

For more details on SQL clauses, refer to SQL Correlated Subqueries.

Refining Queries with the SELECT Clause

The SELECT clause is crucial in defining which columns from the tables will appear in the results of the query. It can also be used to include subqueries that provide calculated columns.

By specifying certain columns, the SELECT clause helps streamline data retrieval, ensuring that only necessary information is presented.

This clause can also include arithmetic operations and functions to transform data. For example, calculating total sales or applying a conditional statement directly within the SELECT clause enables end-users to receive processed data.

Additionally, using the SELECT clause to include subqueries can offer detailed insights without complicating the primary query structure. More on the specifics of subqueries is explored in LearnSQL.com’s article on Correlated Subqueries.

Modifying Data with Correlated Subqueries

A database server with multiple interconnected tables, each containing different sets of data. Queries being executed to modify data based on correlated subqueries

Correlated subqueries in SQL are useful for modifying data based on conditions that involve multiple tables or complex criteria. This section outlines the use of correlated subqueries with DELETE and UPDATE statements.

DELETE Statement in Correlated Subqueries

Correlated subqueries can be used with the DELETE statement to efficiently remove rows that match certain criteria. A common use is deleting records from one table based on conditions met in another table.

For example, to delete rows from a Sales table where the product does not exist in the Products table, a correlated subquery can reference the Products table while checking each row of the Sales table.

DELETE FROM Sales
WHERE ProductID NOT IN (
    SELECT ProductID FROM Products
);

In this example, the subquery runs for each row in Sales, checking if the ProductID is missing from Products. This method is precise, ensuring only unwanted rows are removed.

Updating Entries Using Correlated Subqueries

When using correlated subqueries with UPDATE statements, the goal is often to match the data in one table with another. For instance, you might want to update prices in a Products table based on recent sales figures stored in a SalesData table.

UPDATE Products
SET Price = (SELECT AVG(SalePrice) FROM SalesData WHERE ProductID = Products.ProductID)
WHERE Price IS NULL;

Here, the subquery calculates the average SalePrice for each ProductID found in SalesData. The outer query updates the Price in Products for each product where its price is not set.

This technique is valuable for ensuring databases reflect the latest data trends accurately.

Database Specific SQL Syntax

A computer screen displaying SQL code with correlated subqueries, surrounded by reference books and notes

Correlated subqueries in SQL are used differently across databases. Each system may have unique syntax and behavior that affects how these subqueries execute and interact with data like customer table or department_id.

SQL Server’s Correlated Subquery Handling

In SQL Server, correlated subqueries allow for row-specific operations. These subqueries reference columns from parent queries and execute once per row processed by the outer query.

This approach can be useful when comparing data such as a department_id against specific conditions.

Incorporating correlated subqueries in SQL Server often involves careful tuning. Due to their frequent execution for each row, they can impact performance if not optimized.

Using indexed columns in the outer query or restructuring queries can sometimes reduce execution times.

Adapting SQL for Different Databases

Adapting SQL syntax for various databases ensures compatibility and efficiency. Each database has nuances that may affect a correlated subquery’s structure and behavior.

For instance, query optimizers in different systems might handle category_id differently, impacting performance.

When adapting SQL for a particular database, checking the documentation or guidelines specific to the system is crucial. This can help avoid unexpected errors and ensure queries perform effectively.

Understanding how each database handles query execution and indexing can help tailor the SQL code for optimal results.

Frequently Asked Questions

A computer screen displaying a webpage with a list of frequently asked questions about SQL correlated subqueries, surrounded by open books and notepads

Correlated subqueries are a powerful tool in SQL, providing ways to query data based on dynamic conditions that depend on the outer query. These subqueries are essential in scenarios where relationships between data from different tables need in-depth analysis.

What is the distinction between correlated and non-correlated subqueries in SQL?

Correlated subqueries depend on data from the outer query for their execution. They reference one or more columns.