Categories
Uncategorized

Azure Data Studio Export Connections: A Step-by-Step Guide

Overview of Azure Data Studio

Azure Data Studio is a cross-platform data management tool built for data professionals.

It offers powerful features to streamline data tasks and integrate efficiently with both on-premises and cloud data platforms. Additionally, it provides a modern development experience for managing SQL Server and Azure databases.

Azure Data Studio Features

Azure Data Studio provides a wide range of features designed to enhance productivity.

It includes a graphical user interface for data export options such as Excel, CSV, JSON, and more. This allows users to export data in formats that suit their needs.

Another noteworthy feature is the SQL Server Profiler Extension, which helps monitor and analyze SQL Server performance.

Additionally, Azure Data Studio supports SQL Notebooks and allows users to create rich interactive documents with text, code, and visualizations. For organizing queries, the Query History feature keeps track of past queries.

Comparison with SQL Server Management Studio

When comparing Azure Data Studio to SQL Server Management Studio (SSMS), several key differences emerge.

While SSMS is a comprehensive tool for database administration, Azure Data Studio is more focused on development and data analysis. It is designed to be lightweight and is available on Windows, macOS, and Linux.

Azure Data Studio supports extensions that add functionality not present in SSMS. It emphasizes a user-friendly interface with features like customizable dashboards and an integrated terminal.

While SSMS features more tools for complex management tasks, Azure Data Studio’s simplicity makes it a popular choice for data-focused users.

Managing Connections in Azure Data Studio

Managing connections in Azure Data Studio (ADS) involves adding new connections to databases and organizing them efficiently. This helps users streamline their workflow, especially when frequently switching between different SQL Servers.

Adding New Connections

To add a new connection in ADS, users can navigate to the Connections pane. Here, they select New Connection and enter details such as server name, authentication type, and database name.

It’s important to ensure the correct settings, including encrypting connections, are chosen to maintain security. User settings might be configured to remember certain preferences during this process, streamlining future connections.

Unlike SQL Server Management Studio, ADS offers a modern interface with faster setup times.

Organizing Connections

Organizing connections in ADS allows users to create server groups and sort connections based on project or function. By right-clicking on the Connections panel, they can choose New Server Group to categorize their connections.

Naming groups intuitively aids in quick identification. Additionally, settings like color-coding connections help visually differentiate important or frequently used databases. This functionality ensures a more efficient and personalized workspace.

Exporting Connections from Azure Data Studio

A computer screen displaying the Azure Data Studio interface with a list of database connections being exported

Exporting connections in Azure Data Studio is a useful feature, particularly when you need to transfer settings between environments or share them with a team. Two main methods include using the Command Palette and exporting connections to a JSON file.

Using the Command Palette

To export connections using the Command Palette in Azure Data Studio, users can access a straightforward interface to manage their connection settings.

Begin by opening the Command Palette with Ctrl + Shift + P on Windows or Cmd + Shift + P on macOS. This step opens a list of available commands.

Type “Export Connections” in the search bar, which filters the commands list. Select the option for exporting connections. The Command Palette then guides users through the steps to save their connection configuration.

This method is intuitive for those familiar with using command inputs in Azure Data Studio and requires no additional tools. Users can quickly export their settings in just a few clicks.

Exporting to JSON File

Exporting connections to a JSON file is another method users can use to save their configurations. This approach offers a portable format for the connection data, making it easy to import into other instances of Azure Data Studio.

To start, navigate to File > Preferences > Settings in Azure Data Studio. Once there, look for the Datasource Connections section. This lets users save all connection settings as a JSON file.

The JSON format preserves the connection details, excluding sensitive information like passwords. For a guide on managing data across sources with Azure Data Studio, refer to this detailed example.

JSON files are widely used due to their compatibility with numerous platforms and applications, ensuring flexibility in managing connection data.

Importing Connections to Azure Data Studio

Importing connections into Azure Data Studio enables users to efficiently manage their databases without re-entering connection details. Two common methods include importing from JSON or XML files and importing from SQL Server Management Studio (SSMS).

Importing from JSON or XML File

To import connections using a JSON or XML file, users need to first have their connections saved in the appropriate file format. Azure Data Studio can parse these files to retrieve connection information.

  1. Open Azure Data Studio.
  2. Navigate to File > Open File.
  3. Select the .json or .xml file containing your connections.

Azure Data Studio reads the file and loads the connections into the interface. This method is useful for users who frequently need to switch between different machines or settings.

Importing from SQL Server Management Studio

For those transitioning from SSMS to Azure Data Studio, importing registered servers is straightforward. Users can leverage scripts or built-in tools for this purpose.

  1. First, export your registered servers as a .regsrvr file in SSMS.
  2. Use PowerShell scripts to convert this file to a format readable by Azure Data Studio.

A specific example is using the import guidance from communities to assist in this process. This allows users to maintain their existing connection setups without starting from scratch.

Customizing Azure Data Studio

A computer screen displaying Azure Data Studio with various connections being exported

Azure Data Studio can be tailored to fit users’ specific needs and workflows. Both workspace settings and user preferences offer ways to adjust and optimize the application environment, boosting productivity and comfort.

Workspace Settings

Workspace settings are useful for configuring a specific folder or project. These settings only apply when the folder is open in Azure Data Studio. This allows for tailored configurations, such as specific data connections and environment preferences, which are especially helpful in team projects.

To adjust these, navigate to the Explorer sidebar, open the desired folder, and configure according to the project’s needs. This setup offers flexibility, as multiple folders can each have unique configurations, making project management more streamlined and efficient.

User Preferences

User preferences are changes that apply globally across all instances of Azure Data Studio on a system.

Users can access these settings to personalize their interface and functionality, ensuring a consistent experience no matter what is being worked on.

Typically, modifications are made in the settings.json file, where users can enable or disable features, adjust themes, and set key bindings.

This degree of customization empowers users to create an environment that matches their individual workflow needs, improving overall efficiency and satisfaction with the tool.

Advanced Features in Connection Management

An open laptop displaying the Azure Data Studio interface with multiple connection management tabs open and the export connections feature highlighted

Azure Data Studio offers advanced tools for managing SQL connections effectively. Users can visualize data with charts and organize servers into groups, enhancing the user experience and operational efficiency.

Chart Visualization

Azure Data Studio includes features that allow users to create data visualizations. These charts help in understanding complex datasets by providing a visual representation.

Users can generate charts directly from query results, making it easier to analyze patterns and trends. This feature is particularly useful for database administrators and analysts who need to present data insights clearly.

Different chart types, such as bar and line charts, are available to cater to diverse visualization needs. Charts can be customized according to user preferences, which aids in focusing on specific data points.

This functionality streamlines the process of presenting data in meetings or reports, saving time and effort while ensuring clearer communication.

Server Groups

Organizing connections into server groups helps users manage multiple servers with ease. Azure Data Studio allows setting up groups based on various criteria like department or project.

This helps in maintaining an orderly connection list, reducing clutter and improving navigation.

Server groups offer features such as easy export and import of configurations, facilitating seamless transitions between different setups or environments. Users can share these configurations across teams while keeping the setup process consistent.

Passwords are securely managed, ensuring that sensitive information is protected during exports. Server grouping is a vital feature for those managing a large number of database servers, as it enables better organization and control.

Frequently Asked Questions

A computer screen displaying the Azure Data Studio interface with various connection options and a list of frequently asked questions

Exporting connections in Azure Data Studio is essential for maintaining backups and transferring settings between machines. This section addresses common questions about exporting and managing these connections efficiently.

How can one export a list of database connections from Azure Data Studio for backup purposes?

Users can export a list of database connections by accessing the settings JSON file. Navigate to File -> Preferences -> Settings -> Data -> Connections, then copy the "datasource.connections" array for safekeeping. This ensures a backup of connection details without passwords.

What is the process for transferring Azure Data Studio connections to another machine?

To move connections, export the connection data and save it in a JSON file. On the new machine, import this file into Azure Data Studio by adding it to the settings.

Users will need to enter passwords again since they are not included in the export.

Can you export server connection settings from Azure Data Studio to a configuration file?

Yes, server connection settings can be exported to a configuration file by editing the settings JSON file. This file includes all connection details, making it easy to save and import later if needed.

Is there an option to batch export multiple connections from Azure Data Studio at once?

While Azure Data Studio does not directly provide a batch export feature, users can manually export all connections by extracting the JSON data from the settings. This method allows users to handle multiple connections with ease.

What is the proper method to backup and restore workspace settings in Azure Data Studio?

Backing up workspace settings involves saving configuration files found in the user settings folder. Restoring these settings requires copying the saved files back to the appropriate directory on the target machine, ensuring all personalized settings are intact.

How does one generate a portable copy of configured connections in Azure Data Studio?

A portable copy of connections can be created by exporting the connection JSON. This portable configuration can be used across devices. Users only need to re-enter their passwords after installation. This approach simplifies sharing and maintaining consistent settings.

Categories
Uncategorized

Learning Power BI – Data Modeling for Enhanced Analytics

Getting Started with Power BI Desktop

Power BI Desktop is a tool designed to help users create data models and reports. This section guides users through downloading the software and exploring its main features, ensuring a smooth start with Microsoft Power BI.

Downloading and Installing Microsoft Power BI

To begin, visit the official Microsoft Power BI website to access Power BI Desktop. The application is free and compatible with Windows operating systems.

Ensure your system meets the minimum requirements, including sufficient RAM and disk space.

Once the download is complete, locate the installer file in your downloads folder. Double-click on the file to launch the installation wizard.

Follow the prompts provided by the wizard, accepting the license agreement and choosing a destination folder for the application.

After installation, open Power BI Desktop by finding it in the Start menu or using the desktop shortcut. Initial setup might require signing in with a Microsoft account. This step is essential for accessing additional services, like data sharing.

Exploring the Power BI Interface

Upon launching Power BI Desktop, users will notice a ribbon interface similar to other Microsoft Office products. This includes tabs like Home, View, and Modeling, which organize features systematically.

The Home tab provides basic functionality such as importing data from a wide range of sources.

Under the View tab, users can switch between Data, Report, and Model views, each offering different tools for analysis and visualization.

The Report view is where users design layouts using charts, tables, and maps. It allows for interactive dashboards and storytelling.

The Data view shows imported datasets with filtering options, while the Model view focuses on relationship building between tables.

Introduction to Data Modeling in Power BI

Data modeling in Power BI involves structuring data to enhance analysis. This includes creating relationships, defining calculations, and optimizing for performance. A well-structured data model improves the usability and efficiency of business intelligence solutions.

Understanding the Data Model

A data model in Power BI is a framework that defines how data is organized and interconnected. It serves as the foundation that supports complex queries and drives insights.

At its core, it transforms raw data into a semantic model, which is easier for users to understand and interact with.

Data modeling involves defining relationships between tables, creating calculated fields, and establishing hierarchies. These steps ensure data is presented in an accessible way, enhancing usability.

Proper structuring benefits Power BI dashboards by enabling seamless data exploration and interaction.

Key Components of Data Models

There are several key components in Power BI data models. Tables store data in rows and columns, much like a spreadsheet.

Relationships are connections between tables, enabling complex querying across different data sets.

Measures and calculated columns are expressions created using Data Analysis Expressions (DAX) to perform dynamic calculations.

Attributes like keys and metadata define the framework for the model.

It’s crucial to have a clear hierarchy and data granularity level to achieve the desired detail in analytics. This structured approach enables users to efficiently interact with and extract insights from the data.

Connecting to Data Sources

Connecting to data sources in Power BI involves selecting data from various platforms and transforming it to suit the analysis. This process is crucial for building accurate and insightful models.

The initial steps focus on importing data efficiently, followed by refining and transforming it through Power Query to ensure it meets business requirements.

Importing Data from Various Sources

Power BI enables users to bring in data from numerous sources, including Excel, cloud services, and SQL servers.

These sources can be connected directly via the Power BI interface. Users can choose from options like Excel files, databases, or web sources.

When connecting, it is vital to ensure that the data is clean and structured properly. Any errors in the source data can complicate the import process.

Utilizing direct or live connections facilitates automatic updates ensuring that models reflect real-time data changes. Properly managing these connections optimizes the data flow and maintains data integrity.

Transforming Data with Power Query

Power Query is a transformation tool within Power BI that adjusts data before it enters the model. It helps in modifying, cleaning, and refining data to make it ready for analysis.

Users can perform tasks such as removing duplicates, filtering rows, and adjusting column layouts.

Using Power Query, users can set up transformation steps laid out in a sequence. Each adjustment is recorded, resulting in a repeatable process.

This setup ensures that when the data source updates, the transformations are applied consistently. These steps form a key part of the learning path, making it easier for new users to understand effective data handling in Power BI.

Designing Data Models

Designing data models in Power BI involves creating organized structures that improve data analysis and reporting. Key concepts include schemas, normalization, and managing fact tables. Each plays a vital role in optimizing data efficiency and clarity.

Building Star and Snowflake Schemas

In a star schema, one central fact table connects to multiple dimension tables. This design is popular because it simplifies queries and enhances performance.

Fact tables store quantitative data like sales or inventory levels, while dimension tables hold descriptive data, such as customer or product details.

A snowflake schema refines the star structure by further normalizing dimension tables. This normalization reduces data redundancy, leading to more storage-efficient databases. However, it can complicate query performance due to additional joins.

Choosing between star and snowflake depends on priorities: simplicity and speed favor star, while snowflake supports data consistency and efficiency.

Normalization and Data Granularity

Normalization involves rearranging database tables to minimize redundancy. This process, particularly in snowflake schemas, helps maintain data integrity by saving space and ensuring consistent data updates.

This structure promotes accuracy in reporting, essential for decision-making.

Data granularity refers to the level of detail in the data. High granularity provides detailed records, while low granularity offers summarized data.

Appropriate granularity levels depend on the analysis requirements; detailed analysis needs high granularity. Balancing granularity ensures efficient and relevant data analysis without overwhelming data storage.

Working with Multiple Fact Tables

Multiple fact tables become necessary in complex models with varied data measures or processes. They allow different types of data to coexist, facilitating a comprehensive analysis.

Managing these involves ensuring correct relationships between fact and dimension tables.

Relationships must be well-defined to avoid confusion and ensure accurate reports. Power BI offers tools to manage these connections, helping to organize complex datasets.

Thoughtful arrangement of multiple fact tables enhances data model flexibility and supports diverse reporting needs, making it crucial for robust business intelligence strategies.

Creating Relationships in Power BI

Establishing relationships in Power BI is vital for effective data modeling. Connecting different data tables ensures accurate analysis and facilitates proper use of reports and dashboards.

Types of Relationships

In Power BI, relationships can be one-to-one, one-to-many, or many-to-many. The most common is the one-to-many, where one record in a table is linked to multiple records in another.

Setting relationships up correctly is essential for accurate data visualization. The Manage Relationships feature in Power BI helps define these connections clearly and efficiently.

It’s important to ensure that columns used to establish relationships contain unique values to maintain data integrity.

Handling Many-to-Many Relationships

Handling many-to-many relationships can be tricky. This scenario occurs when multiple records in table A relate to multiple records in table B.

Power BI handles this with bridge tables or by using cross-filtering techniques.

For example, consider sales reps and customers. Each sales rep works with several customers, and each customer can have multiple reps.

A many-to-many relationship can be managed efficiently by designing a structure that includes a bridge table. This helps prevent duplicate data and ensures more accurate reporting.

Using Dimension Tables Effectively

Dimension tables are essential in shaping a star schema. They provide descriptive information about the data such as product names, dates, and locations.

In Power BI, dimension tables connect to fact tables, which store quantitative data like sales figures or transactions.

Using dimension tables properly ensures streamlined data models and allows for faster queries. They facilitate easy understanding of relationships among different data sets.

By maintaining clean and organized dimension tables, users can establish precise relationships that enhance both data quality and visualization capabilities.

Crafting DAX Calculations

Data Analysis Expressions (DAX) is a powerful language in Power BI, used for crafting calculations such as measures and calculated columns. Mastering DAX enhances data modeling by allowing complex calculations and insights within reports. This section covers DAX basics, common functions, and how time intelligence enhances analyses.

Introduction to DAX

DAX is crucial for calculations in Power BI, helping users create powerful data insights. It’s a collection of functions, operators, and constants used for calculations on data in tabular form.

DAX supports building both measures and calculated columns. A measure is a dynamic calculation whose result changes with data context. In contrast, a calculated column computes its result once. This makes them useful for static categorization.

DAX provides a range of functionality, from simple arithmetic to complex conditional logic.

Common DAX Functions

DAX includes numerous functions for diverse data tasks. Basic operations use functions like SUM, AVERAGE, and MIN. These functions allow simple aggregations on data columns.

More advanced calculations utilize functions like CALCULATE, which modifies filter contexts to yield complex insights.

Text functions such as CONCATENATE and LEN handle textual data. Logical functions like IF and SWITCH enable branching logic.

Understanding these functions helps create sophisticated calculations, providing actionable insights from raw data.

Time Intelligence with DAX

Time Intelligence in DAX deals with calculations involving dates. It uses functions designed to handle data within temporal contexts.

Common time functions include DATEADD, PREVIOUSMONTH, and SALESYTD. These functions allow users to make comparisons over fiscal periods, like year-to-date sales or monthly comparisons.

Time Intelligence functions are essential for businesses to track trends and patterns over time. They enable rolling averages, cumulative totals, and performing trend analysis.

Crafting effective time-based DAX calculations can vastly improve data visualization and reporting, aiding strategic decisions.

Creating Calculated Columns and Measures

Calculated columns and measures are essential in Power BI for enhancing data models. Calculated columns integrate data at the model level, while measures provide flexible analysis during queries.

Developing Calculated Columns

Calculated columns are useful for adding new data points to your data model. They are created using Data Analysis Expressions (DAX), a powerful formula language in Power BI. These columns are computed during the data model’s processing time and stored in the model itself. This means they remain static until the data refreshes.

For example, a calculated column can be used to categorize sales data by product type. Since it is part of the data model, filtering and sorting become straightforward. The use of DAX allows for the execution of complex calculations like conditional logic and text manipulation.

Just remember that calculated columns might impact performance due to their storage requirements. Thus, using them should be balanced with the overall model size to avoid unnecessary bloat.

Defining Measures for Analysis

Measures are dynamic and evaluated during query execution, providing flexibility in data analysis. They rely on DAX formulas to perform calculations on aggregated data, rather than individual rows. Measures are preferable when creating summaries, such as total sales or average profit.

These calculations are performed on-the-fly, which means they don’t take up additional storage space. Measures are particularly effective in dashboards and reports as they adapt to different filters and contexts.

Given their impact on model performance, efficient DAX coding practices are important. Simple changes in the DAX expression can significantly alter how a measure behaves, thereby affecting speed and efficiency in data processing. Measures offer versatility in providing insights tailored to specific analytical needs.

Improving Model Performance

Improving model performance in Power BI is crucial for efficient data analysis. By focusing on data model optimization and adopting best practices, users can create models that are both fast and reliable. Performance tuning enhances data processing speed and accuracy.

Optimizing Data Models for Performance

Effective data model optimization begins with understanding the underlying architecture and integrating data efficiently. Use Power Query for preprocessing data, such as filtering unnecessary columns and rows, which reduces data load and enhances performance.

Maintaining simple, clean tables is crucial. Redundant relationships can slow down processing times, so validating each relationship is important. Star schema designs are highly recommended for optimizing data models as they ensure simplicity and improve query performance.

Effective use of complex modeling techniques is also beneficial. This includes creating calculated columns for frequently used calculations, which reduces real-time computation needs. Additionally, leveraging measures instead of calculated columns can improve efficiency because they are computed only during reporting use.

Best Practices for Fast and Reliable Models

Adopting best practices ensures data models run efficiently and accurately without significant lag. Avoid use of volatile calculations in the model; instead, rely on precalculated data when possible. This practice minimizes processing time and optimizes model speed.

Regularly testing and monitoring model performance is essential. Employ built-in tools such as the Performance Analyzer to identify bottlenecks and make necessary adjustments based on analytical insights. Using graphical diagrams can provide a clearer understanding of data relationships and guide performance improvements.

Finally, scaling your data model with the use of SQL Server Analysis Services (SSAS) can enhance performance. This supports large datasets efficiently, ensuring that the system remains responsive and reliable under heavy workloads.

Optimizing Data for Usability and Insight

To improve data usability and generate insights, effective design and data manipulation techniques are crucial. Enhancing the user interface and using a semantic model can make data more accessible. This helps in gaining meaningful insights and optimizing processes.

Enhancing Usability Through Effective Design

Creating an intuitive data visualization requires thoughtful design choices. Using a clean layout and organized structure can help users easily navigate information. Semantic modeling provides a framework that aids in understanding data relationships, making complex datasets easier to work with.

Power BI, for instance, allows adjustments in design elements to improve user experience. Utilizing features like Power Query can simplify data handling by allowing users to transform and clean data before visualization. This ensures that users are not overwhelmed by raw data and can focus on the insights presented.

For example, using concise labels and organized tables can enhance clarity. Prioritizing relevant data fields and excluding unnecessary details keep the focus on what is essential. This makes the visualization more effective and user-friendly.

Generating Insights from Data

Effective data modeling involves more than just organizing data; it requires strategic manipulation to reveal insights. Through techniques like DAX (Data Analysis Expressions) in Power BI, users can create calculated columns and measures that provide deeper insights.

By creating visual reports, users can identify patterns and trends. For instance, interactive dashboards enable users to explore data dynamically, discovering key information swiftly. The process of refining data structures aids in enhancing analytical outcomes, which is vital to business intelligence and process optimization.

This kind of insight generation allows organizations to make informed decisions, optimizing their operations based on concrete evidence derived from well-structured data. Techniques involving filtered views and drill-down options can further assist in pinpointing specific insights tailored to user needs, increasing the data’s usability and utility.

Creating Complex Data Models

A person using a computer to create a complex data model in Power BI

Building complex data models in Power BI requires strategies that enhance performance and adaptability. Key approaches include using calculated tables and implementing advanced techniques that streamline data management.

Utilizing Calculated Tables

Calculated tables are vital in Power BI for organizing data effectively. They allow users to create new tables based on DAX expressions, which helps in transforming raw data into meaningful insights. These tables are particularly useful when relationships between existing tables are insufficient or when new, derived data is necessary.

By employing calculated tables, modelers can perform operations such as merging data from multiple sources, creating benchmarks, or implementing business logic. This approach boosts data model flexibility and aids in more accurate reporting. To maximize their use, ensure calculated tables are optimized for performance, keeping in mind that unnecessary complexity can slow down the model.

Advanced Techniques in Data Modeling

Advanced data modeling techniques are essential for handling large datasets and complex business scenarios. Dimensional modeling, using star and snowflake schemas, is commonly used to enhance query performance and maintain data integrity. These schemas organize data in a way that simplifies complex queries.

Agile modeling practices can further enhance efficiency. For instance, leveraging config tables unlocks more sophisticated business logic, allowing more tailored data presentations. Additionally, adopting the default Import mode can often be more effective than DirectQuery for complex models, as noted in the Power BI cookbook. These techniques help in maintaining optimal performance and ensuring the model’s scalability.

Visualizing Data with Reports and Dashboards

Creating effective reports and dashboards involves developing tools that visualize data for insights and usability. It’s crucial to connect to diverse data sources and implement a solid learning path to master these skills.

Developing Interactive Reports

Interactive reports are a powerful tool in Power BI. They allow users to explore data deeply, making it easier to find valuable insights. When building reports, it’s essential to connect to multiple data sources. Doing so enriches the analysis and provides a comprehensive view of the data.

Data modeling is another critical step in creating reports. It structures the data logically, allowing for detailed analysis. To improve usability, reports should include features like dynamic filtering and drill-through capabilities, enabling users to interact directly with the data.

A learning path can help beginners master the techniques needed to create effective reports. Practice and a thorough understanding of Power BI’s functionalities are vital to producing reports that add real value to a business.

Designing Effective Dashboards

Dashboards offer a quick, visual summary of important metrics. Designing effective dashboards involves selecting the right visualization types to convey information clearly. Pie charts, bar graphs, and line charts can be used to highlight key data points and trends.

Usability is a critical factor. Dashboards should be intuitive and easy to navigate. Arranging visuals logically and grouping related information together enhances understanding.

Real-time data updates ensure that the dashboard reflects current information. This helps in making timely decisions based on the latest data analysis. Designing dashboards in Power BI requires connecting various data sources to ensure that all relevant data is accessible and integrated.

By following these guidelines, Power BI users can create dashboards that are both informative and engaging.

Educating Teams and Onboarding Users

Educating teams in Power BI and onboarding users require effective training methods and dedicated instructors. By focusing on these core areas, organizations can ensure that their teams are well-equipped to handle data modeling and utilize Power BI efficiently.

Training Methods and Resources

Training is essential for a smooth onboarding process. Companies often use hands-on workshops, online courses, and interactive modules. These methods help users understand critical concepts in data modeling. A well-structured learning path guides users through basic to advanced topics.

Online platforms offer self-paced courses, enabling users to learn at their convenience. Interactive resources like quizzes and practice sessions enhance retention. Video tutorials and step-by-step guides provide visual and practical examples, making complex topics easier to grasp.

Additionally, certification programs offer structured paths to learning. They validate the knowledge and skills acquired, which boosts confidence. Organizations may also develop internal training programs tailored to their specific data models and business needs. This ensures that learning is relevant and directly applicable to their work.

Roles of Instructors and Mentors

Instructors play a crucial role in guiding users through their learning journey. They provide expertise in Power BI features, including data models and visualization tools. Effective instructors tailor their approach to different learning speeds and styles, ensuring that all team members benefit.

Mentors supplement formal training by offering personalized assistance and feedback. This mentoring can occur informally on-the-job, helping users overcome specific challenges. Mentors can guide users in applying their knowledge to real-world scenarios. They encourage problem-solving and critical thinking.

Both instructors and mentors contribute to a supportive learning environment. By fostering collaboration and open communication, they ensure that team members feel comfortable asking questions and seeking help when needed. A strong mentoring system can transform theoretical knowledge into practical skills, maximizing the effectiveness of the Power BI onboarding process.

Frequently Asked Questions

Understanding how to create effective data models is essential in using Power BI. Beginners often seek guidance on the best practices and available learning resources. This section addresses common questions related to data modeling in Power BI, including techniques, educational resources, and career prospects.

What are the best practices for data modeling in Power BI?

To start, maintaining a simple and intuitive model is crucial. This means defining clear relationships between tables and ensuring that data types are correctly assigned. Using a star schema can also help improve performance and make queries easier to write.

How can beginners learn data modeling in Power BI?

Beginners should focus on foundational concepts like Power Query and DAX. They can start by exploring free resources, such as Microsoft’s documentation and forums, or engage with community blogs and video tutorials. Practicing with sample datasets is also helpful.

What are the different types of data modeling available in Power BI?

Power BI supports several data modeling techniques. These include the star schema approach, snowflake schemas, and the use of calculated tables. Each type has its benefits, depending on the complexity and needs of the project.

Which online courses are recommended for learning Power BI data modeling?

For structured learning, consider enrolling in well-regarded platforms like Coursera or LinkedIn Learning. Courses often cover essential topics like DAX, Power Query, and creating dashboards. Look for courses that provide hands-on projects to practice real-world scenarios.

How does the Model View in Power BI assist with data modeling?

The Model View visualizes relationships between tables, making it easier to understand data flows and dependencies. Users can drag fields to create relationships or adjust existing ones, providing a comprehensive overview of the model structure.

What is the typical salary range for a Power BI data modeler?

Salaries vary widely based on experience and location.

In the U.S., a Power BI data modeler may earn between $70,000 and $110,000 annually.

Factors like certifications and additional expertise in business intelligence tools can influence earnings, making it a lucrative field for those with specialized skills.

Categories
Uncategorized

Learning How To Analyze SQL Data Using Aggregate Functions with GROUP BY Commands: A Comprehensive Guide

Understanding SQL and Aggregate Functions

SQL is a powerful language used to manage and analyze data in relational databases. It allows users to retrieve, update, and manipulate data stored in tables.

One crucial feature of SQL is its ability to perform complex calculations using aggregate functions.

Aggregate functions are tools in SQL that perform a calculation on a set of values and return a single result. They are often used alongside the GROUP BY clause, which groups data based on one or more columns.

Here’s a brief overview of common SQL aggregate functions:

  • COUNT(): Counts the number of rows in a specific column.
  • SUM(): Adds up all the values in a column.
  • AVG(): Calculates the average of a set of values.
  • MIN() and MAX(): Return the smallest and largest values in a column, respectively.

These functions are essential for summarizing data efficiently. They help transform raw data into meaningful insights, like calculating total sales or average scores. To learn more about how these functions work, refer to this SQL Aggregate Functions guide.

Getting Started with GROUP BY Clause

The GROUP BY clause in SQL is essential for organizing and summarizing data within tables. It is often paired with aggregate functions like COUNT() or SUM() to analyze datasets effectively.

The Role of GROUP BY in Data Aggregation

In SQL, the GROUP BY clause is used to group rows that have the same values in certain columns. This helps in creating summary rows for the data, which is crucial in data analysis.

By using GROUP BY, one can categorize data within a table, making it easier to apply aggregate functions.

Aggregate functions like COUNT(), AVG(), MIN(), and MAX() are often applied to these grouped datasets. For example, in a table of sales data, one might use GROUP BY to calculate the total sales per product category. This technique highlights patterns and insights that are not readily apparent in raw data. Consequently, mastering the GROUP BY clause is valuable for anyone looking to effectively analyze SQL data.

Utilizing Aggregate Functions in Queries

Using aggregate functions in SQL queries helps to summarize and calculate valuable information from data. These functions, such as SUM, AVG, and COUNT, are often used with the GROUP BY clause to provide insights into datasets by organizing data into meaningful groups.

Functions for Calculating Totals and Averages

To calculate totals, the SUM() function is essential. It adds up all values in a column. For example, in a sales database, SUM() can be used to find the total sales revenue.

On the other hand, the AVG() function calculates the average value of a column. It is particularly useful in situations like finding the average salary of employees.

Both functions can be combined with GROUP BY to obtain totals and averages for specific groups. For instance, one could calculate the average salary per department.

The use of aggregate functions like SUM and AVG allows users to transform raw data into actionable insights, making them indispensable in data analysis. Additional detail is provided by functions such as MIN() and MAX(), which find the lowest and highest values in a set.

Counting and Filtering Rows with Aggregate Functions

SQL provides the COUNT() function to determine the number of rows in a dataset. This function is crucial when one needs to know how many entries or records exist in a table.

COUNT() can be used to find the number of employees in each department if combined with GROUP BY.

Aggregate functions can also help filter data. By using conditions like HAVING, a user can filter groups after they have been created using GROUP BY.

For example, they might want to only show groups with a total count above a certain threshold. This allows for flexible query building and ensures that only relevant data is processed for analysis. Functions like COUNT(), SUM(), and others are powerful tools in database queries, enabling precise data aggregation and analysis.

Diving Deeper into SQL SELECT Statements

SQL SELECT statements are essential for extracting data from a database. Understanding how to refine data selection with specific clauses can significantly enhance data analysis capabilities.

Refining Data Selection with WHERE and HAVING Clauses

The SQL SELECT statement allows users to extract specific data by targeting particular columns in a database.

The WHERE clause is crucial for filtering rows before any grouping takes place. For example, SELECT name, age FROM users WHERE age > 30; retrieves users older than 30.

Conversely, the HAVING clause works after data is grouped. It helps filter groups based on aggregate functions.

If a database query uses GROUP BY, HAVING can refine the results, such as SELECT department, COUNT(employee_id) FROM employees GROUP BY department HAVING COUNT(employee_id) > 10;.

Together, these clauses enhance the SQL SELECT statement’s effectiveness, enabling users to perform precise data retrieval and analysis in varying circumstances. They offer refined control over both preliminary filtering and post-aggregation conditions.

Advanced Grouping with SET Operators and Joins

Advanced grouping in SQL involves using set operators and joins to manipulate data more effectively. By mastering these techniques, users can handle complex datasets, extract valuable insights, and optimize database operations.

Leveraging UNION, JOIN, and Subqueries in GROUP BY

UNION is a set operator that combines results from two or more SELECT statements into a single result set. Each SELECT must have the same number of columns, and the columns must have compatible data types.

UNION can help aggregate data from multiple tables which can later be grouped with the GROUP BY clause to provide a comprehensive picture. This is particularly useful when integrating data from different sources or tables.

JOINs play a crucial role in SQL data analysis. A JOIN links rows from two or more tables based on a related column between them.

Common types of JOINs include INNER JOIN, LEFT JOIN, RIGHT JOIN, and FULL OUTER JOIN. Using these, SQL users can combine detailed data from numerous tables and then turn summarized data into insights with GROUP BY. For example, combining sales data with employee data to analyze sales performance per person.

Subqueries can also be used to enhance the functionality of GROUP BY. They allow users to perform several operations within the same query, maintaining the efficiency of data processing.

This technique is beneficial when the aim is to filter large datasets or aggregate them before the main GROUP BY operation, optimizing performance and query clarity.

Analyzing Sales Data with SQL Commands

To analyze data from sales, SQL commands like SELECT, GROUP BY, and aggregate functions are essential. These commands allow analysts to summarize and extract insights from complex datasets, focusing on patterns and metrics.

One common task is calculating total sales. Using SUM() with a GROUP BY command helps gather total sales for different categories, such as regions or products.

Example SQL Command:

SELECT region, SUM(sales) AS total_sales
FROM sales_data
GROUP BY region;

This query provides total sales per region, offering a clear view of performance across areas.

Further insights can be gained by looking at average sales with the AVG() function. This is useful for understanding typical sales amounts in various segments.

Example for Average Sales:

SELECT product, AVG(sales) AS average_sales
FROM sales_data
GROUP BY product;

Tracking Trends:

SQL also aids in identifying sales trends over time. By grouping data by time periods like months or quarters, analysts can observe changes in sales performance.

Creating tables from the results allows clear presentation of key metrics:

Product Total Sales
Product A $50,000
Product B $75,000

With these tools, businesses can make data-driven decisions that enhance understanding of their market and improve strategies.

Calculating Average Salary in Datasets

To calculate the average salary in a dataset using SQL, the AVG() function can be applied. This function computes the average of a set of values. It is particularly useful for deriving insights from employee salary data.

A typical SQL query for calculating average salaries may look like this:

SELECT department, AVG(salary) AS Average_Salary
FROM employees
GROUP BY department;

This query groups employees by department and calculates the average salary for each group. The GROUP BY clause helps organize the data into specified categories, allowing the AVG() function to work effectively within each group.

When dealing with datasets where the salary is below a certain threshold, an additional WHERE clause can be applied. For instance:

SELECT AVG(salary) AS Average_Salary_Below_50K
FROM employees
WHERE salary < 50000;

This example filters the dataset to include only salaries less than $50,000, providing a focused view of average earnings Learn more about aggregate functions in DBMS.

Additionally, using a subquery can be advantageous when working with more complex data structures. It allows calculation of average salaries across different roles or positions:

SELECT employees.position, ROUND(AVG(salaries.salary), 2) AS AVG_Salary
FROM employees
JOIN salaries ON employees.employee_ID = salaries.employee_ID
GROUP BY employees.position;

For a more detailed view of working with aggregate functions like AVG(), you might consider referencing materials such as W3Schools.

Using SQL for Comprehensive Data Analysis

SQL is a powerful tool for data analysis, allowing users to extract meaningful insights from structured datasets.

It offers various commands to manipulate and filter data, making it easier to extract necessary information.

One of the key features of SQL in data analysis is the ability to use aggregate functions. These functions, like COUNT(), SUM(), and AVG(), help summarize data effectively.

When combined with the GROUP BY command, users can analyze specific groupings within the dataset, enabling more focused analysis.

Imagine a table of sales data. By using the GROUP BY command with aggregate functions, an analyst can easily determine total sales per product category or calculate the average sale amount for each salesperson.

This capability transforms large datasets into clear, actionable insights.

Here’s a simple example:

SELECT product_category, SUM(sales_amount)
FROM sales_data
GROUP BY product_category;

This script calculates the total sales for each product category, providing essential insights into sales performance.

Key Benefits:

  • Efficient data grouping
  • Simplified data filtering
  • Enhanced data summarization

Common Aggregate Functions:

Function Description
COUNT() Counts the number of rows
SUM() Adds up values in a column
AVG() Calculates average of values

Understanding how to use SQL for data analysis opens up new possibilities for uncovering trends and patterns within data, allowing businesses to make informed decisions based on reliable insights.

By effectively using commands like GROUP BY and functions like SUM() or AVG(), analysts can transform raw data into valuable knowledge.

Optimizing Queries with ORDER BY and Indexing

A computer screen displaying SQL query code with ORDER BY and GROUP BY commands, alongside a diagram of indexed data tables

Ordering and indexing in SQL can significantly speed up query execution. By understanding how to use these techniques, users can enhance their ability to handle large datasets efficiently.

Improving Query Performance with Ordering and Indexes

Using the ORDER BY clause helps sort SQL query results. It can be set to either ascending (ASC) or descending (DESC) order.

When queries are sorted, processing time may increase, so the use of indexes is crucial to maintain speed.

Indexes can greatly improve query performance by reducing the time it takes to access data. Properly maintained indexes ensure that sorting operations are efficient.

When creating indexes, multiple columns can be combined to enhance retrieval speed.

Example:

CREATE INDEX idx_category_subcategory 
ON products (category, product_subcategory);

This index allows faster execution of queries that sort results by category first and subcategory next.

By implementing such strategies, users can optimize their SQL queries effectively.

Creating and Managing Views in SQL

A computer screen displaying SQL code with aggregate functions and GROUP BY commands

Views in SQL are virtual tables that result from a predefined query. They don’t store data themselves but provide a way to simplify complex queries by encapsulating them.

To create a view, use the CREATE VIEW statement. This defines the view’s name and the query it represents. For example:

CREATE VIEW employee_view AS
SELECT name, department
FROM employees
WHERE status = 'active';

Views can help retrieve data efficiently without repeatedly writing complex queries. They’re especially useful in saving time when dealing with multi-table queries.

To update the query a view is based on, one should use the ALTER VIEW statement.

If there’s a need to change the data structure, such as adding a new column, views offer an easy way to adapt without directly modifying the database.

When there’s a need to insert data into tables linked through a view, the INSERT INTO statement is often employed. However, keep in mind that this feature might have limitations depending on the nature of the view.

Managing views involves keeping track of the data they reference and ensuring they reflect current SQL database schemas. This ensures that changes in the underlying tables don’t lead to errors in the view’s outputs.

Advanced SQL Features for Data Analysis

A computer screen displaying SQL code with aggregate functions and GROUP BY commands

Advanced SQL offers powerful tools for analyzing data, such as window functions and common table expressions. These features allow for detailed insights that go beyond basic queries, enhancing data analysis capabilities.

Exploring Window Functions

Window functions provide advanced ways to perform calculations across rows related to the current row within a result set. They are especially useful for tasks that require comparison over a set range, such as calculating running totals or moving averages.

Unlike aggregate functions, window functions do not collapse rows into a single result, enabling more granular analysis.

For example, using the ROW_NUMBER() window function can help rank data within partitions. This makes it easier to spot trends or patterns in datasets, enhancing analytical depth and flexibility.

Common Table Expressions

Common Table Expressions (CTEs) simplify complex queries by breaking them into parts. A CTE is defined within a WITH statement and provides a temporary result set that can be referenced within the main query.

They help make SQL code more readable and maintainable by organizing it into logical sections.

CTEs are ideal for recursive queries, such as when navigating hierarchical data. They can be particularly beneficial when combining them with window functions for more robust data analysis.

This powerful synergy allows analysts to write cleaner, more efficient SQL code while diving into intricate data manipulations.

Applying SQL in Real-World Scenarios

A computer screen displaying SQL code and the results of aggregate functions with GROUP BY commands

Using SQL in practical applications helps build essential skills needed for data analysis and problem-solving. Engaging in guided projects and practicing SQL interview questions can enhance readiness for real-world challenges and opportunities in data science.

Guided Projects and Hands-On Learning

Engaging in guided projects is a great way to apply SQL in a practical setting. These projects often simulate real-world datasets, allowing learners to interact with data as they would on the job.

During these projects, learners can practice using SQL commands like GROUP BY and various aggregate functions to gain meaningful insights.

Hands-on learning often includes projects that involve analyzing sales data, customer habits, or even website traffic. This type of learning emphasizes trial and error as learners work through errors and improve their SQL skills.

By actively working through each step, learners gain confidence and competence in applying SQL to real-world data scenarios.

Preparing for SQL Interviews with Practical Questions

Preparing for SQL interviews often means practicing with practical questions that assess problem-solving and technical skills.

Interview questions may require candidates to demonstrate their ability to use aggregate functions such as SUM, AVG, or COUNT in different scenarios. These questions help to evaluate how well a candidate understands implementing SQL queries effectively.

Practical questions can often be found in resources like SQL tutorial sites or practice books that offer scenario-based exercises.

For instance, utilizing questions that involve financial data analysis can be particularly helpful for those targeting roles in finance or data analysis.

Through repeated practice, candidates can refine their approach to solving SQL problems, ensuring they are well-prepared for interview challenges.

Frequently Asked Questions

A computer screen displays SQL code with GROUP BY commands and aggregate functions

SQL uses aggregate functions to summarize data, often paired with the GROUP BY command. These functions are important for tasks like categorizing data and filtering results. This section addresses common questions beginners might have when using these tools.

What are the different types of aggregate functions available in SQL?

In SQL, aggregate functions perform calculations on multiple values and return a single value.

Common functions include SUM for totals, AVG for averages, COUNT for counting rows, MAX for the highest value, and MIN for the lowest value. These are crucial for data analysis and reporting tasks.

How do you use GROUP BY to categorize data in a query?

The GROUP BY clause in SQL is used to arrange identical data into groups. It is often combined with aggregate functions to perform calculations on each group.

For example, using GROUP BY on a sales database can help categorize the total sales per product or region.

What is the purpose of the HAVING clause when used with GROUP BY in SQL?

The HAVING clause filters results that have been grouped in SQL. Unlike the WHERE clause, which filters individual rows, HAVING filters whole groups.

It’s useful for applying conditions to aggregated data, such as showing only the groups with a total sales value above a certain threshold.

How can you combine aggregate functions with GROUP BY in SQL queries?

By using aggregate functions with GROUP BY, SQL queries can provide summaries for grouped data.

For example, combining SUM with GROUP BY can calculate total sales per city, while COUNT can determine the number of orders per customer. These combinations support detailed data analysis.

What are the differences between using WHERE and HAVING clauses with GROUP BY in SQL?

WHERE and HAVING serve different purposes in SQL.

WHERE filters records before any grouping takes place and deals with individual rows.

HAVING, on the other hand, is applied after aggregation, filtering the groups generated by the GROUP BY clause.

Both are essential for precise query results.

How can you aggregate data across multiple columns using GROUP BY in SQL?

To aggregate data across multiple columns, list the columns in the GROUP BY clause. This allows SQL to group the data based on combinations of these columns.

For instance, using GROUP BY product, region will categorize data by both product type and sales region, enabling multidimensional analysis.

Categories
Uncategorized

Learning How to Create GUIs in the Jupyter Notebook System: A Comprehensive Guide

Getting Started with Jupyter Notebooks

Jupyter Notebooks are valuable tools for data scientists, providing an interactive platform to combine code, visualizations, and text in one place.

Here, we will explore the basics of Jupyter’s interface and the installation process for both Python and Jupyter Notebook.

Introduction to Jupyter and Its Notebook Interface

Jupyter Notebook is an open-source web application that allows users to create and share documents, combining live code, equations, visualizations, and narrative text. This tool is especially popular among data scientists and researchers because it enables interactive computing.

Notebooks in Jupyter can support over 40 programming languages, including Python, and allow for easy sharing of work.

Jupyter’s interface is designed to simplify project organization. The main components include a dashboard, a menu toolbar, and a code editor.

Notebooks consist of cells that can hold code, markdown, or raw text, creating a flexible environment for conducting experiments and documenting the results.

To streamline navigation, users can install extensions like a Table of Contents, which helps make large notebooks easier to manage.

Installing Python and Jupyter Notebook

Installing Jupyter Notebook requires Python, which is a versatile language for data analysis. Before installing Jupyter, ensure Python is set up on your system. It can be downloaded from the official Python website or through distributions like Anaconda, which includes both Python and Jupyter.

Once Python is installed, Jupyter can be added using the package manager pip by running the command pip install jupyter.

For those who prefer an all-in-one solution, installing Anaconda is recommended. It simplifies the setup process and includes additional data science libraries, making it ideal for beginners.

After installation, start Jupyter by typing jupyter notebook in the terminal, which opens the interface in your default web browser.

Understanding the Basics of Python Programming

Python is a versatile and widely-used programming language. It is known for its simple syntax and readability, making it a great choice for both beginners and experienced programmers.

In this section, key elements of Python programming are covered to build a strong foundation.

Data Types are essential in Python, including integers, floats, and strings.

Strings are collections of characters used to store text data. They are created by enclosing text in single ' or double quotes ".

Python offers several collection data types, like lists, dictionaries, tuples, and sets.

Lists are ordered and changeable, perfect for storing sequences.

Dictionaries hold key-value pairs, making data retrieval fast and efficient.

Tuples are similar to lists but immutable.

Sets are collections of unique elements.

In programming, variables act as containers for storing data values. Python allows variables to store different data types and even change types dynamically.

Functions are blocks of reusable code in Python. Defined with the def keyword, they help organize code and perform specific tasks. Functions can accept arguments and return values.

Python supports object-oriented programming with classes. Classes define objects and can contain properties and methods. They allow for grouping data and behavior logically.

Understanding scope is crucial when working with Python. Variables have either local or global scope, determining their accessibility within different parts of the program. This ensures efficient management of variables and functions within code blocks.

Exploring Python Libraries for GUI Development

Python offers several libraries specifically geared toward creating user-friendly graphical interfaces. Two key libraries that stand out for developing GUIs within Jupyter Notebooks are Tkinter and Ipywidgets. Each provides unique tools and functions to help developers build robust and interactive applications.

Tkinter and Its Role in GUI Programming

Tkinter is one of the most widely used Python libraries for creating graphical user interfaces. As an open-source module, it provides a simple way to integrate GUIs into Python applications. It is often included with Python, making it easily accessible for developers.

The library is built on the Tk GUI toolkit, known for its ease of use and flexibility.

Developers can create windows containing buttons, labels, text fields, and other standard interface elements using Tkinter. This makes it an ideal choice for both beginners and experienced developers aiming to explore GUI development without complex coding.

Notably, Tkinter’s event-driven programming model allows for seamless user interaction through event binding, providing a responsive and engaging experience.

Developers appreciate its simplicity and depth as it offers fundamental tools to achieve dynamic application development. Tkinter remains a reliable choice for desktop application prototyping and development.

Ipywidgets for Interactive Jupyter Widgets

Another effective library for GUI development within Jupyter Notebooks is Ipywidgets. This library is tailored for adding interactive widgets to Jupyter instances, enhancing user engagement and data visualization capabilities.

Ipywidgets allows developers to create sliders, buttons, drop-down menus, and other interactive elements that integrate seamlessly with notebook cells.

This interactivity can be crucial for dynamic data exploration and analysis tasks where user inputs need to reflect immediately in computations.

Additionally, Ipywidgets supports real-time interaction by using JavaScript in the backend to update widget states. The user-friendly API ensures that creating complex GUIs is manageable, allowing even novice developers to leverage Jupyter Notebooks to their full potential.

Designing Basic Graphical User Interfaces

Creating graphical user interfaces in Jupyter Notebooks involves placing interactive elements like buttons and forms, alongside components such as checkboxes for collecting user input. These elements enable users to interact seamlessly with programs within the notebook environment.

Creating Buttons and Forms in Jupyter Notebooks

Jupyter Notebooks offer widgets for designing GUIs that enhance interactivity. Buttons are fundamental GUI components used for triggering events when clicked.

In Jupyter, the ipywidgets library simplifies adding buttons. By importing this library, users can create buttons using simple code snippets.

import ipywidgets as widgets
button = widgets.Button(description="Click Me")
display(button)

Forms can be crafted by combining multiple widgets. Text boxes and sliders are common choices for input fields. These elements allow the program to capture and process user inputs effectively.

It’s important to define actions or callbacks that execute upon user interaction, ensuring that the GUI is responsive and functional.

Utilizing Checkboxes and User Input

Checkboxes offer a straightforward way for users to make selections within a Jupyter Notebook GUI. The ipywidgets.Checkbox class is handy for including these elements.

Checkboxes can be added using code like:

checkbox = widgets.Checkbox(value=False, description='Select Me')
display(checkbox)

User input collection is crucial for dynamic applications. Widgets such as Text, IntSlider, and Dropdown allow intake of various data types.

Employing these widgets assists in capturing diverse user inputs, facilitating their integration into the application’s logic.

Attention to user experience, such as clear labels and intuitive layout, enhances usability and effectiveness of GUIs.

Advanced GUI Components and Event Handling

Mastering GUI components and event handling in Jupyter Notebook allows developers to create interactive applications. By leveraging advanced Python features, users can build sophisticated widgets and efficiently manage user settings and parameters.

Working with Advanced Widgets

Advanced widgets in Jupyter Notebook enhance user interaction. These components, such as sliders, dropdowns, and buttons, are part of libraries like ipywidgets. They allow for dynamic data input and visualization.

Using ipywidgets, developers can link widgets to functions, creating responsive updates whenever users interact with the elements.

One can create layouts with tabs and accordions for better organization.

The use of event listeners is crucial, as they execute code in response to widget changes. For example, when a slider’s value changes, a connected function might adjust a graph in real time. This interaction fosters an engaging learning and analytical environment.

Managing User Settings and Parameters

Handling user settings and parameters is essential for creating personalized applications.

Developers can store user preferences using configuration files or simple local storage. These settings may include theme choices, default widget values, or application modes.

For effective parameter management, it’s important to map these parameters to widgets. Users can adjust the parameters through a user-friendly interface, and the program updates accordingly.

APIs play a vital role here by offering a connection to external data or services, allowing applications to adapt based on the user’s environment.

The flexibility of Python enables the customization of GUI applications, ensuring they meet the functional requirements needed for dynamic user interaction.

Integrating Data Science Techniques in Jupyter GUIs

Jupyter Notebooks are powerful for creating GUIs, especially when integrating data science techniques. Incorporating tools for data visualization and using efficient data handling modules can enhance both functionality and user experience.

Incorporating Data Visualization Tools

Data visualization is essential in data science to interpret complex results effectively.

In Jupyter GUIs, various libraries like matplotlib and seaborn allow users to create interactive plots and charts directly within the notebook interface. These tools help in making data more accessible and understandable.

Using visual elements like histograms, scatter plots, or heatmaps can transform static data into dynamic visuals.

This interactive aspect is key for exploring datasets, identifying trends, and communicating insights.

In addition, incorporating widgets from libraries like ipywidgets enables users to update charts in real-time, which is particularly useful in dynamic data analysis.

Integrating these visualization tools into Jupyter GUIs creates a seamless experience for users processing and analyzing data.

Handling Data with Collections Module

Managing data efficiently is critical in any data science project.

The collections module in Python offers specialized container datatypes like namedtuple, deque, and Counter, which enhance data manipulation capabilities.

In a Jupyter GUI, these datatypes can streamline handling and analysis tasks.

For instance, namedtuple allows for readable code by treating elements as attributes.

deque provides fast appends and pops, which is beneficial for data structures that require frequent updates.

Counter aids in calculating frequencies of elements in a collection, which can be invaluable in data analysis tasks.

By integrating the collections module into Jupyter GUIs, data scientists can enhance the efficiency and readability of their code, facilitating more sophisticated data operations.

Mastering Object-Oriented Programming for GUIs

Object-oriented programming (OOP) plays a crucial role in developing effective and reusable graphical user interfaces (GUIs).

It enables developers to organize code efficiently by using classes and objects, which helps in managing complex interfaces smoothly.

Core Concepts:

  1. Classes and Objects: At the heart of OOP are classes and objects. Classes act as blueprints for objects, defining attributes and behaviors. This allows for easy creation and manipulation of multiple instances.

  2. Encapsulation: This concept helps in bundling data and methods that operate on this data within a single unit, or class. Encapsulation provides a way to hide the internal workings of an object, making the interface simpler to interact with.

  3. Inheritance: This allows new classes to inherit properties and behaviors from existing ones, promoting code reuse and reducing redundancy. It simplifies modifications by centralizing control of shared features.

  4. Polymorphism: With polymorphism, objects can be treated as instances of their parent class rather than their actual class. This allows for flexibility and integration of different object types.

Application in GUIs:

GUIs benefit from OOP through modular design and improved maintenance.

For instance, developers can create a base class for windows and derive various types of specialized windows from it.

Using GUI libraries, like Tkinter or PyQt, together with OOP principles, developers can create user interfaces that are both dynamic and scalable.

For example, the pygame package is used to put OOP concepts into practice in game development.

Customizing GUIs with Python’s Advanced Features

Using Python’s advanced features can greatly enhance the customization of graphical user interfaces (GUIs) in Jupyter Notebooks.

By leveraging decorators, context managers, generators, and coroutines, developers can create more efficient and dynamic GUIs.

Leveraging Decorators and Context Managers

Decorators in Python can be used to modify or extend the behavior of functions or methods. In GUI development, they can be particularly useful for adding logging, access control, or pre-processing tasks before a function runs.

For example, decorators can ensure certain application states before executing a function, streamlining the code for GUI operations.

Context managers, typically employed with the with statement, help manage resources like file handles or network connections effectively.

When used in GUIs, context managers ensure resources are allocated and released properly, preventing resource leaks. This is especially critical in applications with multiple layers of resource dependence.

Employing Generators and Coroutines

Generators are a powerful feature in Python, allowing functions to yield values over time. This makes them ideal for GUIs that handle large data sets or real-time data streams.

By using generators, GUIs can manage memory usage more efficiently by yielding data as needed, rather than loading it all at once.

Coroutines, a type of generator, are useful for asynchronous programming. They allow GUIs to perform non-blocking operations, making GUIs responsive.

This is crucial for applications needing to handle multiple user inputs or background tasks simultaneously, enhancing the user experience.

Developing and Sharing .py Files in Jupyter

Jupyter Notebook allows users to create and share Python scripts efficiently. This includes converting .ipynb files to .py files and managing them with version control tools.

Writing Python Scripts as .py Files

Jupyter Notebooks primarily use .ipynb files, but converting these to .py files is straightforward. This conversion is crucial when integrating with traditional Python projects or when a script needs execution outside of the Jupyter environment.

Using the nbconvert tool, users can easily export their notebooks to .py files, which are plain text and suitable for any text or code editor. This creates flexibility for developing Python applications by allowing them to run independently of Jupyter.

Integrating with Jupyter’s nbconvert tool supports exporting notebooks to various formats, including .py, enabling seamless sharing and extension of the code into cohesive scripts.

Once in .py format, users can harness the power of Python libraries outside Jupyter, making development versatile and integrated with broader Python ecosystems.

Sharing and Version Control

Sharing .py files involves more than just transferring files. It includes managing changes and collaborating with others efficiently.

Python scripts benefit significantly from version control systems like Git, which track changes and allow for collaborative development.

By using Git repositories, teams can ensure that all changes are tracked and integrated smoothly, making collaboration on Python projects more effective.

Platforms like GitHub are popular for sharing and maintaining these scripts. With Jupyter, developers often utilize Python script exports to share code that others can run without needing Jupyter.

This approach enhances collaboration by allowing clear tracking of changes over time, supporting both solo developers and larger teams.

Creating Interactive Tutorials with Jupyter Widgets

Jupyter Widgets add interactive elements to Jupyter Notebooks, making tutorials engaging and dynamic. These widgets allow users to control elements with sliders, buttons, and text boxes. This interactivity enhances learning by providing immediate feedback and a hands-on experience.

To start, users can install the ipywidgets library using pip. Once installed, they can import it and start creating various widgets.

A simple example is using a slider to adjust numerical values in real-time. This is beneficial for visualizing data changes immediately.

Here’s a basic example of a slider widget:

import ipywidgets as widgets

slider = widgets.IntSlider(value=0, min=0, max=10, step=1)
display(slider)

Apart from sliders, Jupyter supports other widget types like dropdowns, radio buttons, and more. These are useful in tutorials where users need to choose from different options or paths in the content.

Beyond individual widgets, there is the ability to create fully interactive widgets in Jupyter Notebooks.

These are great for forming complex interfaces that allow multiple inputs from users, such as forms or controls for data analysis.

Layouts and styles can be customized to match the tutorial theme. Users can arrange widgets in horizontal or vertical boxes, providing a cleaner and more professional look.

Customization options make Jupyter Widgets a versatile tool for creating interactive educational content.

Utilizing Jupyter Notebook for Web Application Development

A laptop displaying a Jupyter Notebook with a web application development interface and GUI creation tutorials open

Jupyter Notebook is a powerful tool that can transform data analysis projects into interactive web applications. Users can build web apps directly from their notebooks and integrate APIs to enhance functionality and access external data sources.

Building Web Apps with Jupyter Notebook

Creating web applications with Jupyter Notebook is made possible through several tools and frameworks.

Tools like Voilà convert notebooks into standalone web applications. This allows users to share their projects with a wider audience without requiring them to know the details of Jupyter Notebook.

Another option is AppMode, a Jupyter extension that allows notebooks to be viewed as web apps by hiding code cells. This simplifies the interface for end users, making it an excellent choice for demonstrating data-driven applications or dashboards in a clean format.

Users can also utilize frameworks like Anvil Uplink to turn machine learning models into interactive apps. This method lets users build complete web applications, incorporating forms, data tables, and other UI elements.

Integrating APIs and External Data Sources

Integrating APIs into Jupyter Notebook projects can significantly enhance the functionality of a web app.

APIs allow applications to access data from various external sources, such as weather updates or financial information. This access enables developers to incorporate real-time data into their applications.

To start, users can make HTTP requests within the Jupyter Notebook to fetch data from APIs. Libraries like requests simplify this process.

This method is beneficial for fetching JSON data, which can then be processed and visualized directly within the notebook.

In addition, incorporating external data sources into a web application enhances its relevance and engagement.

By linking to dynamic datasets, Jupyter-based applications can provide up-to-date insights and interactive experiences.

This combination of Jupyter Notebook and APIs empowers developers to create versatile, data-driven applications.

Frequently Asked Questions

A person typing on a computer, with a Jupyter Notebook open, surrounded by various windows and tabs related to GUI creation

Creating user interfaces within Jupyter Notebooks can enhance data analysis projects by making them interactive and user-friendly. Various tools and libraries are available, allowing for the integration of UI elements and capturing user inputs effectively.

How can I create interactive GUI elements in a Jupyter Notebook using ipywidgets?

Using ipywidgets, users can add sliders, buttons, and other interactive elements directly into Jupyter Notebooks. This library integrates seamlessly, allowing for dynamic changes and updates based on user inputs.

What are the steps to implement Tkinter in a Jupyter Notebook for GUI creation?

Tkinter can be used in Jupyter Notebooks for simple GUI applications. Users need to import Tkinter and create a root window. By constructing the widgets and laying them out using grids or packs, they can interact with Jupyter’s execution cells effectively.

Is it possible to develop a web-based user interface within a Jupyter Notebook, and how?

Developing a web-based user interface is possible by leveraging tools like Ipywidgets and other web-focused libraries. These tools allow the construction of interactive components that mimic web app behavior within the notebook environment.

What libraries are available for designing Python GUIs within Jupyter Notebooks?

For designing GUIs within Jupyter, libraries such as ipywidgets, Plotly Dash, and Voila are popular choices. They provide a range of widgets, visualizations, and deployment options that integrate with the notebook’s functionality.

How do I capture user input in a Jupyter notebook through a graphical user interface?

User input in a Jupyter Notebook can be captured using input widgets from libraries like ipywidgets. These widgets, such as text boxes and sliders, allow users to input data directly into the notebook, which can then be processed further.

Are there best practices for creating responsive and dynamic user interfaces in Jupyter Notebooks?

Best practices involve organizing code into functions and utilizing layout management efficiently.

It’s important to ensure that UI elements update based on user actions quickly.

Maintaining clarity in UI design and preferring libraries that offer dynamic features enhance the interactivity and user experience.

Categories
Uncategorized

Learning about Random Forests: A Guide to Understanding and Utilizing the Algorithm

Fundamentals of Random Forests

Random forests are a popular machine learning tool, known for being an effective ensemble technique. They operate by combining multiple decision trees, which results in more accurate and reliable predictions.

This section breaks down what defines a random forest, how it functions, and the essential elements that make it a powerful algorithm.

Definition and Overview

A random forest is an ensemble learning method, which means it combines the predictions from multiple models to improve accuracy. Specifically, it is made up of numerous decision trees, all working together to produce a single output.

Each tree in the forest operates independently on a random subset of the data and features, which helps in reducing overfitting—a common problem when using decision trees alone.

This approach was popularized by Leo Breiman in 2001. Since then, it has become a cornerstone in machine learning for tasks like classification and regression. By assimilating many decision trees, random forests enhance performance and provide more robust predictions compared to single decision tree models.

How Random Forest Works

In a random forest, each decision tree makes a prediction for each data point. These predictions are then aggregated to determine the most common outcome or the average in the case of regression. This is often referred to as voting (for classification) or averaging (for regression).

The process begins with bootstrapping, where each tree is trained on a randomly selected sample of the data.

Additionally, at each point where the tree splits, a random subset of features is considered. This randomness contributes to reducing correlation among the trees, making the ensemble more accurate overall.

The general process results in an algorithm that can handle large datasets with higher dimensionality effectively.

Key Components of Random Forests

The primary components of a random forest include the decision trees, datasets, and features. Each tree is an independent model trained using a different random subset of the data. The random selection ensures diversity among trees, which is crucial for the success of an ensemble learning method.

Moreover, the use of multiple trees addresses variance and reduces the risk of overfitting.

Feature bagging, another important aspect, involves taking a random sample of features at each split in a tree. This technique helps create an uncorrelated forest of trees, leading to more accurate predictions.

Understanding these components is essential to grasp why random forests are a favored choice in many machine learning applications.

Building Blocks of Random Forest

Random forests are a popular machine learning method built on decision trees. They introduce randomness in feature selection and utilize techniques like bagging to enhance accuracy and decrease overfitting.

Decision Trees as Base Estimators

The fundamental building block of a random forest is the decision tree. Decision trees classify or regress data by asking a series of true or false questions to split data into smaller, purer subsets.

Each tree acts as an independent predictor. These trees learn patterns from data and provide predictions. When combined in an ensemble, their predictions are averaged, leading to more robust outcomes.

Using decision trees as base estimators ensures diverse paths to decision making, contributing both to overall accuracy and model stability.

Randomness in Feature Selection

In random forests, randomness is introduced by randomly selecting a subset of features for each tree. This randomness helps in reducing overfitting and ensuring that the trees in the forest are diverse.

Each decision tree only considers a random set of features at each split, leading to unique perspectives on data patterns. This process enhances prediction accuracy by preventing any single feature from becoming dominant.

It ensures that the model is able to generalize better to unseen data, increasing its predictive strength and durability.

Bootstrap Aggregating (Bagging)

Bootstrap aggregating, also known as bagging, is a crucial step in building a random forest. This involves creating multiple bootstrap samples from the original dataset. Each sample is used to train a separate decision tree.

The predictions from all the trees are then combined, typically by averaging for regression or majority voting for classification.

Bagging predictors help in smoothing out individual tree errors, improving model stability. By working as an ensemble, bagging enhances the reliability of predictions, showcasing one of the strengths of random forests.

This technique effectively balances variance and bias, leading to better overall performance compared to a single decision tree model.

Random Forest for Classification

Random Forests excel in handling various types of classification tasks by using multiple decision trees. Each tree contributes to an ensemble vote, improving classification accuracy. This method effectively deals with feature complexity and provides insights into data patterns.

Understanding Classification Trees

In a random forest model, classification trees are the building blocks that form the ensemble. Each tree is designed to classify data into categories. Decision nodes make choices at each branch, and leaf nodes represent classification outcomes.

Trees in the forest make decisions based on different subsets of data, contributing to a stronger overall decision-making process.

This leads to a more robust model that is less prone to overfitting compared to a single decision tree. By creating diverse trees, the forest reduces bias and variance errors in classification tasks. Each tree’s vote is aggregated to predict the final category for new, unseen data.

Measuring Impurity and Information Gain

Classification trees use metrics like Gini impurity and information gain to find the best splits in the data.

Gini impurity measures how often a randomly chosen element would be incorrectly classified. Trees aim to decrease Gini impurity through their structure, leading to a purer classification result at each node.

Information gain evaluates how much uncertainty in the dataset is reduced after a split. A higher information gain indicates a more effective split.

By maximizing information gain at each step, classification trees in a random forest can make more accurate and meaningful distinctions between classes in the data.

Handling Classification Problems

Random forests are well-suited to address various classification problems due to their ensemble approach. They can handle both binary and multiclass classification tasks.

With their ability to work with high-dimensional datasets and handle missing values, random forests are versatile tools for solving complex real-world problems.

Each tree in the forest operates independently, with results combined to deliver a stable and reliable classification output.

They are particularly effective in scenarios where the relationships between input features are intricate, providing a comprehensive solution by averaging the diverse solutions from individual trees.

Benefits include increased accuracy and the versatility to manage different types of data and problems.

Random Forest for Regression

Random forest for regression involves using a powerful ensemble method to predict continuous outcomes. This technique builds multiple decision trees and averages their results for increased accuracy and stability in predictions.

Regression Trees Explained

Regression trees are the building blocks of the random forest regression model. A decision tree splits data into branches based on input features to predict numerical outputs. Each split is determined by calculating which feature reduces the error the most, often using methods like the mean squared error.

In a random forest, multiple trees operate together. This ensemble approach combines the predictions of several trees to produce a single result. The method increases accuracy and reduces overfitting, making it robust against variability.

A single decision tree can be prone to errors from noise in data. In contrast, a random forest averages predictions across trees, smoothing out anomalies and capturing more reliable patterns. This results in more consistent predictions across various scenarios.

Predicting Continuous Variables

Random forests are particularly useful for predicting continuous variables. This is accomplished through a method called ensemble averaging.

Each tree in the forest gives a prediction, and these predictions are averaged to form the final output.

Predicting continuous variables can be tricky, especially when data is complex or noisy. Random forests handle such situations well. They are flexible, managing non-linear relationships and interactions between variables that simpler models might miss.

This model’s strength lies in its ability to capture intricate data patterns. For example, random forests are often used to predict house prices or patient health metrics in healthcare.

They provide accurate and stable predictions while minimizing the risk of overfitting inherent in single-tree models. Random forests excel in various domains where reliable prediction of continuous outcomes is necessary.

Improving Model Performance

Better performance in Random Forest models can be achieved by focusing on adjusting hyperparameters, tackling overfitting, and ensuring accurate results. This involves fine-tuning different parts of the model to ensure it makes precise predictions and generalizes well to new data.

Tuning Hyperparameters

Tuning hyperparameters is crucial to enhancing the performance of Random Forest models. Key hyperparameters include the number of trees, maximum depth, and the number of features to consider at each split.

Adjusting these can impact the model’s accuracy and efficiency.

Grid Search and Random Search are commonly used methods for hyperparameter optimization. Using Python libraries like Scikit-Learn allows for systematic exploration of different hyperparameter combinations.

Optuna is another tool for hyperparameter optimization, offering advanced techniques to find the best model settings efficiently.

Strategies for Avoiding Overfitting

Overfitting happens when a model captures noise instead of the underlying pattern. Random Forest models can be prone to this without proper regulation.

To prevent overfitting, regularization techniques such as restricting the maximum depth of individual trees or setting minimum samples per leaf can be effective.

Another useful technique is using pruning to remove parts of the trees that provide little predictive power. This helps maintain the model’s generalization error at a reasonable level, ensuring it performs well on unseen data.

Avoiding overly complex models and keeping features relevant also aid in reducing overfitting.

Assessing Model Accuracy

Assessing a Random Forest model’s accuracy ensures it makes precise predictions and maintains high performance.

Cross-validation is a powerful tool here, as it splits the data into multiple sets to test the model’s reliability across different samples.

Accuracy metrics like Mean Absolute Error (MAE) or Root Mean Squared Error (RMSE) provide insights into prediction accuracy.

Visualizing feature importance assists in understanding which variables have the most impact on predictions.

Tools like Scikit-Learn can facilitate the evaluation process, allowing users to improve their Random Forest models effectively.

Advanced Ensemble Techniques

Advanced ensemble techniques play a crucial role in improving the accuracy and robustness of machine learning models. They utilize methods like boosting and bagging to create strong predictors from weak ones. The discussion will include a look at boosting strategies and popular algorithms like Gradient Boosting and XGBoost.

Boosting vs. Bagging

Ensemble techniques such as boosting and bagging enhance model performance in different ways. Bagging focuses on reducing variance by creating multiple versions of a prediction model and averaging them. A classic example is the Random Forest model. Each model is trained on random subsets of the data, making bagging effective for dealing with overfitting.

Boosting, on the other hand, aims to reduce bias by building models sequentially. Each new model tries to correct the errors of the previous ones.

Models become better at handling complex datasets with boosting. Popular algorithms like AdaBoost and Gradient Boosting stem from this concept.

While bagging independently builds models that are later combined, boosting works collectively to improve the final outcome.

Gradient Boosting and XGBoost

Gradient Boosting is an advanced boosting algorithm that builds models sequentially, with each one correcting the errors of its predecessors. It uses decision trees as its base model.

Gradient Boosting is powerful for dealing with complex datasets and patterns. It computes gradient descent to minimize prediction errors, making it suitable for regression and classification tasks.

XGBoost, an optimized version of Gradient Boosting, offers enhanced performance and efficiency. It provides faster computation times through parallel processing.

Additionally, it includes advanced capabilities like regularization, which improves its generalization.

XGBoost has become popular in competitions due to its accuracy and speed. It simplifies tuning parameters, which is essential for achieving optimal model performance.

XGBoost is widely adopted in both academic research and industry applications.

Feature Importance and Selection

Understanding feature importance and selection is crucial for improving the predictive performance of models like Random Forests.

This involves identifying which features contribute most to the model’s accuracy and how they can influence the overall results.

Evaluating Feature Importance

Random Forests use the decision tree algorithm to measure feature importance. Each feature’s contribution to model accuracy is assessed by looking at its impact on reducing variance.

Techniques such as Mean Decrease in Impurity and permutation importance help evaluate this.

Mean Decrease in Impurity calculates how much a feature reduces uncertainty. In contrast, permutation importance assesses a feature’s impact by observing changes in accuracy when the feature’s values are shuffled.

These measures help identify critical features that improve model robustness and performance.

Techniques for Feature Selection

Once important features are identified, selecting them properly is key to boosting model efficiency.

Random Forests automatically rank features, allowing practitioners to focus on the most significant ones. This process can improve model accuracy and reduce computation time.

A popular method is using Random Forest for feature selection, which constructs multiple decision trees and averages their predictions.

Other techniques, such as recursive feature elimination, systematically remove less important features.

Effective feature selection enhances model performance while reducing the risk of overfitting and enhancing interpretability.

Handling Data Within Random Forest

Random forests are effective for managing complex data. They excel in handling different types of data sets and dealing with missing values. This section breaks it down further.

Working With Different Data Sets

Random forests are versatile when it comes to data sets. They can work with both classification and regression tasks.

This adaptability is due to the nature of decision trees, which are flexible in interpreting different types of input data.

When building a random forest model, multiple decision trees grow using randomly selected samples from the dataset. This method, known as bootstrap aggregating or bagging, helps to stabilize predictions and prevent overfitting.

The randomness introduced by choosing subsets of data and features at each split ensures diversity among individual trees. This diversity is crucial for achieving robust performance and reliable predictions in a random forest.

Managing Missing Values Effectively

Handling missing values is an area where random forests shine. They can manage missing data without requiring imputation.

When a decision tree faces a missing value for a certain feature, it can use surrogate splits. These are alternative paths chosen based on other available features, allowing the model to continue processing efficiently.

In a random forest, because multiple trees participate in decision-making, the information can still be captured accurately, even if some data points have missing values. This results in more accurate predictions compared to other algorithms that need complete data.

The flexibility in handling missing values provides a significant advantage in real-world applications, where perfect datasets are rare.

Practical Implementation using Sklearn

Implementing a Random Forest algorithm using Sklearn involves using decision trees to enhance model accuracy and performance. It is essential to understand how to configure parameters, such as n_estimators, to optimize the Random Forest Classifier.

Using Sklearn’s Random Forest

Sklearn provides an efficient way to implement Random Forest through its RandomForestClassifier. It allows users to leverage the power of multiple decision trees for better prediction accuracy.

The key parameter, n_estimators, defines the number of trees in the forest. Higher values can produce better results but may increase computation time.

Users can import the Random Forest model using from sklearn.ensemble import RandomForestClassifier. This step is crucial in setting up the environment for further coding and experimentation.

Additionally, users should consider the dataset size and features as these affect the performance of the model.

Example: Building a Random Forest Classifier

To build a Random Forest Classifier, selecting suitable parameters is vital.

For example, initializing the model with RandomForestClassifier(n_estimators=100) provides a good balance for testing.

The classifier can be trained using the fit method on the training data, which may include datasets like the IRIS dataset, commonly utilized in tutorials.

from sklearn.ensemble import RandomForestClassifier
rf = RandomForestClassifier(n_estimators=100)
rf.fit(train_features, train_labels)

After training the model, predictions can be made using the predict method. Testing the model’s accuracy requires comparing these predictions to the actual data.

Techniques such as cross-validation further refine the model by assessing its performance across different data slices.

Using Random Forests with proper settings can significantly improve classification tasks.

Analyzing Random Forest

Random Forest is a robust machine learning method that addresses both bias and variance. It’s essential for users to understand how it balances model complexity, delivers accurate predictions, and explains feature importance.

Bias-Variance Trade-Off

Random Forest aims to strike a balance between bias and variance, crucial aspects in model development.

Bias measures error from overly simplistic models, while variance indicates sensitivity to fluctuations in data. Too much of either can lead to poor predictions.

With its ensemble of decision trees, Random Forest reduces variance by averaging results. This approach prevents overfitting, where a model is overly tailored to training data but performs poorly on new data.

Model complexity remains manageable as each tree learns from a subset, keeping bias low.

Interpreting Outputs and Results

Understanding Random Forest’s outputs is key in assessing its performance and gaining insights.

Feature importance ranks factors based on their contribution to prediction accuracy. This information helps identify which variables influence results most.

Prediction involves calculating the most frequent class for classification tasks or averaging outcomes for regression. Each tree reaches a decision at a leaf node, combining input features’ impact.

This offers clear interpretations of the final model, revealing patterns and relationships within the data.

Random Forest in Various Industries

A dense forest with a mix of trees, plants, and wildlife. Various industries such as agriculture, technology, and finance are represented within the forest, each with their own unique characteristics

Random Forest, a flexible ensemble learning method, finds broad applications in different fields. Its strength lies in using multiple decision trees for tasks like classification and regression, boosting predictive performance and accuracy across industries.

Applications in Finance

In finance, Random Forest plays a crucial role in decision-making. It is often employed for credit scoring, where it evaluates a client’s creditworthiness by analyzing different risk factors.

Random Forest models offer high predictive accuracy, making them reliable for assessing credit risk.

It is also used in fraud detection, processing vast amounts of transaction data to identify unusual patterns or activities. By doing so, financial institutions can prevent losses and protect customer assets.

These models excel in handling imbalanced data, which is common in fraud detection scenarios.

Moreover, portfolio management benefits from Random Forest as it can assist in stock market predictions. Its classification and regression capabilities help in making informed investment decisions, contributing to the optimization of asset portfolios.

Use Cases in Healthcare

In healthcare, Random Forest is vital for diagnosing diseases and patient risk analysis. It classifies different health conditions based on numerous patient data points, enhancing the accuracy of early diagnoses.

This is particularly important for complex diseases where precision is critical.

The algorithm is utilized in predicting patient outcomes and treatment responses. By analyzing historical data, Random Forest helps in identifying which treatments work best for specific patient groups, thus personalizing healthcare delivery.

Additionally, this tool assists in resource management by forecasting patient admission rates, helping hospitals allocate resources more effectively.

The capability to process large datasets efficiently makes Random Forest indispensable in the healthcare industry.

Future of Random Forest Algorithms

Random Forest algorithms are evolving with new trends and advancements that enhance their efficiency and accuracy. A comparative study with other algorithms reveals their strengths and areas for improvement.

Trends and Advancements

In the future, Random Forest methods will see improvements through advanced tuning of parameters like n_estimators, which determines the number of trees used in the model.

Increasing or optimizing this parameter can significantly improve model performance.

Machine learning advancements continue to focus on reducing computational costs. This is especially crucial for Random Forests, which can be resource-intensive.

Researchers are exploring ways to make these algorithms faster and more efficient to handle larger datasets without sacrificing accuracy.

Moreover, integrating Random Forests with other techniques like deep learning is gaining attention. This hybrid approach aims to combine the interpretability of decision trees with the power of neural networks, leading to more robust models.

Comparative Study with Other Algorithms

When compared to algorithms like XGBoost and neural networks, Random Forests remain competitive due to their simplicity and versatility.

Random Forests are often preferred for tasks requiring strong interpretability.

Though XGBoost may offer better performance in specific settings, Random Forests excel in handling diverse data types with less need for extensive preprocessing. This makes them particularly useful in fields where data can be messy or incomplete.

While neural networks show promise in handling large, complex datasets, they require more data and computational power. Random Forests provide a practical alternative, balancing performance and resource requirements, and continuing to hold significant relevance in machine learning.

Frequently Asked Questions

In this section, various aspects of the Random Forest algorithm are explored, including its training, theory, and comparison with other methods. Key applications in machine learning and techniques for managing overfitting are also covered. Additionally, the section examines how this method applies to regression problems.

How is a Random Forest model trained?

Training a Random Forest model involves creating multiple decision trees using different subsets of data. Each tree is trained on a sample of data chosen randomly, which helps in capturing different patterns in the data.

This method is effective in making accurate predictions and reducing variance.

What is the underlying theory of the Random Forest algorithm?

The Random Forest algorithm is based on the concept of ensemble learning, where the model builds numerous decision trees. Each tree independently predicts the outcome, and the results are aggregated.

For classification tasks, the majority vote is used, while for regression, the average of results is taken. This approach increases robustness and accuracy.

How does Random Forest differ from other ensemble methods?

Random Forest differs from other ensemble techniques like boosting by focusing on building a “forest” of independent decision trees. In boosting, trees are built sequentially, with each new tree correcting the errors of the previous ones.

Random Forest emphasizes diversity and parallel tree construction for more stable predictions.

What are the typical use cases for Random Forest in machine learning?

Random Forest is widely used for both classification and regression tasks. It excels in tasks like detecting fraud, image classification, and predicting customer churn.

Its versatility and ability to handle large datasets make it a popular choice for various machine learning applications.

How does Random Forest handle overfitting in decision tree algorithms?

Random Forest mitigates overfitting by averaging the predictions of multiple trees. Individual decision trees might capture noise and overfit the data, but Random Forest reduces this risk by using different subsets of data for each tree.

This aggregation of diverse models leads to more generalized predictions.

In what ways can Random Forest be used for regression problems?

In regression tasks, Random Forest predicts outcomes by averaging the results from each tree, which provides a robust estimate. This method handles complex relationships in data efficiently.

It is particularly useful in scenarios where the relationship between input variables and target is nonlinear or includes interactions.

Categories
Uncategorized

Learning Advanced Python Skills for Data Engineering: A Comprehensive Guide

Python Fundamentals

Understanding Python’s fundamentals is essential for mastering more advanced data engineering tasks.

Key components include basic syntax, managing data using variables, decision-making with control structures, and working with essential collections like lists and dictionaries.

Language Basics

Python is known for its clean and readable syntax, making it a popular choice for beginners and experts alike. The language uses indentation to define the structure of the code, which is crucial for functions, loops, and conditionals.

Learning how to implement these elements correctly is foundational.

Comments are also necessary for explaining code sections. They are added with the # symbol, helping programmers understand and maintain the code over time.

The simplicity of Python syntax reduces errors and enhances code readability, a significant advantage in data engineering where complexity is common.

Consistent practice with foundational syntax will improve fluency and efficiency in writing Python code.

Variables and Data Types

Variables in Python serve as containers for storing data values. They can hold various data types, such as integers, floats, and strings, each suited for specific roles in data operations.

Variable Declaration is simple and doesn’t require explicit type definition. For instance, name = "Data Engineer" creates a string, while age = 30 creates an integer. This flexibility encourages experimentation and ease of use.

Understanding data types like integers, floats, and strings is vital.

Lists are used for holding ordered collections of items, whereas dictionaries store key-value pairs. These structures allow efficient data manipulation, which is crucial in building and managing data pipelines.

Control Structures

Control structures are essential for directing the flow of a Python program.

Conditional statements, such as if, elif, and else, allow programs to make decisions based on conditions.

Loops, specifically for and while loops, are utilized to repeat actions until certain criteria are met. This is particularly useful for processing large data sets in data engineering.

Mastering these control structures allows programmers to automate and streamline repetitive tasks, enhancing productivity.

Control structures are central for developing complex algorithms that perform a wide range of data processing tasks efficiently.
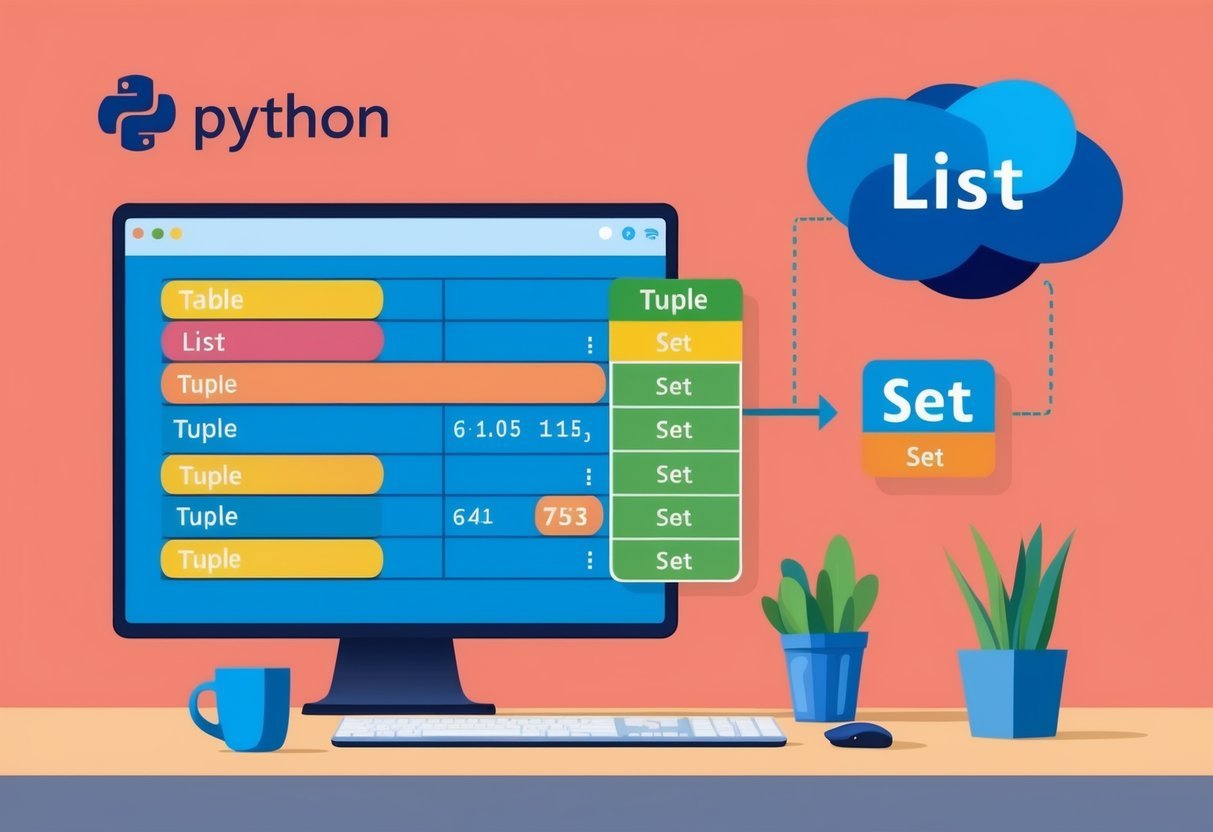
Python Collections

Python collections are versatile tools for storing and manipulating groups of data. Key collections include lists, tuples, sets, and dictionaries, each with unique characteristics.

  • Lists are ordered and mutable, making them ideal for dynamic collections.
  • Tuples are ordered and immutable, preserving data integrity.
  • Sets store unordered, unique items, useful for removing duplicates.
  • Dictionaries offer key-value pairing, which is handy for rapid data retrieval.

Understanding these collections allows engineers to handle complex data coordination.

Knowing when and how to use each type ensures optimized and efficient code when dealing with large volumes of data. Each collection type has its specific functions, making them versatile for various tasks in data processing and management.

Object-Oriented Programming in Python

Object-oriented programming (OOP) is a core aspect of Python programming that enhances coding skills for data engineering. Key concepts include defining classes, utilizing inheritance and polymorphism, and implementing encapsulation and abstraction.

Defining Classes

In Python programming, classes serve as blueprints for creating objects. They encapsulate both data (attributes) and functions (methods) that operate on that data. This tool allows developers to structure their code by partitioning data and behavior.

A basic class structure includes a __init__ method, which initializes the object’s attributes. For instance, defining a class Car involves specifying its make, model, and year. The __init__ method then sets these attributes when a new Car object is instantiated.

Effective use of classes can simplify code management and improve clarity.

Inheritance and Polymorphism

Inheritance enables a class to derive from another, promoting code reuse and efficiency. In Python, a child class inherits attributes and methods from a parent class, while also introducing unique features.

For example, a Vehicle class might serve as a parent to Car and Bike, allowing shared properties like speed, yet offering specific functions such as honk() for Car. Polymorphism allows these classes to redefine methods as necessary, enabling flexible and dynamic code behavior.

Polymorphism further ensures that a single interface can handle different data types, adding versatility to code by allowing objects to be treated as instances of their parent class.

Encapsulation and Abstraction

Encapsulation in coding skills emphasizes restricting direct access to certain attributes and methods to ensure controlled interaction. In Python, this is often done using private variables, marked by a leading underscore (e.g., _engine). Encapsulation preserves the internal state of an object, safeguarding it against unauthorized modification.

Abstraction simplifies complexity by hiding unnecessary details from the user. Through abstraction, Python developers expose only relevant parts of an object to the outside world. This is typically achieved by defining public methods that provide an interface to interact with data.

Together, encapsulation and abstraction enhance the security and usability of Python programs.

Advanced Python Libraries

Advanced Python libraries play a crucial role in data engineering tasks, facilitating efficient data handling and numerical computations. Among these, Pandas and NumPy are renowned for their capabilities and ease of use.

Data Handling With Pandas

Pandas is a powerful tool for data manipulation and analysis. It is especially useful for handling structured data. It provides data structures like DataFrames that allow users to manipulate data effortlessly. With its various functionalities, Pandas simplifies tasks such as data cleaning, filtering, and transformation.

Data engineers often use Pandas for tasks involving large datasets. The library supports operations like grouping and merging data, which are essential for preparing datasets for analysis. Its intuitive syntax makes it accessible for quick explorations and in-depth data investigations.

Pandas also integrates well with other libraries used in data engineering, offering compatibility that enhances its utility. Whether aggregating data or conducting exploratory data analysis, Pandas remains a preferred choice for its robust performance.

Numerical Computing With NumPy

NumPy is a foundational library in Python, crucial for numerical computing. It is particularly noted for its array objects that allow efficient storage and manipulation of data. NumPy arrays are faster and more compact than Python lists, making them ideal for numerical tasks.

Data engineers use NumPy for performing complex mathematical operations. Its functions enable high-speed computations required for large-scale data engineering tasks. This is achieved by providing built-in support for large matrices and multidimensional data, which are common in various applications.

The library works seamlessly with other Python libraries, forming the backbone for advanced operations in data engineering and scientific computing. With tools for linear algebra, random number generation, and more, NumPy is indispensable for engineers who require precise and quick computational solutions.

Data Engineering Essentials

A computer screen displaying code in Python, surrounded by data engineering tools and resources

Data engineering involves working with various technologies and tools to manage and process data efficiently. This includes handling databases, creating data pipelines, and performing file operations like reading and writing data.

Working With Databases

In data engineering, databases are crucial for storing and retrieving large amounts of data. Engineers must understand SQL to interact with relational databases and NoSQL for non-relational data storage. These skills help in executing complex queries, data modeling, and indexing.

Databases like MySQL, PostgreSQL, and MongoDB provide versatile options for different data operations. Knowledge of database management systems (DBMS) is also important for ensuring data integrity, security, and performance optimization.

Data Pipelines Fundamentals

A data pipeline is a series of processes used to automate the flow and transformation of data. Understanding ETL (Extract, Transform, Load) is vital for designing effective pipelines.

Tools like Apache Spark and Apache Airflow help in creating scalable and efficient pipelines. Engineers should be proficient in handling big data platforms like Hadoop.

Pipelines enable the processing of real-time data, which is essential for timely insights and decision-making. Engineers must also focus on error handling and monitoring to maintain data quality.

File Handling and I/O Operations

File handling is essential for working with different data formats such as JSON and CSV. Engineers need to handle files for both input and output operations.

They often use Python for its libraries like pandas and NumPy, which simplify data manipulation. Understanding file paths, directories, and how to handle large files efficiently is important.

Techniques like file compression and buffering improve performance and resource management. These skills are critical when dealing with massive datasets typical in large-scale data engineering projects.

Building and Maintaining Data Pipelines

Data pipelines are essential for moving data efficiently across systems. They involve extracting data, transforming it into useful formats, and loading it where needed. This section covers key areas in managing these pipelines: ETL processes, data transformation techniques, and pipeline orchestration.

ETL Processes

ETL stands for Extract, Transform, Load. It is a core component of data pipelines.

The extraction phase pulls data from various sources, such as databases or APIs. This raw data can often be messy or incomplete.

During transformation, the data is cleaned, formatted, and modified to suit specific needs or standards.

As data engineers transform data, they often use programming languages like Python or SQL. These languages help to automate transformations and ensure data quality.

Finally, the load process involves importing the transformed data into a destination system. This could be a data warehouse or an analytics platform, where the data is ready for further analysis.

Successful ETL processes ensure reliable and timely data flow across systems.

Data Transformation Techniques

Data transformation is crucial in a pipeline. It involves converting raw data into a structured format.

Techniques range from basic operations like filtering and sorting to more complex ones like aggregating and joining data from different sources.

Python libraries such as Pandas and NumPy are often used to handle these tasks efficiently. They offer functions to manipulate large datasets with ease.

Additionally, transformations may involve handling missing values and outliers. These steps ensure that data is consistent and accurate.

Advanced transformation techniques might include creating calculated fields or standardizing formats. By doing this, the data becomes more useful and aligns with business goals.

Understanding these techniques facilitates robust data processing and allows clearer insights.

Pipeline Orchestration

Pipeline orchestration involves managing and scheduling data pipeline processes. This is essential for timely data delivery and ensuring processes run in the correct order.

Tools like Apache Airflow or Luigi are commonly used for this purpose. They help automate and monitor workflows efficiently.

Using these tools, engineers can define dependencies between different tasks. For example, a transformation task might need to complete before loading data.

Orchestration ensures all tasks are executed and monitored seamlessly.

By organizing the pipeline workflow, businesses can avoid data bottlenecks and improve efficiency. This reliability is crucial for making data-driven decisions.

Proper orchestration also includes error handling, ensuring that any issues are quickly identified and resolved.

Data Storage and Retrieval

A computer screen displaying code for data storage and retrieval using Python

Understanding how to store and retrieve data efficiently is crucial for data engineering. This area focuses on systems that handle different types of data, including relational databases and NoSQL solutions. Each type offers distinct advantages for scaling and maintaining data processes.

Relational Databases

Relational databases use structured query language (SQL) to store and manage data in rows and columns. They are well-suited for structured data that needs to be consistent and reliable.

Common examples include MySQL, PostgreSQL, and Oracle Database.

Relational databases are essential for applications requiring complex transactions and queries. They support features like ACID compliance, which ensures that all transactions are processed reliably.

These databases can efficiently handle large volumes of data and are often used in banking, telecommunications, and e-commerce.

Normalization is a key concept, ensuring that data is efficiently organized to minimize redundancy. This process helps maintain data integrity.

Relational databases are ideal for use cases where data relationships are crucial, and where data integrity is a priority.

NoSQL and Big Data Solutions

NoSQL databases are designed to handle unstructured data and large datasets. They are ideal for applications where relational databases may not perform efficiently.

NoSQL solutions include MongoDB, Cassandra, and Couchbase. These databases offer flexibility in data models, supporting document, key-value, column-family, and graph models.

This flexibility makes them suitable for applications with rapidly changing requirements, like social media platforms.

NoSQL databases are often used in combination with big data tools like Apache Spark. These tools enable data engineers to process and analyze vast amounts of data efficiently.

With the ability to scale horizontally, NoSQL solutions handle massive data traffic smoothly, making them essential for enterprises dealing with big data challenges and real-time analytics.

Leveraging Cloud Technologies

A computer screen displaying Python code with cloud icons and data engineering symbols

Cloud technologies are vital for modern data engineering, offering scalable and flexible solutions. They help in efficiently managing data pipelines and reducing infrastructure costs.

Cloud Solutions for Data Engineering

Cloud solutions are transforming data engineering by providing robust platforms like Google Cloud, AWS, and Microsoft Azure. These platforms offer a wide range of tools to build, deploy, and manage data pipelines effectively.

Big data processing frameworks such as Apache Spark or Hadoop run smoothly on cloud environments, ensuring scalability and performance.

Data engineers often use these cloud platforms to set up ETL processes, store large datasets, and run analytics effectively. This enables organizations to process complex data workflows without worrying about physical infrastructure limitations.

Advantages of Cloud-Based Data Pipelines

Cloud-based data pipelines offer numerous advantages, making them a preferred choice for data engineers.

One significant benefit is scalability. Cloud platforms can easily handle increasing data volumes without requiring additional hardware. They provide on-demand resources, ensuring cost-effective scalability.

Another advantage is flexibility. Cloud platforms support various data handling tools and programming languages, such as Python and SQL, making it easier to integrate them into existing systems.

This allows data engineers to quickly adapt to changing project requirements and technological advancements.

Finally, cloud-based pipelines ensure reliability by offering high availability and robust security measures, protecting data integrity and privacy. This helps organizations maintain a competitive edge by ensuring that their data infrastructure is both secure and efficient.

Automating Data Engineering Tasks

Automating data engineering tasks can significantly enhance efficiency and reduce manual errors. By employing coding skills in scripting, engineers can set up processes to run seamlessly.

Scheduling these jobs ensures they occur at optimal times, elevating productivity.

Scripting and Automation

Scripting is vital for automating repetitive data tasks. Engineers use programming languages like Python to write scripts that handle data extraction, transformation, and loading (ETL).

These scripts can manage large datasets efficiently, performing operations such as data cleaning and format conversion.

Python libraries such as Pandas and NumPy are popular for manipulating data within scripts. Leveraging the power of scripts reduces the manual workload and mitigates errors.

This allows engineers to focus on more complex data challenges, enhancing overall data pipeline efficiency.

Scheduling Jobs

Scheduling jobs ensures that automated tasks run at specific times or intervals. Tools like Apache Airflow and Cron are often used for this purpose.

Airflow, for instance, provides a detailed user interface to manage complex workflows visually, adding flexibility to task management.

Engineers set parameters for task frequency, such as hourly or daily, to suit the needs of the project. With these scheduling tools, data pipelines are kept up-to-date without manual intervention.

This reliability is crucial in environments where data insights must be fresh and accurate for decision-making.

Real-World Data Engineering Projects

Engaging in real-world data engineering projects is crucial for gaining practical experience and improving problem-solving skills. This section explores hands-on projects aimed at analyzing retail sales data and developing comprehensive capstone projects.

Retail Sales Data Analysis

Retail sales analysis projects provide an opportunity to work with diverse datasets. Participants can learn to manage large volumes of transaction data, track sales trends, and generate insights.

Key tasks involve cleaning and transforming raw data to ensure accuracy.

Analyzing sales records from multiple stores or channels is a valuable exercise in building data pipelines. Python and libraries like Pandas and NumPy are essential tools.

Using Airflow for scheduling and automating data tasks enhances efficiency.

Creating visualizations with Matplotlib or Tableau helps present findings clearly. This project helps develop skills in database management, SQL, and data visualization.

Capstone Project Development

Capstone projects challenge participants to apply everything they’ve learned. These projects often span months and encompass data collection, transformation, and visualization.

A comprehensive capstone project could involve constructing a data pipeline handling real-time data flows.

It’s essential to identify a meaningful problem or use case, then devise a solution using advanced Python techniques.

These projects often require crafting custom scripts for automation.

Working in teams is beneficial for large-scale projects. Collaboration can mirror workplace dynamics, helping participants refine both technical and soft skills.

A successful capstone project can significantly enhance a portfolio, demonstrating a mastery of data engineering concepts.

Integrating Machine Learning Workflows

A computer with multiple screens displaying code, data visualizations, and machine learning algorithms. A bookshelf filled with Python programming books in the background

Integrating machine learning workflows involves preparing data effectively and deploying models for practical use. Key steps include data cleaning, feature selection, and utilizing platforms for model deployment.

Data Preparation for ML

Effective data preparation is critical to the success of machine learning models. It involves cleaning the data to remove noise and inconsistencies.

This step may utilize Python libraries such as Pandas and NumPy for efficient data manipulation.

Feature selection is another vital task, where important variables are chosen to improve model accuracy and performance. These variables help in creating a robust model that generalizes well to unseen data.

Handling missing data is also a part of this process. Imputation techniques or removing incomplete rows might be needed to ensure the dataset is ready for analysis.

Once the data is clean, scaling and transformation techniques prepare it for machine learning algorithms. This creates a dataset that is not only clean but also enhances learning and prediction strength.

Operationalizing ML Models

Operationalizing machine learning models means taking them from development to production. This step ensures that models are not just accurate but also scalable and maintainable.

Using tools like Apache Airflow or MLflow helps automate workflows and manage machine learning lifecycle stages efficiently.

These tools enable version control, tracking of experiments, and environment management, ensuring smooth transition from training to deployment.

Kubernetes and Docker can be employed for containerization, making deployment less complex and more portable across platforms.

Setting up continuous integration and continuous deployment (CI/CD) pipelines allows for seamless updates and monitoring.

This approach minimizes downtime and ensures the models remain effective and current over time, keeping up with changing data patterns and business needs.

Professional Growth in Data Engineering

A person studying a book on advanced Python, surrounded by data engineering tools and resources

To grow in data engineering, professionals should focus on building a strong portfolio and engaging in effective networking. Highlighting skills through well-organized projects and leveraging platforms like LinkedIn can help in standing out. Networking plays a crucial role in finding opportunities and connecting with industry experts.

Building a Strong Portfolio

A compelling portfolio showcases a data engineer’s skills and achievements. Including projects that demonstrate expertise in programming languages and data handling tools is essential.

For instance, a well-documented project using Python for data engineering illustrates proficiency.

Adding case studies with clear objectives and results can make the portfolio more attractive. Certificates from platforms like Coursera support credibility and highlight continued education efforts.

Using a variety of media such as code snippets, visualizations, and project narratives gives a comprehensive view of skills.

LinkedIn and Networking

Networking is a key component in professional growth. A LinkedIn profile acts as a digital resume, helping to connect with peers and industry leaders.

Keeping profiles updated with recent projects and skills improves visibility.

Engaging with groups and discussion forums on LinkedIn can open new opportunities and provide industry insights. Reaching out to connections for informational interviews helps in gaining deeper understanding and advice from experienced professionals.

Attending webinars and seminars expands knowledge and offers chances to meet potential employers.

Building a strong network fosters collaboration and opens doors to various career advancements.

Certification and Continuing Education

A computer screen displaying Python code with a certification and continuing education logo in the background

Data engineering is a rapidly evolving field, and gaining recognized certifications can give professionals a significant edge. Continuing education is key for staying current and competitive. This section covers certifications as well as strategies for lifelong learning.

Gaining Recognized Certifications

Earning certifications such as the Professional Certificate in Data Engineering can be crucial for those seeking to advance their careers. These certifications demonstrate expertise in areas like Python, SQL, and data pipeline management.

Courses that offer a sharable certificate, like the Applied Python Data Engineering specialization, provide proof of completion that can be added to professional profiles.

Such credentials enhance a resume, making it more appealing to potential employers. They help in learning Python at an advanced level and showcase the ability to handle complex datasets.

Many certifications require passing exams that test practical and theoretical knowledge. This ensures that the individual not only learns Python but also masters its application in real-world scenarios.

Investing time in these certifications builds proficiency in essential tools and platforms relevant to data engineering.

Lifelong Learning Strategies

Staying updated with the latest technologies requires a commitment to lifelong learning. Professionals should engage with online platforms offering the latest courses on data engineering tools and techniques.

Subscribing to resources like LinkedIn Learning’s Python for Data Engineering allows for continuous skill enhancement.

With a vast library of courses, individuals can delve into specific topics or basic refresher courses, ensuring they remain knowledgeable about industry standards.

Joining professional communities can also be beneficial. These platforms facilitate networking and improvement through discussions and sharing of experiences.

Reading industry publications and participating in workshops are additional ways to ensure constant growth and learning in the field.

Frequently Asked Questions

A person studying a thick book on advanced Python, surrounded by computer screens and reference materials

In data engineering, Python plays a crucial role in building efficient workflows. The following sections cover key aspects like essential libraries, application of advanced concepts, and the importance of distributed computing.

What Python libraries and frameworks are essential for data engineering?

For data engineering, libraries such as Pandas, NumPy, and PySpark are critical. Pandas is used for handling data structures, while NumPy performs scientific calculations. PySpark helps in distributed data processing, which is essential for managing large datasets efficiently.

How can I apply advanced Python programming concepts in data pipeline creation?

Using object-oriented programming and decorators can optimize pipeline development. Designing reusable classes ensures scalability, while decorators can modify functions dynamically. These practices enhance the flexibility and maintainability of data pipelines.

Which online resources or courses are best to become proficient in Python for data engineering?

Platforms like DataCamp and Real Python offer comprehensive courses. They cover everything from Python basics to advanced data engineering techniques, focusing on real-world applications and exercises to build practical skills.

What are the prerequisites for mastering Python in the field of data engineering?

A solid grasp of programming fundamentals, including data structures and algorithms, is necessary. Familiarity with databases and an understanding of SQL is crucial. These basics form the foundation needed to tackle complex data engineering tasks using Python.

In what ways does Python for data engineering differ from Python for data science?

Data engineering often focuses on building and maintaining reliable data pipelines. It emphasizes scalability and efficiency.

In contrast, data science uses Python for analysis and visualization. While there is overlap, data engineering requires specific skills in managing large-scale data operations.

How important is it to understand distributed computing when working with Python for data engineering?

Understanding distributed computing is vital, especially when dealing with large datasets.

Tools like PySpark enable distributed processing, making tasks efficient and scalable.

This knowledge is crucial for building robust data pipelines that can handle high data volumes without compromising performance.

Categories
Uncategorized

Learning About Version Control Within the Scientists Workflow: Streamlining Research Processes

Understanding Version Control

Version control is a system that helps track changes in files over time. It is essential for managing code in software development and for scientists working with data. These systems allow users to save different versions of their work, making it easy to roll back to earlier states if needed.

Version control systems like Git enable collaboration by allowing multiple people to work on the same files simultaneously. When users make changes, they create a commit, which is a saved snapshot of the project. Each commit includes a commit message that describes the changes made.

The commit message serves as a reminder for future reference and helps others understand the reasons behind the changes. It is important to write clear and descriptive messages to maintain clarity among team members.

Version control is an iterative process. As changes are made, new versions are created, providing an ongoing, organized history of project developments. This history aids in the reproducibility of experiments and allows scientists to share accurate results.

Data version control tools extend the capabilities of traditional version control systems to handle large datasets and machine learning models. By tracking changes in both code and data, these tools assist researchers in maintaining comprehensive records.

Best practices for version control include committing changes regularly, using meaningful commit messages, and frequently merging changes to avoid conflicts. By following these strategies, scientists can enhance their workflow efficiency and accuracy.

Fundamentals of Git

Git plays a crucial role in version control, offering tools to manage code changes efficiently. It allows users to create branches, merge changes, and maintain a detailed commit history for trackability and collaboration.

Git Basics

Git is a distributed version control system that tracks changes in code. It enables developers to create branches, which serve as independent lines of development. These branches allow multiple changes and experiments without affecting the main codebase.

Users can merge branches to integrate changes, and with commands like git clone, git pull, and git push, they can easily copy repositories, update their local copy, and share changes with others. Commit history in Git logs each change for easy reference.

Learning Git

Learning Git involves understanding basic commands and concepts. Beginners should start by mastering essential commands such as git init to set up repositories and git add to stage changes. git status provides an overview of current changes.

Hands-on practice helps in grasping how branches and merging work together. Tutorials, courses, and online platforms like Anaconda offer structured paths for learning Git, focusing on more complex tasks to boost productivity.

Git Cheat Sheet

A Git cheat sheet is a valuable tool for developers. It provides quick reference to essential Git commands. Key commands include:

  • git clone: Copies a remote repository.
  • git commit: Saves staged changes with a description.
  • git pull: Fetches and integrates changes from a remote repository.

These concise references help speed up the development process by making common tasks readily accessible and reducing the need to memorize every command. For scientists and developers alike, having a Git cheat sheet can enhance efficiency when working on collaborative projects.

Setting Up a Git Repository

Setting up a Git repository involves creating a local repository and connecting it to a remote repository for better version control and collaboration. The process includes initializing a new Git repository and linking it to platforms such as GitHub or GitLab.

Git Initialization

When starting a new project, initializing a Git repository is the first key step. To do this, navigate to the desired directory and run the command git init. This creates a hidden .git directory, which tracks all changes and version history within the folder. It’s essential for maintaining the project’s source control locally.

Once initialized, files must be added and committed to the repository. Use git add filename to stage changes, and git commit -m "Commit message" to save them. This workflow ensures that changes are tracked and easily reversible if needed.

Using Git locally provides significant control. Team members can work on the same project without causing conflicts. Projects benefit from version history, enabling easy backtracking.

Remote Repositories

After initializing a local repository, linking to a remote repository such as GitHub or GitLab is crucial for collaboration and backup. Remote repositories store project data on a separate server, allowing access from anywhere.

To link a local repository with a remote one, use git remote add origin URL, where URL is the link to the remote repository. This connection means local commits can now be pushed to the remote server with git push.

Cloning is another vital process related to remote repositories. It involves copying an entire repository from a remote server to a local machine using git clone URL. This flexibility allows contributors to work on the latest version of the project from various locations, ensuring real-time collaboration and updated contributions.

Collaboration and Team Workflows

Collaboration in software projects often hinges on the effective use of tools like Git and GitHub. These platforms support workflows that include features such as pull requests, code reviews, and careful branch management. These processes help ensure that team members can work seamlessly together while maintaining code integrity and quality.

Pull Requests

Pull requests are a crucial part of collaborative workflows. They let team members propose changes to the codebase, which can then be reviewed and discussed before being merged. This process allows for better code quality as issues can be spotted before they affect the main branch. Pull requests also enable transparency by keeping a record of changes and the discussions around them.

A good pull request includes a clear description of the changes, why they’re needed, and any impacts on other parts of the project. This clarity helps reviewers understand the purpose and scope of the proposed changes. Including relevant test results in the pull request can enhance the review process, making it easier to approve safe and reliable updates to the code.

Code Review

Code review is a collaborative process where team members examine each other’s code during or after making changes. This practice not only helps catch bugs and inefficiencies early but also promotes collective ownership of the codebase. Reviews encourage sharing knowledge across the team, leading to improved coding standards and practices.

During a code review, it’s important for the reviewer to focus on the code’s logic, readability, and adherence to the project’s guidelines. Using comments to highlight parts of the code that need improvement fosters a constructive dialogue. Tools like GitHub make it easy to leave feedback directly on lines of code, simplifying the review process.

Branch Management

Branch management is essential for handling parallel development work efficiently. In Git, branches are used to develop features, fix bugs, or perform experiments separately from the main codebase. This isolation helps prevent unfinished or problematic code from being integrated into the stable version of the project.

Each branch should follow a clear naming convention to indicate its purpose, which simplifies navigation for the team. Regularly merging changes from the main branch into feature branches helps keep them up-to-date and reduces conflicts when the feature is ready to be part of the main project. Managing branches effectively ensures a smooth workflow and minimizes disruption during merges.

Distributed Version Control

Distributed version control systems, such as Git and Mercurial, allow every user to have a full copy of the entire project history on their local machine. This model offers flexibility in collaboration and ensures robust backup and recovery options.

Centralized vs. Distributed Models

In centralized version control, a single server holds the main project repository, and users check out their working copies from this central location. This means that if the server goes down, access to the version history can be compromised.

Distributed systems, by contrast, provide each user with a complete copy of the repository. This allows for local operations, faster access to project history, and offline work.

With distributed systems, users can perform merges and clones locally, reducing dependency on network connections. Both Git and Mercurial use this approach to enhance collaboration and efficiency, offering strong support for branching and merging, which are essential for modern software development workflows.

Integration in Software Development

Software development requires efficient processes to manage and synchronize code changes. Integrating practices like Continuous Integration (CI) is essential for improving collaboration and automating workflows. By using platforms like GitHub and GitLab, developers can streamline their processes.

Continuous Integration (CI)

Continuous Integration is a practice where developers frequently integrate code into a shared repository, such as GitHub or GitLab. Each integration is usually verified by an automated build and testing system to detect errors early.

CI enables teams to maintain a clean repository, reducing integration headaches. It automates repetitive tasks, such as compiling code and running tests, thus freeing up developers to focus on coding. Platforms like AWS provide scalable resources to handle the demands of CI pipelines, making it easier to ensure consistent and rapid deployment. Through CI, software development becomes more efficient, allowing for faster delivery of reliable products.

Best Practices for Version Control

A scientist's desk with a computer displaying version control software, surrounded by research papers and notebooks

Implementing best practices in version control is crucial for efficient management of projects. By following established methods, teams can ensure better collaboration and project flow.

Use Clear Commit Messages

Commit messages should be informative and concise. A clear message helps collaborators understand what changes have been made and why. This clarity is essential for tracking progress and identifying issues quickly.

Track Changes Across All Files

Version control isn’t just for code. Data versioning is vital in data-driven projects. Tools like DVC enable users to manage datasets efficiently, ensuring every modification is recorded and retrievable. This not only aids in project management but enhances the project’s reproducibility.

Practice Effective Branch Management

Branch management is key in keeping projects organized. By creating separate branches for different features or issues, users can work independently without interfering with the main project code. This practice encourages parallel development and reduces the risk of conflicts.

Ensure Reproducibility

Version control enhances reproducibility by maintaining a history of changes. Scientists and developers can revert to previous states of the project, making it easier to understand and duplicate past results. This reliability is fundamental in research and development environments.

Version Control in Machine Learning Projects

A scientist working on a machine learning project, with multiple versions of code and data being organized and managed within a workflow

Version control is a key element in machine learning projects. Managing versions of data and models is essential for effective MLOps. It ensures reproducibility and enables easy debugging. Implementing these practices enhances workflows and helps maintain consistency.

Data Versioning

In machine learning, data plays a critical role. Data versioning helps track changes over time, making it easier to revert back to previous datasets if necessary. This is important for maintaining reproducibility and consistency across experiments.

Using tools like DVC can integrate well with continuous integration (CI) pipelines, ensuring that the correct data versions are used in each step. This practice aids in automating testing and deployment processes, especially in large-scale data science projects. It allows for smooth collaboration among team members, ensuring everyone works with the same datasets.

Model Version Control

As models evolve, it’s crucial to manage their versions efficiently.

Model version control tracks each training iteration, enabling data scientists to identify performance variations in machine learning models. This allows teams to revert to previous versions of models when issues arise, simplifying debugging and improving workflow efficiency.

Implementing a model registry within tools like MLflow streamlines this process.

It provides a centralized location to store, organize, and retrieve different model versions. This ensures that each team member accesses the correct model version, facilitating collaboration and preventing discrepancies in results.

Data Science and Replicability

A scientist working at a computer, surrounded by data charts and graphs, with a focus on version control and replicability within their workflow

Replicability is a key aspect of data science. It ensures that results can be repeated with similar accuracy by different researchers. This is important for maintaining transparency in scientific work.

When data scientists create a workflow, they aim to produce results that others can reproduce.

Using tools like Jupyter Notebooks can help achieve this goal.

Notebooks allow data scientists to combine code, data, and explanation all in a single document. This makes it easier for others to understand and replicate the workflow.

Large datasets are common in data science, and handling them accurately is crucial.

Version control systems help track changes, which aids in managing such datasets efficiently. They allow data scientists to collaborate and ensure that everyone is working on the same version of data.

Reproducibility goes hand in hand with replicability. A reproducible analysis means that using the same input data and analysis steps leads to the same results.

This can be achieved when proper documentation and sharing practices are followed.

Implementing version control in data science projects promotes both replicability and reproducibility. It provides a framework that tracks code, data changes, and model iterations. For more on how version control supports replicability in data science, consider exploring a comprehensive guide.

These practices ensure that scientific findings are robust and reliable, making each project a valuable addition to the wider community of knowledge.

Handling Large Datasets and Binary Files

A scientist at a computer, surrounded by stacks of large datasets and binary files, learning about version control within their workflow

Managing large datasets and binary files is crucial in scientific workflows. Traditional version control systems like Git excel in handling code but struggle with large data. This can cause issues when managing extensive datasets.

Data Version Control (DVC) is a tool specifically designed to tackle these challenges.

It works seamlessly alongside Git to manage large datasets and files. DVC tracks data files without cluttering the Git history.

Aspect Git DVC
Ideal for Code Large datasets, binary files
Data storage Limited External storage supported
Integration Poor with large data Excellent with Git

DVC supports various cloud storage options.

It allows users to connect to remote storage solutions like AWS, Google Drive, and Azure. This flexibility ensures that large datasets remain easily accessible and manageable.

For binary files, Git LFS (Large File Storage) is often used to prevent repository bloat.

It replaces large files with text pointers in Git, storing the actual content outside the main repository. This keeps the repository size manageable and efficient.

Using DVC or Git LFS can significantly enhance productivity in workflows dealing with large data. These tools ensure efficient data versioning, making it easier to revert changes and collaborate effectively.

Data scientists can improve their efficiency by adopting these practices and keeping their workflow smooth and organized.

For more details on using DVC, check out the complete guide to data version control with DVC.

Integrating Version Control with Development Tools

A scientist working at a computer, with various development tools and version control software open on the screen

Version control systems are crucial for managing code changes and collaboration in software development. Integrating them with development tools can streamline workflows and increase productivity, especially in environments like IDEs where developers spend most of their time.

IDE Integration

An Integrated Development Environment (IDE) simplifies coding by combining tools like an editor, compiler, and debugger.

Many IDEs, such as RStudio, Eclipse, and PyCharm, support version control systems like Git. This integration allows developers to manage repositories directly within the IDE, providing functionalities such as commit changes, branch management, and conflict resolution.

Using version control within an IDE means users can track changes without leaving their coding environment, enhancing efficiency.

Jupyter Notebook users can also integrate version control.

Since it’s widely used in data science and research, managing its code and documentation with Git helps maintain an organized workflow. This integration is particularly useful for open source projects, as it ensures that every change is logged and reproducible, enhancing the reliability and transparency of the work.

Frequently Asked Questions

A scientist at a computer, surrounded by research papers and notes, accessing version control software to manage their workflow

Version control systems provide significant benefits to scientific research by improving collaboration, enhancing reproducibility, and integrating seamlessly with existing tools. Scientists often encounter practical challenges in adopting these systems but can gain valuable insights by understanding their applications and best practices.

How can version control benefit scientific research workflows?

Version control allows multiple researchers to collaborate without overwriting each other’s work. It creates a record of changes, so previous versions of data and code can be accessed at any time. This is essential for experiments where precise tracking of changes improves reliability.

Which version control systems are most commonly used in scientific projects?

Git is the most commonly used version control system in scientific projects. Its use is widespread due to its robust features and integration with platforms like GitHub. Systems like DVC are also popular for managing large datasets.

What are the best practices for managing data and code versions in a collaborative scientific environment?

Best practices include using a consistent branching strategy, like the “feature branch” workflow discussed in MLOps Gym’s version control best practices. Documentation of changes through commit messages and maintaining a structured project directory also enhance collaboration and efficiency.

How does version control integrate with other tools commonly used by scientists?

Version control tools often work well with data platforms and analysis environments.

For instance, Git integrates with environments like Jupyter Notebooks and code hosting platforms such as GitHub, ensuring seamless work continuity across different stages of the research process.

Can you provide an example of how version control improves reproducibility in scientific research?

By maintaining detailed records of changes in data and analysis code, version control enables researchers to reproduce experiments accurately. Git’s commit messages provide context for each modification, helping to recreate the exact circumstances under which an analysis was conducted.

What challenges might scientists face when integrating version control into their existing workflows?

Scientists may face a learning curve when adapting to version control systems, especially if they’re used to working with traditional data management methods.

They might also encounter challenges in setting up and maintaining a repository that supports multi-person collaboration without conflicts.

Categories
Uncategorized

Learning About Python Sets: A Comprehensive Introduction

Understanding Python Sets

Python sets are an important and useful data type. They are one of Python’s built-in data types, designed to work with a collection of unordered, unique elements.

Key Characteristics:

  • Unordered: Unlike lists or tuples, sets do not maintain any specific order.
  • No Duplicate Elements: Each element in a set is unique. This makes sets an ideal choice for removing duplicates from a data collection.

Mutability:

  • A set is a mutable type, meaning that the set itself can be changed.
  • Immutable Elements: Elements within a set must be immutable. This means they cannot be altered once they are in the set. Typical immutable data types include numbers, strings, and tuples.

Creating Sets:

A set can be created using curly braces {} with a comma-separated sequence, or by using the set() function. For example:

my_set = {1, 2, 3}
another_set = set([4, 5, 6])

Sample Usage:

fruit_set = {"apple", "banana", "cherry"}
print(fruit_set)

Advantages:

  • Fast Membership Testing: Sets allow quick checks to see if an item exists within the set.
  • Mathematical Operations: Sets support operations like union, intersection, and difference, which help in efficiently managing collections of data.

For more detailed information, explore different set operations and their benefits, such as in this detailed guide on Python sets.

Set Basics and Creation

Python sets are a collection data type that is unordered and unindexed, which makes them distinct from lists and dictionaries. Sets are mainly used for storing unique items and performing operations like union or intersection. Understanding how to create and define sets is crucial for effectively using them in programming.

Defining a Set

A set in Python is a collection of unique elements. Unlike lists or tuples, sets do not allow duplicate values, which makes them ideal for storing unique items.

Sets are defined using curly braces {} with elements separated by commas. They can hold items of different types such as integers, strings, and tuples, but they cannot contain mutable elements like lists or other sets.

Here is an example of a set containing integers and strings:

my_set = {1, 2, 'Python'}

The unordered nature of sets means that their items do not have a defined order. Thus, you cannot access elements by an index like you would with a list.

Creating a Set with set() Constructor

The set() constructor is another way to create sets, especially when converting other iterable data types like lists or strings to a set. This method is beneficial for removing duplicates from a sequence.

The set() function takes an iterable as an argument and returns a set containing unique elements from that iterable.

Here’s a practical example:

my_list = [1, 2, 2, 3, 4]
unique_set = set(my_list)  # unique_set will be {1, 2, 3, 4}

The set() constructor is versatile, allowing for different types of input. It’s particularly useful when you want to perform operations that require unique elements, like comparing two sequences or generating a set from a string’s characters.

Creating a Python Set

Aside from the set() constructor, you can also directly create a set using curly braces. This method is straightforward and intuitive when the elements you want to include are known beforehand.

It’s important to ensure all elements are hashable, meaning they must be immutable types like integers, strings, or tuples.

For example, to create a set from comma-separated values:

direct_set = {3, 6, 'ai'}

When using curly braces, remember to avoid including mutable objects like lists or dictionaries; otherwise, an error will occur. This direct creation method is quick and ideal for predefined values.

The Empty Set

Creating an empty set in Python requires the use of the set() function since using empty curly braces {} defines an empty dictionary, not a set. This is a key distinction for anyone learning Python, as attempting to use {} for an empty set can lead to confusion.

To create an empty set:

empty_set = set()

This method ensures that the variable is indeed a set. It’s particularly useful when you need to initialize a set before populating it with values at a later time or from a loop.

Working with Set Elements

Python sets offer efficient ways to manage unique items. Users can include new data or tidy up existing collections using various built-in methods.

Adding Elements with add() Method

The add() method is used to introduce new elements into a set. Since each element in a set must be unique, the method ensures no duplicates are added.

When attempting to add an element that is already present, the set remains unchanged. For example, if a set contains {1, 2, 3} and the add() method is used to insert the number 2 again, the set will still be {1, 2, 3}. This feature makes the set suitable for avoiding duplicates automatically.

Removing Elements with remove() and discard() Methods

To eliminate specific items from a set, the remove() method is an option. Unlike the discard() method, which does not raise any action if the item is absent, remove() will cause an error if it tries to delete a non-existent element.

For instance, given a set {1, 2, 3}, attempting to remove(4) results in a KeyError, while discard(4) makes no changes and causes no error. This behavior allows flexibility in managing set entries as needed.

Clearing All Entries with clear() Method

The clear() method offers a straightforward way to empty a set, removing all its contents at once.

For example, starting with a set {1, 2, 3}, applying clear() leaves an empty set, shown as {}. This is helpful when it is necessary to reset a set and discard its existing elements entirely. The method leaves the set itself intact but devoid of any entries, providing a clean slate to work with.

Inspecting Set Properties

When working with Python sets, understanding their properties is crucial. Knowing how to check the size of a set with the len() function and determine subset or superset relationships can help efficiently manage data.

Checking the Size with len() Function

To find out the number of elements in a set, one can utilize Python’s built-in len() function. This function returns the total count of unique items within a set.

For instance, if a set contains elements like {1, 2, 3}, calling len(my_set) will return 3.

The function is helpful when dealing with large data sets, as it provides a quick and easy way to determine the size without manually counting elements. This approach is efficient and helps in writing more readable and maintainable code. Using len() to inspect the size is crucial in scenarios where the set’s length impacts further operations or decision-making processes.

Determining Subset and Superset Relationships

Sets in Python can represent mathematical relationships such as subsets and supersets.

A subset indicates that all elements of one set exist in another. This can be checked using the issubset() method, which returns True if conditions are met. For example, {1, 2} is a subset of {1, 2, 3}.

Similarly, a superset means a set contains all elements of another set. The issuperset() method checks if this is true.

Knowing these relationships is useful for tasks like database queries or filtering data, where inclusion relationships play a critical role. By using these methods, one can easily manage and analyze data collection structures within Python.

Set Operations

In Python, set operations allow users to perform mathematical-like calculations on data collections. These operations include union, intersection, difference, and symmetric difference, offering ways to combine or compare sets.

Performing Union with union() Method

The union operation combines the elements of two sets. It includes all unique elements present in either set. The union() method is used in Python to achieve this.

Example:

set1 = {1, 2, 3}
set2 = {3, 4, 5}
result = set1.union(set2)  # {1, 2, 3, 4, 5}

This method helps in gathering unique elements across multiple sets and is useful for scenarios where all possible data points from different sources need to be collected. The union operation maintains the integrity of each element by ensuring no duplicates are present.

More on the union operation in Python sets.

Finding Intersection with intersection() Method

The intersection operation identifies common elements between sets. The intersection() method returns a new set containing these shared elements.

Example:

set1 = {1, 2, 3}
set2 = {2, 3, 4}
result = set1.intersection(set2)  # {2, 3}

This operation is beneficial for comparing datasets to find similarities. In situations like filtering data to identify common attributes or data points, the intersection becomes quite effective.

Learn more about the intersection operation in Python sets.

Difference Between Sets with difference() Method

The difference operation finds elements present in one set but not the other. Using difference(), one can identify unique elements not shared with another set.

Example:

set1 = {1, 2, 3, 4}
set2 = {3, 4, 5}
result = set1.difference(set2)  # {1, 2}

This method is useful in scenarios where it’s important to know what exists uniquely within a data set. It is often used to differentiate and isolate distinct data points from multiple datasets.

For more details, refer to difference operation in Python sets.

Symmetric Difference with symmetric_difference() Method

Symmetric difference yields elements present in either of the sets but not in both. The symmetric_difference() method is used in Python to obtain these distinct elements.

Example:

set1 = {1, 2, 3}
set2 = {3, 4, 5}
result = set1.symmetric_difference(set2)  # {1, 2, 4, 5}

This operation is useful for identifying changes between versions of a dataset, allowing users to spotlight what has been added or removed. The symmetric difference is beneficial when tracking updates or alterations in datasets.

Advanced Set Operations

Advanced set operations in Python allow users to efficiently manage and manipulate data. This involves updating sets without duplicates, checking set membership, and verifying subsets.

Updating a Set with update() Method

The update() method adds multiple elements to a set without duplicates. This method takes an iterable, such as a list or another set, and adds its items to the target set.

For instance, if a set contains {1, 2, 3} and the update() method is called with [3, 4, 5], the set becomes {1, 2, 3, 4, 5}.

Example:

set_a = {1, 2, 3}
set_a.update([3, 4, 5])

Output: {1, 2, 3, 4, 5}

The update() method is effective in a sandbox environment where data integrity is crucial. Instead of adding elements one by one, it handles bulk additions swiftly. It ensures that the set remains a collection of unique elements, helping to maintain data consistency.

Set Membership and issubset() Method

Set membership is vital for checking if elements are part of a set. Python supports efficient membership tests using the in keyword.

For example, checking if 1 is in set_a is simple with 1 in set_a.

The issubset() method checks if all elements of one set are contained within another. If set_a is {1, 2, 3} and set_b is {1, 2}, set_b.issubset(set_a) returns True.

Example:

set_a = {1, 2, 3}
set_b = {1, 2}

Output: set_b.issubset(set_a) returns True

This method is particularly useful when managing data collections and verifying relationships between different data sets. It helps ensure that one set is entirely contained within another, which is crucial for data validation and comparison tasks.

Understanding Set Theory in Python

Set theory in Python revolves around managing collections of unique elements. Python sets are a built-in data structure that allows users to store items without duplicates. This makes them ideal when unique data is key, as the elements in a set must be unique.

Python supports several mathematical set operations, making it practical for various custom tasks. These include union, intersection, difference, and symmetric difference.

For example, using the union operation, one can combine two sets into a new set containing all unique elements from both sets.

A Python set is defined similarly to lists and dictionaries but uses curly braces. For instance, my_set = {1, 2, 3} creates a set with three elements. Additionally, sets are unordered, meaning the items do not follow a specific sequence and cannot be accessed by an index.

Through the efficient removal of duplicate items from lists or tuples, sets streamline data processing in Python programming. This feature enhances performance in scenarios where fast membership testing is needed.

The set theory is also leveraged in Python for logical and mathematical problem-solving. For instance, finding common elements between two sets can be achieved through set intersection. Similarly, detecting differences between two sets is possible with the difference operation.

For a deeper dive into these concepts, consider exploring Python Sets and Set Theory.

Handling Special Set Types

When working with special set types in Python, it is key to understand frozensets and hashable elements. Frozensets are immutable, meaning they cannot be changed after creation, which influences how they are used in programming. Hashable elements are another aspect critical to ensuring sets work properly as a collection of data.

Immutable Sets: Working with frozenset

A frozenset is a special type of set that is immutable. Once it is created, it cannot be altered. This quality makes them beneficial for certain tasks, such as maintaining a constant set of data elements.

Unlike regular sets, frozensets can be used as keys in dictionaries due to their immutability. This characteristic is important because only hashable and immutable data types can be used as dictionary keys.

In Python, frozensets allow developers to handle data with a need for stability and security. Immutability ensures the data remains constant, which can be critical in applications that require consistent data reference. Read more about Python’s frozenset to see examples of how they’re used in different scenarios.

Hashable Elements in Sets

Sets in Python require elements to be hashable, which means they must have a hash value that does not change during their lifetime.

Hashable elements can be compared to each other, which allows Python to manage and store them effectively. Some examples of hashable types include integers, strings, and tuples.

Hashable elements ensure that operations performed on sets are efficient. This quality helps maintain the performance and reliability of set operations. Without hashable elements, the set would not function properly as a collection of unique data points. Learn more about set operations in Python to understand how hashability impacts performance.

Optimizing Set Usage

When working with Python sets, it’s important to choose methods that increase the efficiency of your code. Using the right operations can reduce both time complexity and auxiliary space needs.

Time Complexity

Python sets offer average-case O(1) time complexity for lookups, additions, and deletions. This efficiency is due to the underlying hash table implementation.

For operations involving multiple sets, like union or intersection, make sure to use operations that minimize the elements processed. Using set methods like .union() or .intersection() instead of loops can save time.

Auxiliary Space

The use of sets can also impact memory. When creating a new set from existing data, auxiliary space is required to hold the new, distinct elements.

To reduce this space, ensure that only necessary elements are added. Avoid copying sets unless needed, as it doubles the space usage.

Practical Use Tips

  1. Avoid Duplicate Calculations: Store results of unique operations to prevent recalculating them later.

  2. Use Built-In Functions: Functions like len() and min() work directly on sets, providing optimized ways to perform basic tasks.

  3. Order of Operations: When combining operations, start with smaller sets to reduce total iterations.

For more detailed tips, the article on Master Python Sets Operations offers insights into practical use cases that can help optimize performance.

Common Set Errors to Avoid

When working with Python sets, it’s easy to make errors if you aren’t cautious. Two common areas where errors occur are handling TypeError during set operations and misusing set methods. Each of these can disrupt your code, so understanding them is crucial.

Handling TypeError in Set Operations

TypeError can occur when trying to add or remove elements that aren’t hashable. Sets rely on hashing to ensure elements are unique.

If you try to add a list or another set, you might receive a TypeError because these types are not hashable.

To avoid this, only include immutable types in sets. Use a tuple instead of a list if you need a sequence. When removing elements, ensure the item exists in the set.

Using remove() will raise an error if the item isn’t present, but discard() will not. This simple choice can prevent unnecessary interruptions in code execution.

Common Pitfalls in Set Methods

Using set methods without understanding them fully can lead to unexpected results. For instance, the add() method only accepts one argument; passing multiple items will not work and may seem confusing to beginners.

Furthermore, attempting to update sets with update() can be tricky. This method expects an iterable. If you mistakenly pass a non-iterable, you will face issues.

The difference() and difference_update() methods can also be confusing. While both calculate the difference between sets, the latter modifies the original set. Be mindful of these nuances to ensure code functions as expected without unexpected changes. For more insights and examples, you can explore articles like the one on mistakes in Python sets.

Real-world Applications of Python Sets

A computer screen displaying code using Python sets, with various applications and examples

Python sets are practical tools for handling many tasks in programming. Sets, with their unique element trait, are perfect for eliminating duplicate data. When dealing with large datasets, this can be especially useful. They allow for fast membership tests and can streamline data organization.

Sets can also assist in comparing datasets. With operations like union, intersection, and difference, developers can efficiently determine which items are shared among datasets or unique to each.

For instance, Eric can utilize sets to identify common elements in two sales data files, making data comparison straightforward.

In data structures, Python sets play a crucial role in building more complex structures. They act as the foundation for constructing graphs where nodes are connected uniquely. By leveraging sets in these structures, Eric manages connections without redundancy and keeps operations efficient.

For network analysis, sets help in finding relationships between nodes. With their operations, developers can determine direct and indirect connections quickly.

For instance, sets allow Eric to evaluate social network links or find mutual connections in a network of users.

Even in practical use cases, Python sets are valuable. They are employed in algorithms for solving problems related to paths, like in map routing. Using sets ensures that once a path is traversed, it is not revisited, optimizing the path-finding process and improving algorithm efficiency.

Python sets are essential in tools requiring data validation. By confirming unique entries, they ensure data integrity. Eric may use them in applications to ensure unique user IDs, maintaining accurate records.

Comparing Sets with Lists and Tuples

A table with a list and a tuple, and a set drawn in Python code on a computer screen

Python sets, lists, and tuples are all used to manage collections of data. Each has distinct features that make them suitable for different tasks.

Sets are unique because they contain no duplicate elements. This makes them perfect for tasks where duplicates need to be eliminated easily. Unlike lists and tuples, sets are unordered. This means there’s no guaranteed order when retrieving elements.

Lists, on the other hand, are ordered collections, allowing duplicates and enabling indexing. This makes lists highly flexible for retrieving and processing data in specific positions. Since lists can be modified, they are ideal for dynamic data where adding and removing items is common.

Tuples are similar to lists in that they are ordered, but they are immutable. Once created, the data in a tuple cannot be changed. This immutability makes tuples particularly useful for storing constant data that should not be altered through the program.

Here is a brief comparison:

Feature Sets Lists Tuples
Order Unordered Ordered Ordered
Duplicates No duplicate elements Allows duplicates Allows duplicates
Mutability Mutable Mutable Immutable

Each data structure serves specific needs. Sets are best for unique elements, lists excel in ordered sequences with frequent changes, and tuples are secure storage for constant data. For more detailed differences, you can explore their features further in resources such as Differences and Applications of List, Tuple, Set, and Dictionary in Python.

Frequently Asked Questions

A stack of books with Python logos, a computer with code, and a set of mathematical symbols

Python sets are unique collections, useful for handling data efficiently. These FAQs provide insights into defining, manipulating, and understanding sets in Python.

How can you define a set in Python with an example?

In Python, a set can be defined using curly braces {}. For example, my_set = {1, 2, 3} creates a set containing the numbers 1, 2, and 3. Elements in a set must be unique and unordered.

What are the key methods available for manipulating sets in Python?

Python sets come with several methods such as add(), remove(), union(), and intersection().

These methods allow users to modify sets, add or remove elements, and perform mathematical operations like unions and intersections.

What is the correct method to add an element to a set in Python?

To add an element to a set, use the add() method.

For example, my_set.add(4) will add the number 4 to the set my_set. This method only adds unique elements, so duplicates won’t appear in the set.

Are sets in Python mutable, and how does that affect their usage?

Sets in Python are mutable, meaning their contents can change. You can add or remove elements at any time.

However, the elements themselves must be of immutable types, like strings or numbers, ensuring the set’s integrity.

How do you initialize an empty set in Python?

An empty set in Python is initialized using set().

It’s important not to use {} for an empty set, as this syntax creates an empty dictionary. Use empty_set = set() instead for an empty set.

What is the difference between sets and tuples in Python?

Sets are unordered and mutable, allowing unique elements only.

Tuples, on the other hand, are ordered and immutable, meaning their content cannot be changed after creation.

Tuples can include duplicate elements and are often used for fixed collections of items.

Categories
Uncategorized

Learning about SQL Functions: Mastering Database Queries

Understanding SQL and Its Functions

Structured Query Language (SQL) is an essential tool for database management. It allows users to interact with databases by performing tasks such as querying, updating, and managing data.

SQL is widely used by developers and data analysts to handle various database operations efficiently.

SQL functions are built-in routines that help perform complex operations. They can be categorized into several types including aggregate functions like AVG() and SUM(), string functions, and date functions.

These functions simplify complex data manipulations and improve query performance.

Aggregate functions are used to perform calculations on a set of values. For example, COUNT() helps count rows while MIN() and MAX() are useful for finding minimum and maximum values in a dataset.

These are especially handy for data analysts who need to summarize data quickly.

For those new to SQL, taking an SQL Basics Course could be beneficial. These courses often cover fundamental SQL data types and query syntax, making it easier to understand and implement SQL functions effectively.

List of Common SQL Functions:

  • Numerical Functions: Deal with numbers.
  • String Functions: Handle text operations.
  • Date Functions: Work with dates and times.

Databases rely on SQL to ensure data is accurate and easily accessible. SQL’s ability to manage and retrieve large datasets quickly makes it a valuable skill for anyone working in database management.

Aspiring SQL users can boost their skills using SQL Tutorials and interactive exercises.

Setting Up the SQL Environment

Setting up the SQL environment is important for database management and development.

Specific platforms, like PostgreSQL, MySQL, SQL Server, MS Access, and Oracle, each have distinct setup requirements and features. Understanding these will help you efficiently create and manage databases and tables.

Working with PostgreSQL

PostgreSQL is a powerful, open-source database system known for its advanced features. To start, download and install PostgreSQL from the official website.

During installation, you set a password for the PostgreSQL superuser.

Once installed, use tools like pgAdmin for a graphical interface. With pgAdmin, users can create databases with ease.

You simply right-click on the “Databases” node and choose “Create Database.”

Tables can be created by defining their columns and data types under the new database.

Dropping a database is straightforward. In pgAdmin, right-click the database you want to delete and select “Delete/Drop.”

Be sure to double-check before confirming!

Exploring MySQL and SQL Server

Both MySQL and SQL Server offer robust platforms for database creation and management.

Download MySQL from its website and SQL Server from Microsoft’s site.

MySQL uses MySQL Workbench for a graphical interface, while SQL Server relies on SQL Server Management Studio (SSMS).

In MySQL Workbench, creating a database involves clicking on the “Create a new schema” icon, entering the database name, and applying the changes.

For SQL Server, use SSMS to connect to your instance, right-click “Databases,” and choose “New Database.”

Creating tables in MySQL requires defining columns and settings within the schema. For SQL Server, right-click the database, select “New Table,” and define your columns.

Dropping a database in both MySQL and SQL Server can be done by running a DROP DATABASE command or through the GUI.

Setup Essentials for MS Access and Oracle

MS Access is part of Microsoft Office, making setup easy for users familiar with the suite. Tables are created using the “Table Design” view, where columns and types are defined.

Access is ideal for smaller projects due to its ease of use.

Oracle Database setup involves downloading the installer from Oracle’s website, and configuring it using Oracle SQL Developer for a visual interface.

Creating a database in Oracle can be complex but is often managed by entering specific commands or using their setup tools.

Oracle and Access both allow for straightforward table creation through their respective interfaces.

Dropping databases in Oracle involves specific commands, so ensuring the right database context is crucial.

SQL Syntax: Writing Select Statements

When writing SQL queries, the SELECT statement is a cornerstone command for retrieving data from databases. This section will cover how to refine searches using the WHERE clause and organize data effectively with ORDER BY and GROUP BY.

Understanding the Where Clause

The WHERE clause filters records in a query, making it an essential part of SQL syntax. It helps specify which rows should appear in the results.

For instance, if a table named employees contains information about staff, the query SELECT * FROM employees WHERE department = 'Sales'; retrieves only those in the Sales department.

Operators like =, <, >, and LIKE can refine searches. To find employees hired after 2020, use WHERE hire_date > '2020-12-31';.

Logical operators such as AND, OR, and NOT combine multiple conditions.

SELECT * FROM employees WHERE department = 'Sales' AND salary > 50000; finds high-salary employees in the Sales department.

These features make the WHERE clause a powerful tool for customizing query results.

Utilizing Order By and Group By

The ORDER BY clause sorts query results. Whether ordering alphabetically by name or numerically by salary, it provides structure.

For example, SELECT * FROM employees ORDER BY salary DESC; lists employees from highest to lowest salary. Specifying ASC sorts data in ascending order.

GROUP BY categorizes data based on shared values. In a sales database, SELECT department, COUNT(*) FROM employees GROUP BY department; displays the number of employees per department.

Combined with aggregate functions like SUM, AVG, or COUNT, GROUP BY is instrumental in summarizing data.

Using these clauses, SQL users can control the organization and presentation of their query results, enhancing data analysis capabilities.

Utilizing Aggregate Functions in Queries

SQL aggregate functions are essential for summarizing data efficiently. These functions, including COUNT(), SUM(), and AVG(), help in calculating totals, averages, and more. SQL also provides functions to determine the minimum and maximum values within datasets.

Mastering Count(), Sum(), and Avg()

When working with SQL queries, mastering COUNT(), SUM(), and AVG() functions is crucial. These functions help process large datasets and provide meaningful information.

  • COUNT(): This function counts the number of rows that match a query. For instance, COUNT(*) returns the total row number in a table, which is common in analyses and reports.

  • SUM(): Ideal for financial and numerical data, SUM() calculates the total sum of values in a column. For example, to find the total sales for a month, SUM() is employed.

  • AVG(): To find the average value of a dataset, AVG() is used. It’s particularly useful for computing average scores or prices.

Combine these functions with the ROUND() function for numeric precision, especially when dealing with decimal values, for more readable results.

Finding Minimum and Maximum Values

SQL provides the MIN() and MAX() functions to identify the smallest and largest values in datasets. These functions are vital in performance analysis and decision-making processes.

  • MIN(): This function finds the lowest value within a set. For instance, in a list of prices, MIN() helps to identify the cheapest item.

  • MAX(): Conversely, MAX() determines the highest value. It is useful in domains like sales data analysis, where finding the highest sales month is necessary.

Using these functions ensures data is efficiently summarized and insights are easily gathered.

These operations can be enhanced when used with other SQL functions like the GROUP BY clause, which organizes data into groups, allowing more complex and detailed data analysis.

Effective Use of Conditions and Logic

Using conditions and logic in SQL allows for complex data manipulation and retrieval. Effective use can lead to more precise results and efficient queries.

Applying Conditional Logic with Case

The CASE statement in SQL is similar to if-then-else logic in programming languages. It lets users handle conditions directly in the query.

This function enables dynamic content creation by providing specific outputs based on varying conditions.

For example, one can classify data by using CASE to assign category names based on values.

An important part of this is understanding how CASE is used in comparison with other conditional operators like WHERE, LIKE, and BETWEEN.

Each of these operators has unique ways of filtering data. By incorporating CASE, users can create detailed custom outputs alongside these filters, greatly enhancing query power and flexibility.

Leveraging In, And, & Or in Queries

The IN operator simplifies writing conditions when checking if a value exists within a set. This is particularly useful when filtering multiple values in a column.

For example, using IN can replace repetitive OR conditions, which checks several possibilities.

Logical operators AND and OR determine how conditions combine. They help build more specific filtering criteria within WHERE clauses.

AND is used when all conditions must be true, while OR satisfies any condition. When combined with NOT, these operators further refine the results by excluding specific criteria.

Understanding how these elements work together allows SQL users to build sophisticated and efficient queries.

Advanced Data Manipulation Techniques

A computer screen displaying SQL functions and data manipulation techniques

SQL offers diverse tools for manipulating data efficiently. Mastery of these advanced techniques ensures effective data management that suits various practical needs.

Inserting and Updating Data

The INSERT INTO statement allows adding new records to a table. You specify the table and the VALUES for each column, ensuring the correct data type for each entry.

An example syntax might be INSERT INTO table_name (column1, column2) VALUES (value1, value2). This technique is essential for expanding datasets with new information.

When data needs modification, the UPDATE command is used. It targets specific records based on given conditions, using SET to define new values.

For instance, UPDATE table_name SET column1 = new_value WHERE condition.

Understanding this lets users maintain up-to-date data, which is crucial for accurate data analysis.

Deleting Rows and Setting Defaults

Removing unnecessary data from a table is accomplished with the DELETE statement. It permanently removes rows from a table that meet specified conditions.

For example, DELETE FROM table_name WHERE condition deletes specific records without affecting the table structure. This action helps keep databases clean and relevant.

Specifying default values ensures that new records in a table always have baseline data if no value is provided at insertion.

The DEFAULT keyword is used in table creation, like column_name type DEFAULT default_value. This feature helps avoid errors in data entry and ensures consistency, especially when dealing with large volumes of data.

Understanding Joins and Relational Databases

A diagram showing tables connected by lines, with SQL functions displayed nearby

Joins are essential for working with relational databases, enabling users to connect data from multiple tables. Select statements and the where clause often work alongside joins to filter and retrieve specific data.

Exploring Different Types of Joins

SQL Joins are crucial in relational databases for combining records from two or more tables. The most common types include:

  • Inner Join: Returns records with matching values in both tables. It’s the default join type.
  • Left (Outer) Join: Returns all records from the left table and matched records from the right.
  • Right (Outer) Join: Returns all records from the right table and matched records from the left.
  • Full Join: Retrieves all records when there is a match in either table.

Each join type is used based on what data is needed from the tables. By choosing the right join, users can efficiently gather the required information.

Executing Queries Across Multiple Tables

Executing queries across multiple tables involves using select statements and may use the where clause to filter data.

With an understanding of join operations, users can specify how different tables relate. Join conditions are used to identify linked data.

For instance, in an inner join, users specify columns from each table that match, such as a customer ID.

Including a where clause can filter these results further, focusing on rows that meet certain criteria.

Working with Nulls in SQL

A computer screen displaying SQL code with NULL values and SQL functions

Dealing with null values is crucial in SQL because they represent missing or unknown information in a database.

Understanding how to handle these values can lead to more accurate data queries and analysis.

Handling Nulls with Coalesce and IsNull

Two important functions for dealing with null values are Coalesce and IsNull.

Coalesce takes multiple arguments and returns the first non-null value. It’s useful when you want to provide substitute values for null entries.

For instance, to replace a null value in a salary column, one could use COALESCE(salary, 0), which returns zero if the salary is null.

IsNull is another helpful function, particularly in SQL Server. It checks whether a given expression is null and returns a specified replacement value instead.

For example, ISNULL(bonus, 100) will provide 100 if the bonus column entry is null.

Both functions enhance data reliability by allowing the use of default values in calculations.

Setting and Using Defaults

Default values play a vital role in managing nulls by ensuring that no data entry lacks essential information.

In table design, default values can be specified for columns, which SQL applies automatically if no other value is provided during data insertion. This prevents the occurrence of unexpected nulls.

To set a default, a column can be created with a specified default value like this: ALTER TABLE employees ADD bonus INT DEFAULT 0;.

This default applies when inserting new rows without specified bonus values.

Utilizing defaults ensures consistency and completeness in data records, making queries and analyses more dependable.

Using String and Text Functions

A computer screen displaying SQL code using string and text functions

SQL string and text functions are powerful tools that allow users to alter and query string data effectively. This section highlights key techniques, such as combining strings using concatenation and identifying patterns in strings with the LIKE operator.

Manipulating Strings with Concatenation

Concatenation in SQL involves combining two or more strings into a single string. This is essential for creating comprehensive and readable data outputs.

Users frequently need to join text attributes, such as combining first and last names into a complete name.

In SQL, the concatenation operator varies by database. In SQL Server, the plus sign (+) is used, while in MySQL and others, the CONCAT() function works universally. An example of its use:

SELECT CONCAT(first_name, ' ', last_name) AS full_name FROM employees;

This operation is essential for ensuring data presents in a coherent way.

String functions such as this maintain the integrity of string data, preparing it for display or further processing in SQL queries.

Searching Patterns with LIKE

Pattern matching is a crucial task in handling text data. The LIKE operator is used in SQL to search for a specified pattern in a column. It uses wildcard characters, such as % for multiple characters and _ for a single character.

For instance, finding all names starting with ‘J’ can be done as:

SELECT * FROM employees WHERE name LIKE 'J%';

This makes pattern matching flexible, allowing users to find records that meet specific textual criteria.

Understanding these text functions empowers users to efficiently filter and manage their data based on unique patterns and structures.

Performing Date and Time Calculations

A calendar with overlapping date and time calculations, surrounded by SQL function symbols

Date and time calculations in SQL are essential for tasks like finding differences between dates, formatting date inputs, and extracting specific date components. These operations often use date functions that make handling temporal data straightforward and efficient.

Working with Dates and Times

Working with dates and times in SQL involves using various functions designed to simplify date manipulations.

Common date functions include GETDATE() for retrieving the current date and DATEDIFF() for calculating the interval between two dates. These tools help to measure durations or identify specific timeframes within datasets.

An interval in SQL can specify the amount of time between two dates. This is often used with functions like DATEADD() to adjust dates by adding or subtracting specified intervals.

These operations are essential for tasks like forecasting or scheduling future activities.

SQL can also extract specific parts of a date, such as the year, month, or day, using functions like YEAR(), MONTH(), and DAY().

These are helpful for filtering or grouping data by particular date components. Comprehensive resources like SQL Server Date and Time Functions with Examples provide numerous examples of how these functions are applied.

Optimizing Queries with Indexes and Views

A computer screen displaying a database query with indexes and views, alongside a book on SQL functions

Indexes and views are essential tools for improving SQL performance. They help queries run faster by organizing and simplifying data retrieval. This section explores how to create, use, and manage these tools effectively.

Creating and Using Indexes

Indexes improve query speed by allowing quick access to data rows. SQL indexes act like a detailed table of contents, letting the database find information without scanning every record.

For example, indexing a column like last_name can make queries up to 3,000 times faster.

There are different types of indexes, such as clustered and non-clustered. Clustered indexes sort the physical data according to the index, while non-clustered indexes do not alter the data arrangement.

Choosing the correct type of index is crucial for SQL query optimization.

Unique indexes are special as they prevent duplicate values in a column, ensuring data integrity. Creating indexes on frequently searched or sorted columns can save time and resources.

Building and Managing Views

Views are virtual tables created from a SQL query. They simplify complex queries by storing the logic separately, making them easier to reuse.

Views help ensure consistent results and enhance security by exposing only the necessary data to users.

Managing views involves updating the underlying query as data structures change. This maintenance ensures views remain accurate and relevant.

Views also help optimize performance by encapsulating complex joins and calculations, making the main queries more concise.

Views can be a powerful tool when dealing with large datasets, as they reduce data redundancy and improve clarity. By using views effectively, database administrators can streamline workflows and enhance database performance.

Exploring Window Functions and Their Uses

A computer screen displaying SQL code with various window functions and their applications

Window functions in SQL provide a powerful way to perform operations across a range of rows related to the current row, helping in data analysis. They allow calculations like ranking, cumulative sums, and averaging over a specified frame.

Understanding Over Clauses and Frames

Over clauses are crucial in window functions. They define the set or “window” of rows to consider during calculations. An over clause uses partitions to segment the data, processing each section separately without aggregating the data into one result.

Frames refine the data selection further by limiting the rows within a partition. Frames can be specified as rows or ranges, offering flexibility in how the calculations apply.

They determine how window functions like ROW_NUMBER, RANK, or SUM behave on subsets of data.

Knowing how to use these effectively can enhance data queries, providing deeper insights into specific data segments. It helps identify trends, manage large datasets, and gain meaningful analytics from raw data.

Leveraging Window Functions for Analytics

Window functions excel in complex data analysis. By utilizing functions such as RANK, ROW_NUMBER, and DENSE_RANK, users can assign unique ranks or sequential numbers within data partitions. This is useful for identifying top records in ordered datasets.

Functions like SUM, AVG, and COUNT can calculate cumulative totals or averages over a window frame, offering a dynamic view of data trends.

By applying FETCH and OFFSET, analysts can retrieve only specific rows, refining data management and reducing processing load.

These capabilities make window functions indispensable for tasks requiring detailed data slices. They can improve performance and expand the analytical capabilities of SQL, supporting more strategic data-driven decision-making.

Frequently Asked Questions

A computer screen displaying a list of frequently asked questions about SQL functions, with a person reading and learning from it

Understanding SQL functions is crucial for managing and manipulating data effectively. This section explores different types of functions, user-defined functions, and examples of common string functions in SQL.

What are the different types of functions available in SQL?

SQL offers a variety of functions, including aggregate functions like SUM and COUNT, which are used to perform calculations on sets of data.

Scalar functions, such as UCASE and LCASE, work on individual data values. There are also date functions like NOW() and numeric functions like ROUND().

How do you create and use user-defined functions in SQL?

User-defined functions (UDFs) in SQL are created to perform specific calculations or tasks. To create a UDF, use the CREATE FUNCTION statement.

A UDF can take parameters, perform operations, and return a result. They are useful for simplifying complex calculations and promoting code reuse in queries.

Can you provide examples of common string functions used in SQL?

Common string functions in SQL include CONCAT, which combines two strings, and SUBSTRING, which extracts a part of a string.

The REPLACE function can substitute parts of a string with new values, making string manipulation more efficient and straightforward.

What are some examples of SQL functions and how are they applied in database management?

Examples of SQL functions include AVG for calculating average values and MIN and MAX for finding minimum and maximum values, respectively.

These functions are crucial in database management as they provide quick insights into data trends and summaries.

What techniques are effective for learning SQL functions and commands?

Effective techniques for learning SQL functions include hands-on practice with examples and exercises.

Resources like SQL tutorials can also provide structured learning paths. Regular practice of writing and debugging SQL queries helps build a solid understanding of various functions and commands.

How are functions used in Oracle databases compared to standard SQL?

Oracle databases use SQL functions similar to standard SQL, but have additional features and optimizations.

Functions like DECODE and TO_DATE offer advanced processing capabilities specific to Oracle.

Oracle’s PL/SQL expands on standard SQL functionalities for more complex database operations.

Exploring these functions can enhance database management skills in an Oracle environment.

Categories
Uncategorized

Learning Math for Data Science – Hypothesis Testing Explained for Beginners

Fundamentals of Hypothesis Testing

Hypothesis testing is a statistical method used to make inferences about a population based on sample data. This involves formulating different hypotheses, calculating probabilities, and making decisions based on the data and statistical criteria.

Understanding the Null and Alternative Hypothesis

In hypothesis testing, two opposing hypotheses are formulated: the null hypothesis and the alternative hypothesis.

The null hypothesis (often denoted as ( H_0 )) suggests no effect or no difference. It’s a statement of status quo or no change. For example, in a drug effectiveness study, the null hypothesis might state that the drug has no effect.

The alternative hypothesis (( H_a ) or ( H_1 )) is the statement that contradicts the null hypothesis. It suggests that there is an effect or a difference. In the same study, the alternative hypothesis might indicate that the drug does have an effect. Researchers aim to provide evidence against the null hypothesis through data analysis.

Significance Levels and P-Values

Significance levels and p-values play a critical role in hypothesis testing.

The significance level (denoted as (\alpha)) is a threshold for decision-making. It’s usually set at 0.05, meaning there’s a 5% risk of rejecting the null hypothesis if it’s actually true.

The p-value measures the probability of observing the data, or something more extreme, if the null hypothesis is true. A p-value less than the significance level leads to rejecting the null hypothesis. For example, if the p-value is 0.03 with a significance level of 0.05, the null hypothesis would be rejected, suggesting evidence for the alternative hypothesis.

Critical Value and Decision Making

Critical values are the cut-off values that define regions where the test statistic leads to rejecting the null hypothesis. Depending on the test, these values can be found using statistical tables or software. They form the basis for decision making in hypothesis testing.

There are two main outcomes in decision making: rejecting the null hypothesis when the test statistic falls in the critical region, or failing to reject the null hypothesis if it doesn’t. This decision hinges on comparing the test statistic with the critical value. Understanding these concepts is essential for interpreting the results of hypothesis tests.

Probability and Statistics in Data Science

Probability and statistics are essential for interpreting data in data science. These tools help data scientists understand patterns, make informed predictions, and drive decision-making processes based on solid data analysis.

Probability Theory Foundations

Probability theory is the mathematical framework for quantifying uncertainty. It involves studying random events and predicting the likelihood of different outcomes.

In data science, understanding probability helps in modeling and simulation of complex systems. A probability measure assigns a value between 0 and 1 to events, indicating their chance of occurring.

Probability is crucial in algorithms like decision trees and Bayesian networks. It also plays a role in hypothesis testing, where researchers evaluate assumptions about data. For example, this might include analyzing whether a new drug affects recovery rates or understanding distributions in machine learning models.

Descriptive vs. Inferential Statistics

Descriptive statistics provide summaries of data. They offer a way to describe the size, distribution, and variability of datasets with measures such as mean, median, range, and standard deviation. These statistics are foundational, often visualized through charts and graphs, helping decode raw data into insightful information.

Inferential statistics go beyond descriptions, allowing data scientists to make predictions or inferences about a population based on a sample. Techniques include hypothesis testing and regression analysis.

For example, inferential methods might assess whether observed patterns are due to chance or reflect true statistical significance, thus informing research decisions.

Types of Hypothesis Tests

Hypothesis testing is used to decide between two claims about a population. It can be broken into different types depending on the data nature and distribution. The choice between parametric and non-parametric tests, and the use of t-tests, Z-tests, or F-tests vary based on sample characteristics.

Parametric vs. Non-Parametric Tests

Parametric tests assume that the data follows a certain distribution, often the normal distribution. This helps in making specific inferences about population parameters. Common parametric tests include t-tests and Z-tests. If the normal distribution assumption holds true, these tests can be highly effective.

Non-parametric tests, on the other hand, do not assume a specific distribution. These tests are used when the data doesn’t meet parametric assumptions. Non-parametric methods are flexible and can be applied to a wide range of data scenarios, making them useful for data that is not normal or has unknown distribution.

One-Sample T-Test and Two-Sample T-Test

The one-sample t-test tests if the mean of a single sample differs from a known population mean. It is useful when comparing the sample mean to a specific value. This test assumes the sample is drawn from a normally distributed population.

The two-sample t-test compares means from two different groups. It’s applied to determine if the groups are statistically different. There are two types: one assuming equal variances, and another assuming unequal variances. Each type helps address different scenarios in hypothesis testing.

Z-Test and F-Test

The Z-test is used when the sample size is large (n > 30) or when the population standard deviation is known. It is applicable for comparing means and proportions. Z-tests assume a normal distribution, making them fit for large datasets where the central limit theorem holds true.

The F-test compares two variances to analyze if they come from populations with equal variances. It’s important in models requiring variance comparison, such as analysis of variance (ANOVA). An F-test helps in understanding the relationship between sample variability and hypothesis testing.

Test Statistic Computation

Understanding how to compute a test statistic involves knowing the difference between population parameters and sample statistics, and grasping the concept of degrees of freedom and their relation to different distributions. These key topics are essential in performing hypothesis tests effectively.

Population Parameters and Sample Statistics

To compute a test statistic, it is vital to distinguish between population parameters and sample statistics.

Population parameters are values that describe an entire population, such as the population mean or standard deviation. These are often unknown and need to be estimated.

In contrast, sample statistics are calculated from sample data. These include the sample mean and sample variance, which help estimate the population parameters.

Test statistics are computed using these sample statistics, enabling comparison to a hypothesized population parameter. For instance, if we want to test a population mean, we calculate the sample mean and compare it with the hypothesized mean using the standard error. Using these values in the formula for the test statistic helps decide whether to support or reject a hypothesis.

Degrees of Freedom and Distributions

Degrees of freedom refer to the number of values in a calculation that are free to vary. They are crucial in determining the shape of the test statistic’s distribution used for hypothesis testing.

Different statistical tests require different distributions.

For example, a t-distribution is often used when the sample size is small, and the population standard deviation is unknown. This distribution relies on degrees of freedom, which can impact the critical values required for hypothesis testing.

The choice between distributions, like normal or t-distributions, depends on the sample size and known parameters. Understanding these nuances allows more accurate conclusions from statistical tests. Calculating the correct degrees of freedom ensures the test statistic aligns with the appropriate distribution, leading to valid test results.

Errors in Hypothesis Testing

In hypothesis testing, errors can occur when deciding whether to reject or not reject a null hypothesis. These errors are known as Type I and Type II errors. Understanding their consequences and how to minimize them is essential for accurate data analysis.

Type I and Type II Errors Explained

Type I error happens when the null hypothesis is mistakenly rejected when it is actually true. This is called a false positive. The probability of making a Type I error is represented by the alpha (α) level, commonly set at 0.05 for 5% significance.

Type II error occurs when the null hypothesis is not rejected when it is false, leading to a false negative. The probability of a Type II error is symbolized by beta (β). Lowering the chances of these errors helps improve the statistical significance of a test.

Both errors have implications on test results. Balancing them is key in hypothesis testing. Reducing alpha decreases Type I error risk but can increase Type II error risk, necessitating careful consideration.

Minimizing Errors and Power of a Test

To minimize errors, researchers can adjust sample size, alpha levels, and test conditions.

Larger samples often yield more reliable results. Setting an appropriate alpha level reduces Type I errors but requires balancing with Type II error risk.

The power of a test, (1 − β), indicates its ability to detect a true effect. A higher power means a lower probability of Type II error, enhancing test reliability.

Increasing power often involves increasing sample size or effect size expectations.

Researchers aim to achieve an optimal balance between Type I and Type II errors while maximizing the power of a test to ensure statistically significant and reliable outcomes. Focusing on these factors is crucial for effective hypothesis testing.

Mathematical Concepts in Data Science

Mathematical concepts are essential in data science, helping professionals understand and use tools like machine learning. Linear algebra and calculus form the backbone, while concepts like matrices, vectors, and linear transformations are crucial for solving complex problems.

Linear Algebra and Calculus

Linear algebra plays a vital role in data science, especially in machine learning algorithms. It deals with the study of vectors, vector spaces, and linear equations, which help in understanding data transformations and model optimizations. Techniques from linear algebra are used in training machine learning models, making efficient calculations possible.

Calculus, particularly multivariate calculus, is important for understanding how changes in data inputs affect machine learning models. It helps in optimizing algorithms by calculating derivatives.

Data scientists rely on linear algebra for constructing algorithms that require the manipulation of equations and matrices. Understanding gradients and slopes through calculus is essential for improving model accuracy. Learning these math concepts is key to mastering data-driven decision-making.

Matrices, Vectors, and Linear Transformations

Matrices and vectors are essential tools in data science for handling large datasets and complex computations.

A matrix represents data in a structured format, with each element corresponding to a data point. Operations on matrices, such as addition, multiplication, and inversion, are used to manipulate and analyze data efficiently.

Vectors provide a way to represent data points in multi-dimensional space, which is fundamental in many machine learning algorithms.

Linear transformations are operations that map vectors to other vectors in a linear manner. They are critical in data science, where they are used to understand data patterns and feature spaces. Knowing how to apply linear transformations allows data scientists to manipulate data in ways that reveal hidden insights and improve model performance. These concepts form the foundation for many advanced techniques in mathematics for machine learning.

Advanced Statistical Techniques

Advanced statistical techniques are essential for data science, providing insights into complex data sets. Understanding these tools helps make informed decisions, improve predictions, and discern relationships within data.

Regression Analysis

Regression analysis is a vital tool in data science used to model relationships between variables. This technique involves predicting a dependent variable based on one or more independent variables.

Types of regression include linear and logistic regression.

Linear regression analyzes continuous data and determines the linear relationship between variables. Logistic regression, on the other hand, is used when the dependent variable is categorical, like yes/no outcomes.

These methods help understand patterns and make predictions, guiding decision-making in fields like finance and healthcare.

Correlation and Causation

Understanding correlation and causation is crucial in data analysis. Correlation measures the strength and direction of a relationship between two variables. It is quantified using correlation coefficients, which range from -1 to 1.

Positive coefficients indicate variables move in the same direction, while negative values show an inverse relationship.

However, correlation does not imply causation. Just because two variables move together does not mean one causes the other.

It is essential to distinguish these concepts to avoid misleading conclusions. Techniques like controlled experiments and causal models can help establish causal links.

Central Limit Theorem and Its Applications

The Central Limit Theorem (CLT) is a fundamental concept in statistics. It states that the distribution of sample means approximates a normal distribution as the sample size increases, regardless of the population’s distribution.

This theorem is pivotal for statistical analysis because it enables making inferences about populations from sample data.

Applications of the CLT include hypothesis testing and confidence interval estimation. It facilitates working with sample data by assuming a normal distribution for larger samples, simplifying analysis.

Understanding the CLT helps in designing experiments and interpreting data in a wide range of disciplines.

Practical Application of Hypothesis Testing

Hypothesis testing is an important tool in data science for making decisions based on data. Both Python and real-world scenarios in social sciences and business offer practical applications for this statistical method.

Using Python for Statistical Analysis

Python is widely used for statistical analysis in data science. With libraries like SciPy and pandas, users can conduct hypothesis tests efficiently.

These libraries provide tools for conducting tests like the t-test, chi-squared test, and more.

Data scientists use Python to test hypotheses about customers and trends. This involves checking data assumptions and determining if results are due to chance or representative of larger patterns.

Python’s versatility and ease of use make it a popular choice for handling complex data.

Case Studies in Social Sciences and Business

Hypothesis testing plays a crucial role in fields like social sciences. Researchers often use this method to examine behaviors, trends, and social phenomena.

It helps them determine if observed patterns are statistically significant.

In business, hypothesis testing aids in decision-making regarding marketing strategies and customer preferences.

For instance, companies might test if a new advertising campaign results in greater customer engagement.

This allows for data-driven decisions, ensuring strategies are effective and resources are well-utilized.

Tailoring Hypothesis Tests

Understanding how to choose and apply the right hypothesis test is crucial in data science. It involves mastering concepts like one-tailed and two-tailed tests and knowing how to align your hypothesis with significance levels to draw meaningful conclusions.

One-Tailed Test vs. Two-Tailed Test

A one-tailed test is designed to determine if a sample statistic is greater than or less than a population parameter, focusing on one side of the distribution. This is often used when a researcher has a specific direction in mind, such as testing whether a new drug increases or decreases blood pressure significantly.

In contrast, a two-tailed test evaluates whether a sample statistic is significantly different from the population parameter, regardless of direction.

It is useful when deviations in either direction are important, such as checking if a new process changes production output either too high or too low.

The choice between these tests often impacts the level of significance and interpretation of results. For instance, researchers usually apply a stricter significance level for a two-tailed test to account for potential error on both ends.

Choosing the Right Test for Your Data

Selecting the appropriate hypothesis test depends on the research question, type of data, and assumptions about the distribution.

The alternative hypothesis should guide this choice, indicating the expected direction or change in the population.

For data with clear directional hypotheses, a one-tailed test is suitable. If the hypothesis simply queries if there is a change, regardless of direction, a two-tailed test often provides a better fit.

Knowing these distinctions ensures the findings are accurate and reflect true data behavior.

The significance level—often set at 0.05—requires careful adjustment based on these tests. Lowering the level of significance might reduce the risk of false positives but could also make detecting true effects harder, aligning statistical rigor with real-world data needs.

Machine Learning and Hypothesis Testing

Machine learning relies on hypothesis testing to ensure models are both valid and effective. By focusing on feature selection and model validation, as well as the role of neural networks in hypothesis testing, these techniques enhance predictions and outcomes.

Feature Selection and Model Validation

In machine learning, selecting the right features is crucial. Feature selection involves choosing the most significant variables from the dataset to improve model accuracy and efficiency.

By performing hypothesis tests, analysts can determine if certain features significantly impact the outcome.

These tests guide in filtering out irrelevant features, thus preventing overfitting and making models more reliable.

Model validation follows, where hypothesis testing helps evaluate if a model accurately predicts outcomes.

Using different datasets for testing ensures that a model generalizes well, maintaining performance across varied data.

Neural Networks and Their Hypotheses

Neural networks use layers to learn complex patterns in data, and hypotheses play a significant role in shaping these learning methods.

Here, the network’s assumptions about input data affect its structure and function.

Testing these hypotheses involves training the network on different data sets to ensure they are valid.

Through hypothesis testing, weaknesses in neural networks can be identified. This allows for adjustments that improve learning and performance.

Consistent testing and validation processes ensure networks adapt effectively, enhancing their predictive capabilities and accuracy in tasks ranging from image recognition to natural language processing.

Frequently Asked Questions

Hypothesis testing is crucial in data science to form and test assumptions using sample data. This section explores common questions on how hypothesis testing is applied in data science, its core concepts, and its practical implementation.

What are the fundamental steps involved in hypothesis testing for data science?

Hypothesis testing typically starts with stating the null and alternative hypotheses. Then, a significance level is chosen, often 0.05 or 0.01, to determine the threshold for rejecting the null hypothesis.

The test statistics are calculated and compared against critical values.

How is the null hypothesis defined in the context of data science?

In data science, the null hypothesis is usually an assumption that there is no relationship between variables or that a particular factor has no effect.

It acts as a baseline that a data scientist seeks to disprove with evidence from statistical tests.

Which types of hypothesis testing are most applicable to machine learning?

Common types include t-tests, which compare means between groups, and chi-squared tests, which evaluate categorical data. ANOVA is also used when comparing three or more groups.

These tests help determine the significance of features in predictive models.

What mathematical concepts are essential to understand hypothesis testing in data science?

Key concepts include probability distributions, sample sizes, p-values, and confidence intervals. An understanding of statistical significance and type I and II errors is also important.

These concepts help in designing and interpreting hypothesis tests accurately.

Can you provide examples of hypothesis testing used in real-world data science applications?

In marketing analytics, hypothesis testing can help analyze the impact of a new campaign on sales. In healthcare, it might be used to test the effectiveness of a new treatment.

Each application involves testing assumptions to drive data-driven decisions.

How is hypothesis testing implemented in Python for data analytics?

Python offers libraries like SciPy and statsmodels for hypothesis testing. These libraries have functions like ttest_ind or chi2_contingency that perform specific tests. Visualization tools such as Matplotlib help to illustrate results, making the interpretation clearer for analysts.