Categories
Uncategorized

Learning Seaborn Distribution Plots and Plot Types: A Comprehensive Guide

Getting Started with Seaborn for Data Visualization

Seaborn is an essential tool for creating beautiful, informative graphics in Python. Built on top of Matplotlib, this library enhances data visualization by providing a high-level interface for drawing attractive statistical graphics.

Seaborn’s ease of use makes it a popular choice for beginners. Its well-designed API allows users to generate many types of plots with minimal code, facilitating a smoother learning curve.

Users can create a variety of plots using Seaborn, including scatter plots, line plots, and distribution plots. This versatility helps in understanding different aspects of data. For example, distribution plots reveal data trends and patterns, essential in statistical analysis.

Key steps to get started with Seaborn:

  1. Installation: Install Seaborn using pip:

    pip install seaborn
    
  2. Basic Setup: Import Seaborn alongside Matplotlib to begin plotting:

    import seaborn as sns
    import matplotlib.pyplot as plt
    
  3. Example Use: Create a simple plot using built-in datasets:

    sns.set_theme()
    tips = sns.load_dataset("tips")
    sns.histplot(tips['total_bill'])
    plt.show()
    

Seaborn’s plots are aesthetically pleasing and informative, adding value to any data analysis task. The library’s ability to create complex visualizations with simplicity in syntax makes it a preferred choice for data scientists and analysts.

Explore the potential of Seaborn by experimenting with different styles and themes to enhance the appearance of your plots. For more on specific types of distribution plots, refer to the realpython.com tutorial on Seaborn.

Understanding the Data: Importing and Preparing

To effectively use Seaborn for visualizations, it is crucial to start by importing and preparing your data. This involves loading datasets using Seaborn’s built-in functions and performing essential pre-processing tasks with Pandas. These steps ensure that the data is in the right format and ready for analysis.

Loading Data with Seaborn’s load_dataset

Seaborn offers an easy way to load example datasets using the load_dataset function. This function is handy for testing and learning purposes. By simply calling seaborn.load_dataset(), one can access well-known datasets such as the tips dataset, which contains data about restaurant tips, or the iris dataset, which includes measurements of iris flowers.

To load a dataset, specify the dataset name as a string argument in the function. For example:

import seaborn as sns

# Load the "tips" dataset
tips = sns.load_dataset('tips')

The load_dataset function returns a Pandas DataFrame, which is crucial for further analysis and manipulation. These example datasets are stored in a format that is readily usable with Seaborn’s plotting functions.

Pre-processing with Pandas

Once data is loaded into a DataFrame, the next step typically involves pre-processing it using Pandas. This is essential for cleaning the data and making it suitable for visualization.

Common tasks include handling missing values, filtering specific rows, and renaming columns for clarity.

For instance, removing any rows with missing values can be done using:

# Drop rows with missing values
tips_clean = tips.dropna()

Pandas also allows for more advanced manipulations, like grouping and aggregating data. Such tasks prepare the dataset for deeper analysis and visualization, making it more informative and easier to interpret.

Preparing clean, well-structured data is key to successful data visualization in Seaborn.

Basic Plotting Functions in Seaborn

Seaborn provides powerful tools for creating various plots that help visualize and understand data distributions and relationships. The key functions include histograms, scatter plots, line plots, and bar plots, each offering unique insights.

Creating Histograms with histplot

Histograms are an excellent way to visualize the distribution of a single variable. The histplot function in Seaborn is designed to create these visualizations. This function allows for customizing the number of bins, which are the intervals used to group data points.

Choosing the right number of bins is crucial for accurately showing the data’s distribution. Users can adjust bins to see more detailed or broader views of the data.

Additionally, it’s possible to apply color to different histogram bars to enhance visual distinction. This feature can help identify patterns or trends that might not be immediately obvious.

Managing the histplot function effectively can reveal significant insights into the data’s frequency distribution.

Scatter Plots and scatterplot Function

The scatterplot function is ideal for displaying relationships between two numerical variables. By plotting individual data points on a scatter plot, users can identify patterns, trends, or potential correlations.

This type of plot is beneficial for understanding how one variable relates to another. The scatterplot function allows for adjusting the size and color of points, which can represent different variables or groups within the data.

This customization provides a deeper layer of information, making it easier to spot clusters or outliers. Additionally, using hues can help separate data by category, adding another dimension to the analysis.

Seaborn’s ability to modify these elements makes scatter plots a flexible tool for data analysis.

Line Plot Essentials

Line plots are useful for visualizing data trends over time or a sequence. The lineplot function in Seaborn facilitates the creation of these plots by connecting data points with a line.

This visualization highlights how values change, making trends easier to observe. Users can customize line style, color, and the addition of markers to indicate specific data points.

These adjustments enhance the clarity of the trends being analyzed. Line plots are especially helpful for identifying consistent patterns or shifts in data over a period.

By effectively using the line plot function, analysts can gain insights into both short-term changes and long-term trends.

Bar Plots and Data Aggregation

Bar plots are excellent for displaying and comparing quantities across different categories. Seaborn’s barplot function assists in aggregating data and representing it using rectangular bars.

The length of each bar corresponds to the value it represents. This plot type is particularly effective for showing distinctions between groups.

One of the primary advantages of bar plots is their ability to represent both raw data and summaries like averages or other statistical measures. They can also be color-coded to highlight specific categories or variables, improving data visibility.

Customizing bar plots allows for highlighting comparisons across distinct categories, making them a versatile tool for data representation.

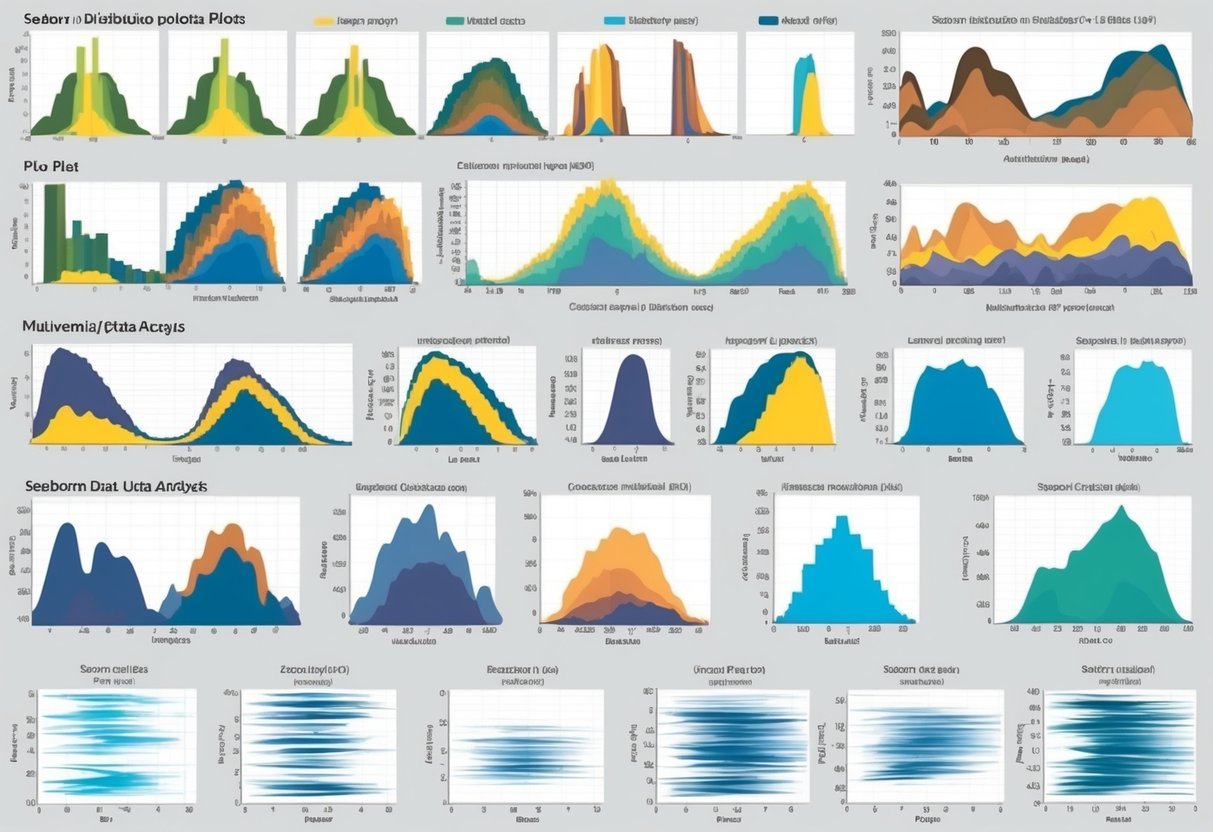
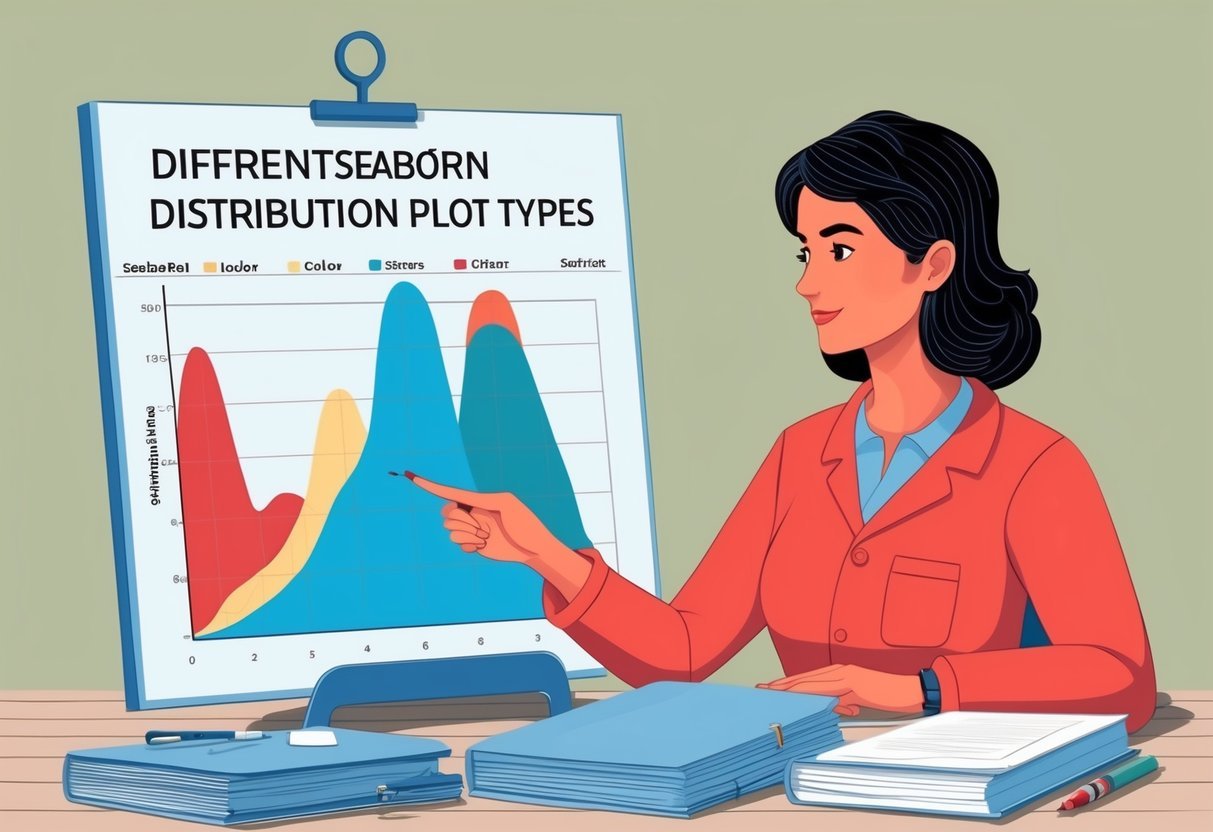
Univariate Distribution Analysis

Univariate distribution analysis focuses on visualizing a single variable’s data. It uses different plots to showcase the central tendency, dispersion, and shape of the data. Histograms, kernel density estimation, and rug plots are common methods for analyzing these distributions.

Visualizing Histograms and KDE Plots

Histograms are essential for displaying the distribution of a single variable. They divide the data into bins and use bars to show the count of observations in each bin. Choosing an appropriate bin size is crucial for accurately representing the data’s distribution.

The kernel density estimation (KDE) plot adds another dimension by displaying the data’s probability density. While histograms provide a view in discrete bins, KDE plots smooth the data. This results in a curve that is easier to read and offers insight into the central tendency and variability.

The Seaborn library uses the kdeplot() function for this purpose.

Rug Plots and Their Usage

Rug plots are another technique used in univariate distribution analysis. They display each data point directly on the plot as short vertical lines (or “rugs”), typically along the x-axis. This helps in understanding the data’s distribution.

When paired with a histogram or a KDE plot, a rug plot offers a more detailed view of individual data points. This combination provides immediate feedback on where actual data clusters exist, assisting in spotting anomalies or skewed data.

Seaborn’s rugplot() complements other distribution plots, adding depth to the visual analysis of univariate data.

Exploring Bivariate Data

Bivariate data analysis looks at relationships between two variables. This involves understanding how variables interact, often through visual tools like scatter plots and histograms. The focus here will be on using joint plots and pair plots to capture these interactions effectively.

Jointplot: Combining Scatter and Histogram

Joint plots are a powerful tool in data visualization, merging scatter plots and histograms into one compact view. This combination allows users to observe bivariate distributions and see how two variables relate.

The scatter plot shows individual data points, while histograms on the axes reveal the distribution of each variable.

A jointplot in Seaborn often includes options to display additional information, such as correlation coefficients. This makes it easier to measure the strength of the relationship between variables, often quantified by a metric like Pearson’s r.

Users can enhance joint plots with KDE (Kernel Density Estimation) to smooth the distribution line and add clarity.

Joint plots are ideal for exploring data patterns, highlighting clusters, and spotting outliers. Analysts can quickly assess whether a linear or non-linear relationship exists, aiding in further data modeling decisions.

Pair Plot Dynamics

Pair plots provide a dynamic overview of relationships across multiple pairwise combinations of variables. Unlike joint plots, which focus on a single bivariate relationship, pair plots display a grid of scatter plots and histograms, covering every variable in the dataset.

This comprehensive view is especially useful for datasets with more than two variables, offering insights into bivariate interactions between each pair.

Through these interactions, users can identify complex relationships and multivariate structures.

Seaborn’s pair plot feature includes options for customizing plots, such as adding hue to differentiate data classes. The ability to visualize this information easily helps uncover trends and correlations in the data that may not be apparent at first glance.

Overall, pair plots offer a clear, efficient way to explore numerous bivariate relationships simultaneously, making them a versatile choice for in-depth data analysis.

Working with Categorical Data

Categorical data is made up of discrete groups or categories. In data visualization, it’s crucial to display this data clearly to understand patterns and differences. This section explores various types of categorical plots in Seaborn, such as bar plots, box plots, violin plots, scatter plots, strip plots, and swarm plots.

Bar Plots, Box Plots, and Violin Plots

Bar plots are ideal for displaying categorical data. They show information using rectangular bars, where each bar’s length corresponds to the category’s value. This plot is particularly useful for comparing quantities across different categories.

Box plots give a five-number summary: minimum, first quartile, median, third quartile, and maximum. These plots are essential for identifying outliers and observing the spread of the data among categories.

Violin plots are similar to box plots but also show the data distribution’s density. They combine a box plot with a kernel density plot, providing deeper insights into the distribution shape. Violin plots are helpful for comparing data across different categories.

Categorical Scatter Plots

Categorical scatter plots are effective for displaying individual data points along a categorical axis. Strip plots and swarm plots offer nuanced ways to visualize such data.

In a strip plot, individual data points are displayed along a categorical axis. This plot can sometimes make data points overlap, which might obscure the data’s overall pattern.

A swarm plot addresses this by adjusting the position of points along the categorical axis to prevent overlap. This adjustment provides a cleaner view of the data, making it easier to see variations and patterns across categories.

Strip Plot and Swarm Plot

Strip plots show each data point as a single point along the category axis. They’re straightforward but can become cluttered if the data points overlap significantly.

Swarm plots solve this by offsetting points so that they do not overlap, preserving the original data distribution view. This makes it easier to distinguish individual points and provides an organized visualization of the data across different categories, especially when dealing with dense datasets.

These plots are particularly useful when one needs to observe how data points are distributed across different categories, assisting in detecting patterns or trends that may not be apparent otherwise.

Advanced Visualizations

Seaborn offers tools to create advanced visualizations that enhance data analysis. Techniques like heatmaps and facet grids allow users to explore relationships and patterns within datasets effectively.

Constructing Heatmaps

Heatmaps are ideal for visualizing data matrices. They display variable correlations using color gradients, making it easy to spot patterns.

Seaborn simplifies this with the heatmap() function, where users can input a dataset matrix and customize it using various options.

Cluster maps, which extend heatmaps, add hierarchical clustering to both rows and columns, revealing groupings within the data. Annotating heatmaps with numeric values can provide more detailed insights. Adding annotations can help in understanding the specific data values corresponding to each cell.

By leveraging these features, users can generate plots that not only highlight data relationships but also support complex analyses. Interactive Plotly visualizations can be used to explore larger datasets in detail.

Creating Facet Grids

Facet grids facilitate multi-plot visualization by creating a matrix of plots based on data categories. They are particularly useful for exploring relationships in multi-variable datasets.

In Seaborn, the FacetGrid class allows for easy structuring of grids. Users define row, column, and hue categories to create a grid layout.

Pair grids and facet grids are related, with pair grids being more focused on relationship exploration among multiple variables. This is especially helpful for revealing interactions between variables visually.

Facet grids encourage consistent formatting across plots, aiding comparison. They offer a systematic approach to data visualization, making intricate data patterns more accessible.

Customizing Plots for Better Insights

A computer screen showing a variety of Seaborn distribution plots with different plot types and customization options

Customizing plots in Seaborn helps reveal deeper insights and makes the visualizations more engaging. By adjusting color palettes and modifying plot sizes and bins, users can create aesthetically pleasing graphics that enhance data analysis.

Adjusting Color Palettes

Color palettes play a key role in how data is perceived. Seaborn offers a wide range of palettes to decorate plots effectively, improving clarity and emphasis.

For instance, users might choose the darkgrid theme for a professional look or whitegrid for a cleaner appearance. Each palette can highlight specific data points and trends.

Choosing colors that contrast well can make plots stand out. Seaborn makes it easy to experiment with different palettes like deep, muted, or colorblind to find the best fit for a dataset. This approach helps ensure that colors are not just visually appealing but also functional in emphasizing critical data points.

Modifying Plot Sizes and Bins

Adjusting plot sizes and bins is crucial for displaying data accurately.

Seaborn’s high-level interface allows easy resizing of plots, which ensures that visualizations fit well on various devices or publications. Modifying plot dimensions can prevent overcrowding or excessive whitespace, making information clearer.

Bins, particularly in histograms, determine the number of intervals that data is divided into. By increasing or decreasing bins, analysts can control the granularity of the data.

More bins can reveal detailed patterns, while fewer bins provide a broader overview, helping to avoid misleading interpretations.

For both size and bin adjustments, Seaborn provides flexibility, making plots more insightful and tailored to specific analytical needs.

Plot Types and Customization in Seaborn

Seaborn is a powerful library for creating a variety of plots. It offers different plot types like displot, relplot, and catplot, each serving specific purposes. Customization is possible through axes-level functions that allow users to tailor visuals to fit their data presentation needs.

Differentiating displot, relplot, and catplot

Displot is used for visualizing the distribution of data. It offers options for histograms and kernel density estimates. It’s ideal for understanding the frequency and spread of data points. This makes it useful for gaining insights into univariate data distributions.

Relplot focuses on relational data. It allows users to explore connections between variables.

This plot type is essential when examining trends or relationships, such as growth over time. Relplot can represent data using scatter plots or line plots, adaptable for both categorical and continuous data.

Catplot is best for categorical data visualization. It includes various plots like bar plots, box plots, and violin plots, among others. They help highlight different aspects of categorical variables.

Catplot is versatile for showing comparisons across categories in a dataset. These plot types allow for comprehensive and insightful data analysis.

Customizing with Axes-Level Functions

Axes-level functions are key for fine-tuning plots in Seaborn. Functions like sns.lineplot or sns.scatterplot provide granular control over the style and mapping of data.

They help customize aspects like color, markers, and line styles, which enhances the clarity of visual data representations.

Users can modify plots to highlight specific data points or trends by adjusting axes, labels, and titles. This customization supports clearer data interpretation.

Axes-level customization can make charts more informative and visually appealing. Customization empowers users by tailoring visuals to specific data analysis needs.

Statistical Data Visualization Techniques

Seaborn offers powerful tools for statistical data visualization, helping users understand complex datasets. This section explores methods for analyzing data distribution and regression, focusing on specific techniques to visualize general trends and detect outliers.

ECDF Plots for Distribution Analysis

Empirical Cumulative Distribution Function (ECDF) plots are crucial for understanding data distribution in a straightforward manner. The ECDF plot is a step function that displays the proportion of observations below or equal to each unique data value.

This plot is particularly useful for comparing multiple datasets, as it provides a visual representation of data spread and central tendencies.

Seaborn’s ecdfplot function is a handy tool for creating these graphs. By plotting data points on a uniform scale, users can easily assess distribution characteristics like skewness and identify outliers.

Compared to traditional histograms or density plots, ECDFs offer a clearer view of the distribution, especially in highlighting data tails. This makes ECDF plots a preferred choice for exploratory data analysis, especially when the goal is to compare distributions between different groups.

Regplot and lmplot for Regression

Seaborn also excels in regression analysis through functions like regplot and lmplot. These tools help visualize the relationship between two variables by fitting a regression line over scatter plots.

Such plots are essential in spotting trends, relationships, and potential outliers within the data.

The regplot function is useful for simply overlaying a linear fit on data, while lmplot offers more advanced options, such as faceting by additional variables. This allows for multi-panel plots that show the regression across subsets of data, thus providing deeper insights into complex relationships.

These plots help clarify whether a relationship is linear or if there are non-linear patterns present.

Incorporating regression plots into analysis allows for a clearer understanding of how variables interact statistically and visually.

Analyzing Distribution Characteristics

When analyzing data, understanding its distribution is key. Seaborn provides various tools to achieve this, especially through distribution plots. These plots help visualize how data points are spread across different values.

The histogram is one of the most common distribution plots. It groups data into bins and shows how many data points fall into each bin. This is useful for identifying patterns like skewness or data concentration.

Histogram Example

Another plot type is the density plot, which smooths out data distributions. It provides a more polished view compared to histograms, making it easier to see trends and peaks in the data.

Furthermore, the bivariate plots are excellent for exploring the relationship between two variables. These plots can include scatter plots or heatmaps.

For example, a bivariate distribution plot can reveal correlations by using a heatmap to display data density.

Seaborn also offers the pairplot, which combines different types of plots. This is useful for examining multiple variables at once, allowing for insightful multivariate analysis.

Analyzing distribution characteristics involves inspecting measures like skewness and kurtosis to understand the symmetry and peakedness of the distribution. With Seaborn’s distribution plots, users can effectively examine these features, providing a thorough overview of data characteristics.

Understanding Multivariate Data

A colorful array of Seaborn distribution plots showcasing various plot types and multivariate data analysis

Multivariate data involves observations with more than one variable. Analyzing these data points is essential for identifying patterns and relationships among variables. Tools like Seaborn provide versatile plots that reveal these complex structures.

Visualizing Multi-dimension Data

Visualizing multivariate data involves showing relationships between multiple variables. Pairplot is a powerful tool, offering comprehensive visuals by creating a grid of scatter plots for continuous variables. It helps identify clusters, trends, and correlations.

Another useful tool is FacetGrid, which lets users plot subsets of data across multiple facets. This is helpful to compare different categories of a categorical variable while analyzing continuous characteristics.

Seaborn’s scatter plots can also visualize multivariate data by using color to encode a third variable’s information. These methods are crucial in exploratory data analysis to understand and interpret complex datasets better. Learn more about these techniques by exploring the detailed guide on multivariate data analysis.

Frequently Asked Questions

A person studying a chart of different distribution plot types for Seaborn

Seaborn offers a variety of options for visualizing data distribution in Python. In this section, users will discover how to work with distribution plots and learn about specific plotting functions and customization techniques available in Seaborn.

How can one create and interpret a seaborn distribution plot in Python?

To create a distribution plot in Seaborn, use the distplot or displot function. These plots help visualize the distribution of a dataset, providing insights into patterns such as central tendency and variability. Interpreting these plots involves examining features like peak areas, spread, and any skewness present in the data.

What are the key differences between histogram and distribution plots in seaborn?

Histograms are used to group continuous variables into bins, showing the frequency of occurrences in each bin. Distribution plots, on the other hand, can include kernel density estimation (KDE) which smoothens the appearance, providing a more detailed view of the data’s distribution shape.

Which seaborn function is used to visualize data distribution?

Seaborn features several functions for visualizing data distribution, such as distplot, displot, and kdeplot. These functions offer flexibility in how data distributions are displayed, including options for histograms, KDE, and empirical cumulative distribution functions (ECDF).

In seaborn, which plots are most suitable for visualizing statistical distributions?

For visualizing statistical distributions, Seaborn’s KDE plots, histograms, and pair plots are quite effective. Each offers unique ways to understand data spread and relationships. KDE plots are particularly helpful for seeing smooth distribution curves, while pair plots can examine multi-variate relationships.

Can you outline the steps to customize the appearance of seaborn distribution plots?

Customization in Seaborn is straightforward. By altering parameters like color, alpha, and bins, users can tailor plot aesthetics. Additionally, using matplotlib settings, plots can be further refined with customized axes, titles, and labels for improved clarity and presentation.

What are the various options for plotting bivariate distributions using seaborn?

Seaborn offers several options for bivariate distributions, including scatterplot, kdeplot, and jointplot functions.

These plots help visualize relationships between two variables, showing patterns like correlation and clustering.

Joint plots, for instance, combine scatter plots with histograms or KDE for enhanced insights.

Categories
Uncategorized

Learning About Python External Modules: A Comprehensive Guide

Understanding Python and Its Modules

Python is a versatile programming language popular for its simplicity and readability.

This section explores Python’s core programming fundamentals, its module system, and how modules are imported in Python.

Python Programming Fundamentals

Python programming is known for its straightforward syntax and dynamic typing. It handles both simple and complex tasks elegantly.

The language supports different programming paradigms, such as procedural, object-oriented, and functional programming.

Variables in Python don’t require explicit declaration; their types are inferred when a value is assigned.

Control structures like loops and conditional statements are also simple to use, making Python an excellent choice for beginners.

Python’s standard libraries and built-in functions streamline common tasks like file handling and data processing. These features make Python a powerful tool for developers across various fields.

The Module System in Python

Modules in Python are files containing Python-code that define functions, classes, and variables. They help organize code and promote reusability.

A module is created by saving Python code in a file with a .py extension.

To access a module’s content, Python programmers use the import statement. This method brings one module’s functions and classes into another, allowing seamless integration of different functionalities.

With these abilities, developers can break their code into manageable parts.

Python’s extensive support for modules enhances productivity and maintains organization during software development projects.

Core Python Modules and Import Mechanics

Python features numerous built-in modules, such as itertools, sys, and os. These modules are loaded by default and offer tools for various tasks.

To utilize a module, the import keyword is employed. For finer control, the from keyword can import specific components.

For instance, import math allows access to mathematical functions, while from math import sqrt directly imports the square root function.

Modules have their own namespace, avoiding conflicts between different functions and variables. This system is crucial for larger projects that involve various dependencies.

Setting Up the Python Environment

Setting up the Python environment efficiently is crucial for managing dependencies and project versions. This involves correctly configuring paths and deciding how to handle different Python versions.

PythonPath Configuration

The PYTHONPATH variable helps define where Python looks for modules outside its default locations. This can be crucial on systems like Windows, where file paths can vary.

The sys.path is a list that includes directories Python searches for modules. Python apps can adjust this list at runtime, but configuring PYTHONPATH beforehand ensures the environment is set up before Python starts.

Setting PYTHONPATH requires adding paths to directories containing Python modules in the environment variables. This process can be done via the command line or through system settings.

Correctly managing these paths helps avoid conflicts and ensures that scripts run smoothly by accessing the correct resources first.

Managing Python Versions

Managing Python versions is vital for maintaining compatibility across different projects.

Tools like pyenv or the built-in venv module can create isolated environments, each with its own version of Python. This is important for projects that rely on specific features or libraries.

On Windows, updating or switching between versions might require administrative privileges.

Using virtual environments not only isolates dependencies but also simplifies the process of switching projects with differing requirements.

This ensures smooth operations by preventing version mismatches.

Structured management of versions and environments allows developers to focus on development without worrying about compatibility issues.

Working with External Python Modules

Working with external Python modules allows developers to enhance their programs with additional features. By utilizing tools like pip, they can easily manage and install these modules. Understanding the structure of .py files is key to successfully integrating external code into projects.

Using pip to Install Packages

pip is Python’s package manager that simplifies the installation process of external modules. It allows users to easily add and manage different packages in their environment, making it an essential tool for anyone learning Python.

To install a package, users simply type a command such as pip install <package-name> in their terminal.

Many popular libraries are available through pip, such as NumPy for numerical computations and requests for making HTTP requests.

When installing a package, pip resolves dependencies and installs them automatically, ensuring all necessary components are available.

Using pip, developers can also update and uninstall packages, providing flexibility and control over the development environment.

Staying organized with pip is crucial, and it supports creating a requirements.txt file. This file lists all necessary packages and their versions, which can be shared across projects.

By using pip install -r requirements.txt, developers can quickly set up a consistent environment on different systems.

Understanding the .py Files

When working with external Python modules, developers often encounter .py files. These are the main files containing source code written in Python. They can include functions, classes, and other definitions that form a module or package.

These files are essential for learning how to use a module effectively. Developers can explore the code within .py files to see how specific functions are implemented and understand usage patterns.

This is especially helpful when documentation is limited or when clarifying the behavior of complex code.

Sometimes, it’s necessary to modify .py files to customize the behavior of a module. When doing so, customizing can bring specific functionality into line with project requirements. However, one must always consider compatibility issues with future updates to the module.

Understanding how .py files work and how to navigate them is crucial for successfully integrating external modules into a Python project.

Module Aliases and Namespace Management

In Python, using module aliases can simplify code by creating shortcuts for module names. It’s crucial for programmers to manage namespaces efficiently to prevent conflicts. The following subsections explore how to create aliases for modules and best practices for managing namespaces.

Creating Aliases for Modules

When working with Python modules, defining aliases can make code more readable. For instance, instead of using the full name of a module, a short alias can be used. A common example is importing the pandas library as pd.

import pandas as pd

This practice helps keep code concise, reducing clutter when repetitive module names are needed. Aliases are especially useful in large projects where module names overlap. Using a consistent alias across projects also enhances code readability.

Using standard aliases that are widely recognized minimizes confusion. For instance, np is the standard alias for numpy. Recognizable aliases improve collaboration by maintaining uniformity across different codebases.

Namespace Best Practices

Namespaces in Python act as containers for identifiers like variables and functions. Proper management prevents naming conflicts that could arise from using the same name for different objects.

When importing modules, it’s essential to manage the namespaces to avoid collisions.

By structuring and utilizing namespaces, programmers can avoid unintended interactions between different parts of a program.

For instance, using from module import function can bypass a full module name, but may lead to conflicts if two modules have functions with identical names.

Programmers should prefer importing the whole module and using an alias to access its functions or classes. This approach keeps namespaces distinct and clear, reducing potential confusion and errors.

Organizing code into packages and sub-packages with clear naming conventions also helps in managing namespaces effectively.

Data Handling with Python Modules

When handling data in Python, understanding the available data structures and analytical tools is important. Using them correctly can greatly improve the efficiency of coding tasks related to data processing. This section focuses on essential data structures and modules in Python for effective data handling and analysis.

Data Structures in Python

Python offers several data structures that allow for efficient data manipulation.

Lists are one of the most common structures, ideal for storing ordered data. They allow for easy modifications such as adding or removing elements.

Dictionaries are another powerful structure, providing a way to store data as key-value pairs. This makes data retrieval straightforward when you know the key associated with the data you need.

Sets are useful for handling unique elements and performing operations like unions and intersections efficiently.

Arrays can be managed using libraries like numpy, offering specialized features such as multidimensional arrays and high-level mathematical functions.

Each of these structures can help reduce the complexity and increase the speed of data operations in Python, making them fundamental to effective data handling.

Modules for Data Analysis

For more advanced data analysis, Python provides powerful libraries such as the pandas library.

Pandas offer data manipulation capabilities similar to a spreadsheet, allowing users to create, modify, and analyze data frames with ease.

With functionalities for handling missing data, grouping data, and computing statistics, pandas is a favorite among data analysts.

It also supports data import from various formats such as CSV, Excel, and SQL databases, making it versatile in data preparation.

In addition, tools like matplotlib and seaborn are often used alongside pandas for data visualization.

They help in creating plots and graphs, which are essential for data-driven storytelling.

By combining these tools, Python becomes a robust choice for comprehensive data analysis tasks.

Enhancing Code Maintainability and Readability

Improving the maintainability and readability of Python code involves employing effective programming paradigms and ensuring clarity in the code structure. This section explores the significance of adapting different paradigms and highlights why readable code is crucial.

Programming Paradigms and Python

Python supports multiple programming paradigms that help enhance code maintainability and readability.

Object-oriented programming (OOP) encourages code organization by using classes and objects. This leads to better reusability and simplicity, which is essential for managing larger codebases.

Functional programming, another paradigm, focuses on immutability and pure functions. As a result, the code is often more predictable and easier to test.

These practices help in reducing errors and maximizing readability.

Using paradigms like these allows developers to write cleaner code that aligns well with Python’s design philosophy.

Python’s support for various paradigms provides flexibility in choosing the best structure for the task. By using the right paradigm, developers can write more readable, maintainable, and efficient code.

The Importance of Readable Code

Readable code is vital for maintaining and scaling projects in any programming language.

Clarity in code makes it easier for other developers to understand and contribute to existing projects. It reduces the learning curve for new team members and simplifies debugging processes.

Following style guides like PEP 8 ensures consistency, helping developers focus on logic rather than syntax nuances.

Tools and best practices, like those found in resources discussing Pythonic code, offer ways to enhance code clarity.

Readable code is not just about aesthetics; it significantly affects the ease with which a codebase can be maintained and advanced.

Prioritizing readability from the start can lead to more streamlined and efficient development processes.

Scientific Computing in Python

Python is a powerful tool for scientific computing due to its extensive range of libraries. Two critical aspects are performing numerical tasks and data visualization. These topics are addressed through libraries like Numpy and Matplotlib.

Leveraging Numpy for Numerical Tasks

Numpy is essential for numerical computing in Python. It provides high-performance multidimensional arrays and tools to work with them efficiently.

Scientists use arrays to store and manipulate large datasets, which is common in scientific applications.

One key feature is broadcasting, allowing operations on arrays of different shapes without needing additional code. This helps simplify complex mathematical operations.

Numpy also offers functions for linear algebra, Fourier transforms, and random number generation.

Arrays in Numpy can be created with simple functions such as array() for lists and linspace() for generating evenly spaced numbers.

Numpy’s capabilities make it a cornerstone in scientific computing, ensuring speed and ease-of-use in data processing tasks. For those interested in diving deeper into Numpy, GeeksforGeeks covers it in greater detail.

Data Visualization Techniques

Visualizing data effectively is crucial in scientific computing. Matplotlib is a popular library providing ease in creating static, animated, and interactive plots in Python. It helps in making sense of complex data through graphical representation.

With Matplotlib, users can create line plots, scatter plots, histograms, and more. Its interface is inspired by MATLAB, making it familiar for users transitioning from those environments.

Important plot elements like labels, titles, and legends are customizable.

Example code:

import matplotlib.pyplot as plt

plt.plot([1, 2, 3, 4])
plt.ylabel('some numbers')
plt.show()

Matplotlib’s flexibility allows integration with other libraries like Pandas for data analysis. Understanding its core functions enhances anyone’s ability to present data effectively. More information about these techniques can be found at the Scientific Python Lectures site.

Integration of Python in Data Science

A computer screen displaying code with Python modules and data science concepts, surrounded by books and notebooks

Python plays a crucial role in data science due to its vast ecosystem of libraries. These tools aid in data manipulation and machine learning, providing the foundation for effective data analysis and model building.

Key libraries include Pandas and Scikit-Learn, each offering unique capabilities for data scientists.

Pandas for Data Manipulation

Pandas is a powerful library for data manipulation and analysis. It provides data structures like DataFrames, which allow users to organize and explore large datasets effortlessly.

Pandas is particularly valuable for cleaning data, handling missing values, and transforming data into a more usable format.

With its intuitive syntax, it enables quick data aggregation and filtering, crucial steps for preparing data for analysis. Key features of Pandas include:

  • Data Alignment: Handles missing data seamlessly.
  • Grouping: Easily group and summarize data.
  • Merge and Join: Combine datasets based on common fields.

By providing these functions, Pandas streamlines the data preparation process, making it easier to perform analyses needed in data science projects. Pandas is an essential tool for anyone working with data.

Machine Learning with Scikit-Learn

Scikit-Learn is a pivotal library for machine learning in Python. It is designed for a wide range of applications, from classification to regression.

Scikit-Learn provides simple tools for building predictive models, making it accessible even for beginners in data science.

It supports model selection and evaluation, allowing users to fine-tune their algorithms for improved performance. Here are key aspects of Scikit-Learn:

  • Versatile Algorithms: Includes SVMs, decision trees, and more.
  • Model Validation: Offers cross-validation techniques.
  • Feature Selection: Helps identify the most important data attributes.

Scikit-Learn’s comprehensive suite of tools positions it as a go-to library for implementing machine learning models in Python. This makes it an integral part of data science practices.

Python for Web Development

A computer screen displaying Python code with various web development modules open in the background

Python is a versatile language often used in web development. It supports powerful frameworks like Flask and tools such as Beautiful Soup for web scraping.

Web Frameworks: Flask

Flask is a micro web framework written in Python. It is designed to make building web applications straightforward and quick.

Unlike bigger frameworks, Flask gives developers control over the components they want to use by keeping the core simple but allowing extensions when needed.

Flask is based on the WSGI toolkit and Jinja2 template engine. It is lightweight, making it easy to learn and ideal for small to medium-sized projects.

Flask does not enforce a specific project layout or dependencies, offering flexibility.

Developers often choose Flask when they desire to have a modular design for their web application. It allows them to organize their code in a way that makes sense for their specific needs.

Web Scraping with Beautiful Soup

Beautiful Soup is a library that makes it easy to scrape web pages. It can parse HTML and XML documents, creating a parse tree for web scraping tasks like extraction and navigation of data.

Beautiful Soup provides Pythonic idioms for iterating, searching, and modifying the parse tree.

For web developers, Beautiful Soup is useful when they need to retrieve data from web pages quickly and efficiently.

It can turn even the most tangled HTML into a manageable parse tree. It supports many parsers, but working with Python’s built-in HTML parser makes this tool very straightforward.

This library is widely used for tasks like data mining and creating automated data collection tools.

Advanced Python Modules for Machine Learning

A computer displaying code with machine learning algorithms and Python module icons

Python offers strong modules like TensorFlow and Keras that are essential for deep learning. They enable the construction and training of neural networks, providing tools needed to develop sophisticated machine learning applications.

TensorFlow and Keras for Deep Learning

TensorFlow is a robust open-source framework ideal for tasks involving neural networks. It supports computations on both CPUs and GPUs, making it highly versatile for various environments.

Its core strengths include flexibility and scalability, catering to both research and production needs.

TensorFlow facilitates intricate model building with its vast collection of tools and libraries.

Keras, often used alongside TensorFlow, offers a simpler API for building and training deep learning models. It is particularly popular because it allows users to prototype quickly without deep diving into the complicated details of backend computations.

Keras supports layers and models and is efficient for trying out new models rapidly.

Constructing Neural Networks

Developing neural networks with these tools involves several steps like defining layers, compiling models, and specifying optimization strategies.

TensorFlow provides robust support for customizing neural networks, making it easier to tailor models to specific needs by adjusting layers, activations, and connections.

Keras simplifies the network construction process with its user-friendly interface. It allows for quick adjustments to various elements such as input shapes and layer types.

Users can effortlessly stack layers to create complex architectures or modify settings to enhance performance.

Interacting with the Python Package Index

A computer screen displaying the Python Package Index website, surrounded by open books on Python programming and external modules

The Python Package Index (PyPI) is a hub where users can discover a wide range of packages to enhance their projects. It also offers an opportunity for developers to share their work by contributing packages to the community.

Finding Python Packages

PyPI serves as a repository where users can find and install packages made by the Python community. Tools like pip help in fetching these packages directly from PyPI.

Users can browse and explore packages on the PyPI website, which provides details about each package, including its dependencies and usage. Many packages also host their source code on GitHub, allowing users to review code and participate in development.

Contributing to Python Packages

Developers looking to contribute to PyPI can package their code and submit it to the index for community use.

Creating a package involves preparing code and documentation, and using tools like setuptools to handle packaging requirements. Detailed instructions for uploading packages help guide developers through sharing their projects on PyPI.

Often, developers collaborate using platforms like GitHub to maintain and discuss improvements to their projects, fostering a collaborative environment.

Computer Vision and Image Processing with Python

Python, with its simplicity and power, offers robust tools for computer vision and image processing. At the forefront of these is OpenCV, a comprehensive library that enables the manipulation and understanding of visual data. This provides both beginners and experts with a suite of tools to create complex applications.

Understanding OpenCV

OpenCV is a powerful, open-source library designed for computer vision and image processing tasks. It supports Python, making it accessible to a wide range of users.

The library can handle various functions such as image recognition, object detection, and video analysis.

One of OpenCV’s strengths is its ability to convert images and videos into a format that can be easily processed. For example, it can convert colored videos to gray-scale efficiently, a common step in many image processing tasks.

The handy APIs in OpenCV allow developers to write efficient code for real-time applications, leveraging multicore processors effectively.

For those new to this field, OpenCV provides a strong foundation for learning and experimentation. It integrates well with libraries such as NumPy, allowing for powerful mathematical operations on image data.

OpenCV also supports machine learning tasks, forming a bridge between computer vision and AI.

Advanced users can take advantage of OpenCV’s GPU acceleration features, which enhance performance for resource-intensive tasks. This is crucial for projects requiring high efficiency and speed.

Overall, OpenCV remains a versatile and essential library for those venturing into computer vision with Python. For additional tutorials and resources on OpenCV, developers can explore GeeksforGeeks or the OpenCV University.

Frequently Asked Questions

A computer screen with Python logo surrounded by question marks and various external module icons

Learning about Python external modules can greatly enhance programming projects. Understanding how to find, install, and manage these modules is important for both beginner and advanced developers.

How can I find and install external modules in Python?

External modules in Python can be found on the Python Package Index (PyPI). To install them, one can use the pip command in a terminal or command prompt.

For example, to install a module like NumPy, the user can execute pip install numpy.

Which external modules are essential for beginners in Python development?

Beginners might start with modules that simplify common tasks. Popular choices include NumPy for numerical computations and matplotlib for creating visualizations.

These modules are user-friendly and have rich documentation, making them great choices for newcomers.

What are the differences between built-in and external Python modules?

Built-in modules are part of the Python standard library and do not require installation. External modules, on the other hand, are developed by third parties and need to be downloaded and installed separately using tools like pip.

What are some examples of popular external modules used in Python projects?

Some widely used external modules in Python projects include requests for handling HTTP requests, Pandas for data manipulation, and Flask for web development.

These modules offer specialized functionality that can significantly boost development efficiency.

Where can beginners find resources or tutorials for learning about external Python modules?

Beginners can explore platforms like GeeksforGeeks for articles and guides. Additionally, sites like Stack Overflow provide answers to specific questions, and the official Python documentation offers comprehensive information about module usage.

How do you manage and update external Python modules in a project?

To manage and update external modules, tools like pip are essential.

Users can check for outdated packages with pip list --outdated and then update them using pip install --upgrade package-name.

Version control systems also help maintain module consistency in project environments.

Categories
Uncategorized

Learning How to Deal with Categorical Data in Python: Essential Techniques and Tools

Understanding Categorical Data

Categorical data is critical for multiple fields like marketing and finance. Proper handling of this data type is key for machine learning applications.

The sections below cover its types and the significance of transforming categorical variables for effective model implementation.

Definition and Types

Categorical data consists of discrete categories that are not expressed in numbers. It is usually divided into two main types: nominal and ordinal data.

Nominal data includes categories that do not have a specific order, like gender or country of origin.

On the other hand, ordinal data has a defined sequence, such as a rating scale from low to high.

Importance in Machine Learning

Categorical variables are common in datasets and must be converted to a numerical form for machine learning models. This transformation process, known as encoding, is essential because most learning algorithms expect numerical input.

Failing to encode categorical data properly can lead to poor model performance.

Techniques like one-hot encoding or label encoding are often used.

One-hot encoding creates binary columns for each category, while label encoding assigns a specific integer to each category.

Proper encoding helps in leveraging categorical data effectively for building robust models, enabling the algorithms to draw accurate insights from diverse inputs.

Setting Up the Python Environment

Setting up a Python environment is crucial for handling categorical data efficiently. This involves installing necessary libraries like Pandas and Scikit-learn and importing them into your workspace.

Installing Required Libraries

To process categorical data effectively, the right Python libraries are essential. Pandas, NumPy, and Scikit-learn are commonly used for this purpose.

To install these libraries, use the package manager pip. In the command line, execute:

pip install pandas numpy scikit-learn

Installing these libraries provides tools for managing datasets, performing numerical computations, and implementing machine learning algorithms.

Pandas offer data manipulation capabilities, while NumPy handles numerical operations.

Scikit-learn, an extension of sklearn, is vital for encoding categorical features, making it an essential part of the toolkit for data preprocessing and analysis.

Importing Libraries

Once the necessary libraries are installed, the next step is importing them into the Python script. This is done at the beginning of the script to utilize their functions throughout.

Add these lines to your Python code:

import pandas as pd
import numpy as np
from sklearn.preprocessing import LabelEncoder, OneHotEncoder

Pandas is imported as pd for data manipulation, and NumPy as np for numerical tasks.

Scikit-learn’s LabelEncoder and OneHotEncoder are imported for transforming categorical data into numerical form.

This setup allows practitioners to execute data tasks efficiently, ensuring smooth preprocessing in machine learning workflows.

Data Preprocessing in Python

Data preprocessing transforms raw data into a clean dataset, ready for analysis. It involves loading, exploring data structures, and addressing missing values. Using libraries like pandas, these tasks become easier and more efficient.

Loading Data

The first step in data preprocessing involves loading data into a Python environment. This can be done using pandas, a popular library for data analysis. It allows users to read data from different sources such as CSV files, Excel spreadsheets, or SQL databases.

For instance, data from a CSV file can be loaded using:

import pandas as pd

data = pd.read_csv('file.csv')

This code snippet creates a DataFrame, a pandas object for handling datasets. Users can also employ functions like read_excel or read_sql to import data from various formats.

Ensuring accurate loading is crucial for subsequent data manipulation.

Inspecting Dataframe Structure

Once data is loaded, it’s important to understand its structure. This involves examining the DataFrame to identify column names, data types, and any missing values.

The head() function is often used to view the first few rows:

print(data.head())

Other useful functions include info(), which provides a summary of the data types and non-null counts, and describe(), which offers statistics for numeric columns.

This step allows users to get a sense of the dataset’s dimensions and potential preprocessing needs, ensuring accuracy in how data is further manipulated and used for machine learning or analysis tasks.

Exploratory Data Analysis for Categorical Variables

Exploratory Data Analysis (EDA) for categorical variables helps uncover patterns and insights in data science by summarizing and visualizing these variables effectively. This process aids in understanding data distributions and relationships.

Summary Statistics

Looking at summary statistics of categorical variables provides insights into their distribution. Frequency counts are essential, as they show how often each category appears.

This can be done using functions like value_counts() in Python, which offers a quick overview.

Another useful statistic is the mode, or the most common category. It gives an idea of the majority preference within a dataset.

Examining proportions and percentages also aids in comparing different groups within the data.

These measures help form initial impressions and hypotheses for further analysis.

Visualization Techniques

Visualization plays a vital role in EDA for categorical variables. Bar charts are some of the most common and effective tools. They display category frequencies visually, making it easy to compare different groups.

In Python, libraries like Matplotlib and Seaborn are popular choices for creating these plots.

Pie charts, though less detailed, provide a quick look at the proportion each category holds in the entire dataset.

Stacked bar charts can be used to analyze the relationship between multiple categorical variables.

Interactive plots, like those created with Plotly, enhance exploration by allowing users to focus on specific details.

These visuals are instrumental in revealing patterns that summary statistics alone might miss.

Encoding Techniques Overview

Encoding categorical data is essential for using it in machine learning, as algorithms need numerical input. Various encoding methods exist to handle categorical data, each with different benefits and best-use scenarios.

Understanding Encoding

Encoding is the process of converting categorical data into numerical form. Methods such as Label Encoding and One-Hot Encoding are commonly used.

Label Encoding assigns each unique category a number, making it simple but potentially problematic for non-ordinal categories since it might imply a relationship between numbers that does not exist. This method is ideal for ordinal data where natural order is present.

On the other hand, One-Hot Encoding creates binary columns for each category, resulting in sparse data that’s manageable with modern computational resources.

Choosing the Right Encoding Method

Choosing the right method depends on the data type and the machine learning model.

For example, One-Hot Encoding is suitable for algorithms that do not assume order among categories, such as linear regression.

For large datasets with numerous categories, Target Encoding can be valuable as it uses mean of the target variable for each category, effectively capturing more information.

Models like CatBoost natively handle categorical data and often work well with one-hot or target encoding, making them a good choice for complex datasets.

It is important to always consider the implications of each encoding method on model performance and interpretability.

Implementing One-Hot Encoding

One-hot encoding is a method used to convert categorical data into a binary matrix, which is essential for many machine learning models. This encodes categorical variables as a series of binary vectors. Two popular libraries for performing this task in Python are Pandas and Scikit-learn.

Using Pandas get_dummies

Pandas offers the get_dummies function, which simplifies one-hot encoding. This function transforms categorical columns into separate columns of binary values. It is effective because it automatically handles nominal data, where the categories do not have an inherent order.

Benefits of get_dummies:

  • Ease of Use: One-liner implementation.
  • Automatic Handling: Deals with missing categories by filling with zeros.
  • Flexibility: Provides options to drop the first binary column to avoid multi-collinearity in linear models.

Using get_dummies is straightforward:

import pandas as pd

data = {'Color': ['Red', 'Blue', 'Green']}
df = pd.DataFrame(data)
one_hot = pd.get_dummies(df['Color'])

This code turns the ‘Color’ column into a binary format, creating new columns for each unique value.

Using Scikit-learn’s OneHotEncoder

Scikit-learn provides the OneHotEncoder class, which is highly customizable and integrates smoothly with its machine learning pipelines. It converts categories into a sparse matrix, saving memory when dealing with large datasets.

Key Features of OneHotEncoder:

  • Handle Missing Values: Option to manage unknown categories at transform time.
  • Sparse Output: Efficient storage of large binary matrices.
  • Integration: Can be seamlessly combined with other preprocessing and modeling tools.

Example usage:

from sklearn.preprocessing import OneHotEncoder
import numpy as np

encoder = OneHotEncoder(sparse=False)
data = np.array(['Red', 'Blue', 'Green']).reshape(-1, 1)
encoded_data = encoder.fit_transform(data)

Here, OneHotEncoder is used to convert the array of color categories into a binary format, ready for use in machine learning models.

Working with Ordinal Encoding

Ordinal encoding transforms categorical data into numerical form, assigning order to categories. This method is crucial for data where order matters. It is often used in machine learning to label ordered categories with integer values.

The Basics of Ordinal Encoding

In ordinal encoding, categories are ranked and given integer values. This method is especially useful for ordinal data, where the sequence is significant.

For example, income groups might be encoded as 1 for “40K-75K,” 2 for “75K-100K,” and so on.

The order allows machine learning models to understand the progression between categories.

Ordinal encoding contrasts with one-hot encoding, which doesn’t account for order but instead uses binary columns. This approach is simpler and more compact for ordered categories.

Applying Scikit-learn’s OrdinalEncoder

Scikit-learn provides a convenient tool with its OrdinalEncoder to apply this encoding method efficiently. It maps each category to an integer value automatically.

To implement this, one must first import the module and then fit and transform the data. Once the data is processed, it can be used in a variety of machine learning models.

While OrdinalEncoder is versatile, it’s important to know when to use a LabelEncoder instead.

LabelEncoder is suited for the target variable rather than features. These encoders help streamline the preparation of data, ensuring models accurately interpret the order of information.

Advanced Encoding Strategies

To effectively handle categorical data, advanced encoding strategies can be employed. These techniques help transform categorical variables into a format that machine learning models can interpret more efficiently.

This section covers two popular methods: binary encoding and frequency and mean encoding.

Binary Encoding

Binary encoding is a technique that combines aspects of one-hot encoding and label encoding to reduce dimensionality. This approach first assigns a unique integer to each category.

These integers are then converted to binary. Each binary digit is turned into a new column, creating binary columns for the dataset.

This strategy limits the risk of high dimensionality, which is a common issue with one-hot encoding. By reducing the number of columns, it also helps with memory efficiency.

Binary encoding works well when dealing with features that have a large number of unique categories. It maintains the information while simplifying the data structure.

Frequency and Mean Encoding

Frequency encoding is a straightforward method that replaces categories with their frequency count in the dataset. It helps in revealing the significance of each category by showing how often it appears.

This approach is beneficial when the frequency of occurrences is more informative than categorical labels.

Mean encoding, on the other hand, replaces each category with the mean value of the target variable for that category. This representation is effective in showing the relationship between categories and the target, but it poses a risk of data leakage.

To counter this, cross-validation techniques are advised.

These encoding methods are commonly utilized in machine learning tasks, allowing models to perform better with the encoded data. By selecting the appropriate encoding strategy, practitioners can optimize their data for better model performance.

Integrating Encoded Data with Machine Learning Models

Successfully integrating encoded categorical data into machine learning models requires careful preparation and evaluation. It is crucial to convert categorical features into a format that models can interpret.

Strategies like cross-validation help ensure that models remain robust and do not suffer from overfitting, which can occur when a model learns the noise in the data instead of the actual signal.

Preparing Data for Modeling

Before feeding data into a machine learning algorithm, categorical features must be efficiently converted into numeric forms. This often involves techniques like one-hot encoding or ordinal encoding.

One-hot encoding creates binary columns for each category, making it suitable for models like linear regression that require numeric inputs.

The choice of encoding can significantly affect the performance of the model, so it’s important to understand the structure and nature of the data.

For instance, ordinal encoding is better suited for features with a clear order. Proper preparation of the data helps machine learning algorithms process the information accurately and efficiently, enhancing model performance.

Avoiding Overfitting with Cross-Validation

Overfitting is a common pitfall in machine learning, where a model performs well on training data but poorly on unseen data. This can occur if a model learns intricate details and noise within the training data.

To counter this, cross-validation techniques are employed.

Cross-validation involves splitting the data into multiple subsets and training the model multiple times, each time with a different subset used for validation.

This method helps ensure the model captures the underlying patterns. It also provides a more reliable estimate of model performance, as seen in practices like cross-validation techniques, which are crucial in validating models and ensuring they are not overfitted.

Modeling with Decision Trees

Decision trees are used to handle various data types, including categorical features. They provide clear decision paths and can effectively split data to help make predictions.

Handling Categorical Data with Decision Trees

Handling categorical data in decision trees requires attention to data representation. Decision trees in tools like Scikit-Learn typically require numerical input. To include categorical features, these must be encoded into numbers.

Approaches like one-hot encoding can be used to transform categorical data into a numerical format.

Another strategy is to use binary encoding, which can be more memory-efficient for large datasets. While Scikit-Learn itself doesn’t natively handle categorical data, other libraries like Spark do support explicit declaration of categorical features, which can be beneficial for certain projects.

Evaluating Model Performance

Evaluating model performance is key to understanding how well a decision tree predicts outcomes. Metrics such as accuracy, precision, recall, and F1-score are commonly used.

Confusion matrices give a detailed breakdown of model predictions, helping to identify if the model is biased towards certain categories.

Cross-validation methods, such as k-fold cross-validation, can test the model across different data splits to ensure robustness.

It’s crucial to assess if the decision tree model tends to overfit, which can happen if it learns the training data too perfectly.

Regularization techniques, such as pruning, can help maintain a balance between model complexity and performance, ensuring it generalizes well to unseen data.

Advanced Machine Learning Considerations

When handling categorical data in machine learning, certain advanced techniques can significantly enhance model performance. Key areas include assessing feature importance and fine-tuning hyperparameters for optimal results.

Feature Importance

Feature importance is crucial for understanding which categorical features most influence the target variable. By focusing on these important features, unnecessary complexity can be reduced, leading to more efficient models.

Feature selection techniques such as using tree-based algorithms like Random Forests and Gradient Boosting can rank features by importance effectively.

Another method involves using permutation importance, which measures feature impact by assessing changes in model accuracy when a feature’s values are shuffled.

This helps identify features that highly affect predictions, allowing practitioners to focus on what really matters in the dataset.

This kind of analysis aids in making informed decisions on feature engineering that accurately reflect the influence on the target variable.

Hyperparameter Tuning

Hyperparameter tuning is an essential process in machine learning that enhances the performance of models that use categorical data.

Methods such as grid search and random search are commonly employed to discover the optimal hyperparameters, allowing algorithms to work best with the given data.

Advanced techniques like Bayesian Optimization are also utilized for more efficient exploration of hyperparameter space.

Bayesian methods consider past evaluation results to make informed decisions on which hyperparameters to test next. This reduces computational cost and improves model performance.

Ensuring well-tuned hyperparameters is key in refining how the model interacts with categorical features, ultimately leading to more accurate predictions of the target variable.

Best Practices in Encoding

Converting categorical data into numerical data is crucial for machine learning. Effective encoding ensures improved model performance while maintaining data integrity.

Avoiding Common Mistakes

One common error in encoding categorical data is mishandling non-ordinal categories by using simple label encoding. This might imply a false order in data, which can mislead models.

Instead, for non-ordinal categories, one-hot encoding is preferred. It represents categories without implying any hierarchy by creating a binary column for each category.

Another mistake is not fitting the encoding on the training set before applying it to test data. This can cause discrepancies in category representation.

If there are new categories in test data absent in training data, hashing might be a solution. Hashing encodes categories by mapping them to fixed-size vectors, helping models handle unseen categories smoothly.

Ensuring Data Consistency

Data consistency is vital during encoding to maintain reliability across train and test datasets. This involves applying the same encoding method used on the training data to the test data.

The practice ensures that the representation of categorical variables remains the same, supporting seamless model evaluation and comparison.

Consistent handling of missing data is also crucial. It may be handled by creating a separate category for missing values or using specific techniques to fill these gaps.

Ensuring numerical data remains consistent involves checking for discrepancies post-encoding. Any outliers or inconsistencies in encoded data need to be reviewed to maintain the model’s integrity.

Frequently Asked Questions

When working with categorical data in Python, it is important to convert it into a numerical format for machine learning models. This usually involves methods like encoding, normalization, and summarization to prepare the data effectively.

What are the common methods for encoding categorical data in Python?

Encoding is essential for turning categorical data into a format that machine learning models can understand. The two most common methods are label encoding and one-hot encoding. Label encoding assigns a unique number to each category, while one-hot encoding creates binary columns for each category.

How can one perform one-hot encoding of categorical variables in Python?

To perform one-hot encoding, libraries like Pandas can be used. The pandas.get_dummies() function is often employed to transform categorical columns into a matrix of binary values, where each unique category has its own column with ones and zeros indicating its presence.

What techniques are used for handling categorical data in machine learning models?

Categorical data requires transformation before it can be used in machine learning models. Techniques such as one-hot encoding and label encoding are frequently employed. These methods allow models to process categorical data by converting it into numerical values that can be used within algorithms.

How can categorical data be normalized in Python before analysis?

Normalization ensures data is on a consistent scale. In Python, libraries like sklearn offer functions like MinMaxScaler or StandardScaler to normalize numerical representations of categorical data. This process adjusts the values to fall within a specified range, improving the performance of many algorithms.

What is the process for summarizing categorical data using Python?

Summarizing categorical data involves calculating metrics such as frequency counts and proportions.

Python’s Pandas library provides functions like value_counts() and groupby() to easily aggregate and summarize this data, helping identify patterns and insights within datasets.

Categories
Uncategorized

Learning Pandas for Data Science – Essential Tool for Data Manipulation

Getting Started with Pandas

Pandas is a powerful Python library used for data manipulation and analysis. It is commonly employed in data science to handle structured data efficiently.

Starting with Pandas involves installing it and integrating it effectively with Python.

Installing Pandas

To begin using Pandas, one must first install the package. The easiest method is through the Python package manager, pip.

Simply open a terminal or command prompt and type pip install pandas. This command downloads and installs the latest version of Pandas along with its dependencies.

For those using Anaconda, Pandas often comes pre-installed. However, users can update it by using the command conda install pandas.

Keeping Pandas up-to-date ensures access to new features and bug fixes.

Installation is usually straightforward, and any issues can often be resolved by checking network connections or permissions.

Pandas for Python

Pandas is designed to work seamlessly with Python, providing data structures for making data operations easy. It introduces two main data types: Series and DataFrame.

A Series is a one-dimensional array, while a DataFrame is a two-dimensional, table-like structure akin to a spreadsheet.

A typical workflow begins with importing Pandas using import pandas as pd. This convention allows easy access to the library functions.

Users can then read data from various formats such as CSV, Excel, or SQL databases into DataFrames using commands like pd.read_csv() or pd.read_excel().

Utilizing Python’s comprehensible syntax, Pandas enables users to perform complex data manipulations and analysis tasks such as filtering, grouping, and aggregating data. This makes it a go-to choice for many data scientists and analysts.

Understanding Pandas Data Structures

Pandas provides two core data structures, Series and DataFrames, which are essential for data manipulation and analysis. These structures offer robust capabilities for handling a wide range of data operations with efficiency and ease.

Series and DataFrames

A Pandas Series is a one-dimensional array-like object that can hold any data type, such as integers, strings, or even other arrays. It is indexed, meaning each element in the Series has a label, making it like a cross between a list and a dictionary.

This feature allows for easy data retrieval, facilitating operations like filtering or aggregation.

In contrast, a Pandas DataFrame is a two-dimensional, tabular data structure consisting of rows and columns, similar to a spreadsheet. Each column in a DataFrame is a Series.

DataFrames allow users to perform a wide array of operations, such as merging datasets, calculating summary statistics, or handling missing values efficiently. They are designed to make data analysis tasks straightforward and are an indispensable tool for data scientists.

Data Structure Properties

Both Series and DataFrames come with a host of properties that make them powerful.

For instance, they support data alignment, automatically matching data values by their index labels across operations. This alignment is particularly useful for time series data or when combining datasets with disparate indices.

Another critical property is handling missing data. Pandas provides built-in functions to detect, replace, or drop missing values, ensuring that datasets maintain their integrity.

Additionally, DataFrames can handle large datasets efficiently, offering functions to split, stack, or reshape data without compromising performance. These properties make Pandas an ideal choice for anyone looking to manage and analyze data methodically.

Data Importing and Exporting

Pandas provides robust tools for both importing and exporting data. This capability is essential for data scientists who need to work with various file types and formats.

Reading Data from Files

Pandas offers powerful functions to read data from multiple file formats. The read_csv function is used for reading CSV files, which are common due to their simplicity.

Similarly, data from Excel files can be imported using read_excel, allowing users to handle spreadsheets efficiently. For databases, Pandas can connect and import data using SQL queries, making it versatile across different sources.

JSON files are another popular format, and Pandas can handle them with read_json. This function is particularly useful when working with structured data.

Furthermore, HTML pages can be imported with Pandas, transforming tables from web pages into DataFrames, which greatly aids web data analysis.

Saving Data to Files

Exporting data with Pandas is straightforward. Data can be saved as CSV files using the to_csv function, ensuring easy sharing and storage of datasets.

For structured data, to_json is available, converting DataFrames into JSON format, which is beneficial for web applications and data interchange.

For Excel files, Pandas provides to_excel, allowing users to export data into spreadsheets. This function is crucial for sharing data with those who prefer working in spreadsheet applications.

Pandas also supports saving to SQL databases, providing seamless integration for database updates.

These functions together make Pandas an incredibly versatile tool in the data science toolkit, handling a wide range of data sources with ease.

Data Wrangling Basics

Data wrangling with Pandas is crucial in data science. It involves preparing raw data for analysis by cleaning and transforming it. This ensures that data is reliable and ready for analysis, which leads to more accurate insights.

Data Cleaning

Data cleaning deals with fixing issues in the data, such as missing values and incorrect data types. In Pandas, a DataFrame is a common structure used to handle tabular data.

It is essential to identify and address any missing values, as they can lead to incorrect results.

Techniques like replacing missing values with a mean or median, or even removing rows with too many missing entries are commonly used.

Pandas offer functions such as dropna() and fillna() to handle these issues. Using dropna(), you can remove any row or column with missing data, whereas fillna() allows you to provide a substitute for missing entries.

Ensuring consistent data types within a DataFrame is also essential. This involves converting, for example, text numbers into integers or floats to make calculations possible.

Data Transformation

Data transformation includes altering the structure or values within a dataset to make analysis easier. This might involve changing the layout of data or creating new calculated columns.

In Pandas, this means modifying a DataFrame using functions like pivot_table() or operations such as merging and concatenating datasets.

For example, combining multiple data sources into a single DataFrame using merge() helps in consolidating the dataset for comprehensive analysis.

Pandas also provides powerful tools to group data into categories with groupby(), allowing for summary statistics that provide insights into trends within the data.

Ultimately, data transformation prepares data for any deep analysis that follows, making use of a wide array of Pandas’ functionalities to tailor the dataset precisely to the analyst’s needs.

Exploratory Data Analysis

Exploratory Data Analysis (EDA) is crucial in the realm of data science, offering insights into datasets through various techniques. It aids in the identification of patterns, the detection of anomalies, and helps draw important conclusions using numerical summaries and visual tools.

Summary Statistics

Summary statistics provide a quick way to get an overview of the data. These metrics include the count, mean, median, minimum, and maximum values, among others.

Using tools like Pandas’ describe() function, one can quickly assess these statistics for a dataset. This function provides a series of useful metrics by column, allowing analysts to understand the spread and central tendency of data points.

In practice, EDA with summary statistics identifies outliers and patterns that might not be immediately apparent. For example, discrepancies between mean and median can indicate skewness in the data distribution.

By scrutinizing statistics, data scientists can make informed decisions about data cleaning and preparation. These statistics serve as a foundational step in data analysis, guiding further investigations and analyses.

Data Visualization Tools

Data visualization tools transform datasets into graphical forms, making it easier to spot trends and anomalies. Matplotlib and Seaborn are two popular Python libraries that aid in this process.

Matplotlib offers a versatile platform for creating static, animated, and interactive visualizations. When combined with Seaborn, users can create more aesthetically pleasing and informative graphics.

Seaborn is built on top of Matplotlib and provides an easier way to create complex visualizations with less code.

Tools like these enable analysts to better comprehend data characteristics and enhance communication of findings.

By visualizing data, one turns complex data sets into understandable and accessible pictures that guide decision-making processes.

Advanced Data Manipulation

Advanced data manipulation in Pandas involves techniques like grouping, aggregating, and reshaping data. These methods allow users to uncover insights by organizing data effectively and analyzing complex datasets.

Grouping and Aggregating Data

Pandas provides a powerful tool for grouping data using the groupby function. This method allows users to group data by one or more columns, and then perform aggregate functions on the grouped data.

For example, one can calculate the average or sum of numerical columns within each group.

The groupby functionality is flexible, supporting several operations such as sum, mean, max, min, and even custom functions.

Users can also explore the number of unique elements within each group using the nunique function, which provides insights into data diversity.

Grouping helps in finding patterns and relationships within datasets. For instance, if analyzing sales data, a user can group by product category to see correlations between different items and their sales figures.

Pivot Tables and Cross-Tabulation

Pivot tables in Pandas are similar to those in spreadsheet applications. They allow data to be reshaped for better readability and analysis.

By using the pivot_table function, users can summarize data, which is essential for reports and presentations.

Pivot tables support multiple index and column specifications. Aggregation functions can be applied during the pivot process, making it easy to summarize large datasets. This aids in tasks like sales data analysis or performance metrics comparison.

Cross-tabulation is another helpful function that calculates the frequency of a specific combination of categories. This enables further analysis of relational statistics, like correlation between categorical variables, which assists in discovering trends within the data.

Handling Missing Data

Managing missing data in pandas is essential for accurate data analysis. This involves techniques like detecting gaps and deciding whether to fill or drop these missing entries depending on the analysis requirements.

Detecting and Filling Gaps

In pandas, handling missing values often starts with detection. The isna() or isnull() functions are crucial for identifying gaps. They help in flagging missing entries within a dataset.

Once detected, appropriate actions can be taken, such as filling these gaps.

Filling gaps can be done using the fillna() method. This method allows for replacing missing values with a specified value, mean of the column, or using the forward/backward fill method.

Choosing the right approach depends on the data context and the importance of the missing values. Pandas for Everyone provides useful strategies for this process.

Dropping Missing Data

Alternatively, one might opt to drop rows or columns containing missing data. This is often done when gaps are too widespread or irrelevant to the analysis. The dropna() function in pandas enables this by removing rows or columns with missing values.

Deciding to drop data depends on how significant the missing portion is compared to the entire dataset. If the missing data isn’t critical, dropping can simplify analysis without losing key insights. In data science projects with Python, it’s important to weigh the impact of missing data before deciding to drop it from the dataset.

Integration with Other Python Libraries

A computer screen displaying code using Pandas library with other Python libraries integrated for data science

Pandas is exceptional for handling and manipulating data, but its true power emerges when integrated with other Python libraries. This section highlights how Pandas connects seamlessly with libraries like NumPy and SciKit-Learn, expanding its capabilities in numerical computing and machine learning respectively.

NumPy for Numerical Computing

NumPy is a fundamental package for numerical computing in Python. It provides support for arrays and a range of mathematical functions. Integrating NumPy with Pandas enhances data processing capabilities.

DataFrames in Pandas can be easily converted to NumPy arrays for efficient computations involving large datasets.

Both libraries complement each other effectively. For example, NumPy’s functions can be used alongside Pandas’ capabilities for advanced manipulations. This is useful in data science tasks requiring complex mathematical operations, where speed and efficiency are key. Thus, NumPy and Pandas form a powerful duo for any data analyst or scientist, providing the tools needed to handle large-scale data with precision.

SciKit-Learn for Machine Learning

SciKit-Learn is a key library for machine learning in Python. It provides simple and efficient tools for data mining and data analysis. Pandas plays a crucial role when using SciKit-Learn, as it allows the convenient handling and cleaning of data before feeding it into machine learning models.

The integration with Pandas makes it easier to prepare AI and machine learning models. DataFrames from Pandas serve as a suitable input format for SciKit-Learn’s algorithms, simplifying the process of feature selection and data preprocessing. This partnership enables machine learning practitioners to streamline their workflows, focusing more on model optimization, rather than data preparation challenges. No other combination so effectively bridges data handling with model training in Python.

Time Series Analysis with Pandas

Pandas provides robust tools for handling and analyzing time series data in data science. This makes it indispensable for tasks involving big data, allowing users to effectively manipulate and analyze time-indexed data using DataFrames.

Time Series Functions

Time series analysis with Pandas involves utilizing a variety of functions that simplify working with dated data. The resample() function, for example, allows aggregation or downsampling to different time frequencies.

Users can perform operations like calculating weekly averages or monthly totals efficiently.

Another important function is rolling(), which is useful for calculating moving averages or other statistical metrics over a specified window of time. Such features are crucial for trend analysis and forecasting in big data contexts.

Additionally, shift() enables comparisons over different time periods by moving data along the time index. These functions empower users to perform complex time series analysis with ease.

Working with Dates and Times

Handling dates and times is central to time series analysis. Pandas offers to_datetime(), a function that converts date strings into a datetime format that Pandas can interpret. This conversion is necessary for performing any time series computations.

The library’s support for frequency conversion makes it easy to switch between different time periods, such as daily to monthly data.

Users can also leverage Timedelta for managing time durations, and Period for handling different time intervals naturally. These tools ensure that data scientists can efficiently manage and analyze temporal data stored within DataFrames, driving insights from massive datasets.

Performance Tips and Tricks

Using Pandas effectively in a data-driven world requires smart techniques to enhance performance, especially when handling large datasets. Essential strategies focus on reducing memory usage and performing operations efficiently.

Reducing Memory Usage

Minimizing memory usage is critical when working with large datasets in Pandas, as this can significantly impact performance.

One effective method is to convert data types to more memory-efficient alternatives. For example, converting integers from int64 to int32 or int16 can save significant space. Similarly, changing float64 to float32 helps when precision is not a crucial factor.

Another approach is to use the category data type for columns with a limited number of unique values, such as categorical variables or text fields with repetitive entries. This can drastically reduce memory usage because it stores the data more efficiently by using only the unique values and referencing them as categories.

It’s helpful to remove unnecessary columns from dataframes before processing them. This reduces the amount of memory required and speeds up calculations. Using the del keyword or the drop method makes this task straightforward.

Efficient Operations

Efficient operations in Pandas help minimize processing time, which is invaluable in extensive data manipulation tasks.

Vectorized operations, where operations apply to an entire array, are significantly faster than iterating through rows with loops. This is due to Pandas’ optimized backend, which leverages low-level libraries like NumPy.

Using methods like apply or applymap can offer readable and efficient alternatives to complex operations. However, they may not always be the most efficient choice.

Whenever possible, employing built-in Pandas functions such as mean, sum, or max can provide better performance.

Pre-allocating space for data structures instead of dynamically resizing them is another efficiency gain. When appending data, it’s more efficient to collect all data into a list and concatenate them at once rather than appending row by row.

Effective Data Exporting in Pandas

Exporting data efficiently is a key feature of Pandas. It allows users to share datasets or analyze them further using different tools. This often involves exporting data to various formats and connecting with external sources.

Exporting to Different Formats

Pandas provides versatile options to export data to different file formats. CSV files are commonly used due to their simplicity and wide acceptance. The to_csv() method in Pandas allows users to export data frames with ease. It includes options to control delimiters, header inclusion, and index settings.

Another format supported is Excel files, which use the to_excel() function. This method can handle multiple sheets by writing different datasets to each.

For users interested in web-based formats, Pandas supports JSON and HTML through to_json() and to_html(). These are particularly useful for web applications where interactive data displays are required.

Connecting with External Sources

Pandas also excels in connecting with external data sources, which enhances its exporting capabilities.

It can directly interact with databases like SQL using functions such as to_sql(). This capability is crucial when working with large datasets stored in databases that need to be shared.

Pandas also integrates with online APIs to fetch and export data. Users can employ libraries like requests to pull data into Pandas and then use its exporting functions to save data in the desired format. This integration streamlines workflows, especially in data science projects that pull from real-time sources. The ability to export to cloud platforms further extends Pandas’ utility in collaborative environments.

Real-World Applications of Pandas

Pandas is an essential tool for data scientists due to its capability to handle complex data structures and perform in-depth analysis. It simplifies the process of data cleaning and preparation, making it valuable in various industries for tasks such as data manipulation, statistical analysis, and visualization.

Case Studies

Pandas is commonly used in data-driven projects. In finance, it processes large datasets like stock prices or panel data, allowing analysts to extract trends and insights for market predictions.

In healthcare, it manages patient records, enabling efficient data cleaning and statistical analysis that supports clinical decision-making processes.

In marketing, companies leverage Pandas to analyze customer data, identifying patterns in purchasing behavior. This helps in creating targeted advertising strategies and improving customer engagement.

Pandas in the Industry

Pandas is a standard tool in various industries, including finance, healthcare, and technology.

Financial institutions use it to analyze and forecast market trends. It handles panel data efficiently, providing valuable insights for investment decisions.

Data scientists appreciate Pandas for its robust data manipulation capabilities and its seamless integration with other Python libraries.

In healthcare, professionals rely on Pandas for analyzing patient data. It supports creating meaningful visualizations that aid in medical research and improve patient outcomes.

Technology companies use Pandas for data analysis in software development, helping optimize processes and improve product features.

Frequently Asked Questions

Pandas plays a vital role in Python data analysis with its robust features for data manipulation. Its capabilities often complement other tools like NumPy and scikit-learn, offering a structured approach to handling complex datasets.

What is the purpose of Pandas in Python data analysis?

Pandas is used for handling large datasets with ease and efficiency. It provides data structures like DataFrames that simplify data manipulation, cleaning, and preparation tasks, making it essential for data analysis tasks and exploratory data analysis.

How do Pandas and NumPy differ in handling data for data science?

Pandas and NumPy are both essential for data science but differ in functionality. While NumPy focuses on numerical data and computations using arrays, Pandas provides more flexible data structures suited for tabular data with labeling support, making it easier to analyze and manipulate data.

What are the key advantages of using Pandas in data manipulation?

Pandas offers extensive options for data manipulation, such as filtering, grouping, and merging datasets. Its ability to handle missing data and perform complex operations on large datasets efficiently makes it a favorite tool for data scientists who deal with diverse data types.

How does Pandas integrate with machine learning libraries like scikit-learn?

Pandas integrates seamlessly with machine learning libraries like scikit-learn. It allows for easy manipulation and transformation of data into the required format, facilitating the preprocessing steps essential for building machine learning models.

In what scenarios might the use of Pandas be considered disadvantageous?

Pandas might be less effective with extremely large datasets that exceed memory constraints. In such cases, using tools specifically designed for big data, such as Dask or PySpark, may be more appropriate.

Why is Pandas proficiency important for data scientists?

Proficiency in Pandas is crucial for data scientists. It streamlines the process of data cleaning and preparation. By mastering Pandas, data scientists can efficiently handle, analyze, and visualize data. These are core tasks in the field of data science.

Categories
Uncategorized

Machine Learning – Classification: Support Vector Machines Explained

Basics of Support Vector Machines

Support Vector Machines (SVM) are powerful tools in machine learning for classification tasks. They are known for their ability to handle high-dimensional data and their use in various applications, from image recognition to bioinformatics.

Definition of SVM

A Support Vector Machine is a type of supervised learning model used for classification and regression. Its main idea is to find a hyperplane that best separates data points into different classes.

The SVM aims to maximize the margin between the classes, which is the distance between the closest data points to the hyperplane from each class. These closest points are called support vectors.

Using kernel functions, an SVM can handle both linear and non-linear classification tasks, making it versatile in its applications. SVMs are also robust against overfitting, especially in cases with high-dimensional input space, because they focus on the points that are the most difficult to classify.

History and Evolution

The concept of SVMs emerged from statistical learning theory, initially developed by Vladimir Vapnik and Alexey Chervonenkis in the 1960s. Their work laid the foundation for contemporary machine learning models.

The SVM gained popularity in the 1990s when it was further refined and adopted for practical machine learning tasks. Over the years, advancements included the development of kernel methods, which allow the SVM to classify data that is not linearly separable.

Today, SVMs are widely used in various fields, such as text classification and image recognition, due to their accuracy and efficiency. They continue to evolve with ongoing research, leading to new variations and enhancements like support vector regression and one-class SVM for outlier detection.

Mathematical Foundations

Support Vector Machines (SVMs) are built on several important mathematical concepts that help them classify data effectively. These include the use of vectors and hyperplanes to separate data points, defining the margin that separates classes, and optimizing this separation using techniques like convex optimization and hinge loss.

Vectors and Hyperplanes

In SVMs, data points are represented as vectors in a multidimensional space. A hyperplane is a flat affine subspace that divides the space into two half-spaces.

In classification tasks, the goal is to find the optimal hyperplane that separates different classes of data.

For a simple example, consider a 2D space where the hyperplane is a line. In higher dimensions, this line becomes a plane or hyperplane. The equation of a hyperplane can be written as w · x + b = 0, where w is the weight vector, and b is the bias.

Margin and Support Vectors

The margin is the distance between the hyperplane and the closest data points from each class. SVMs aim to maximize this margin to create a robust classifier.

The larger the margin, the lower the chance of misclassification.

Support vectors are the data points that lie on the boundary of the margin. These points are critical as they define the position and orientation of the hyperplane. Therefore, even small changes or movements in these points can shift the hyperplane.

Convex Optimization and Hinge Loss

SVMs use convex optimization to find the best hyperplane. Convex optimization ensures that there is a global minimum, making the problem solvable efficiently. The optimization problem is generally formulated as a quadratic programming problem.

To ensure accurate classification, SVMs often employ hinge loss, which is used to penalize misclassifications.

The hinge loss function is defined as max(0, 1 – y(w · x + b)), where y is the class label. This function is advantageous for its simplicity and ability to differentiate between correct and incorrect classifications efficiently.

SVM Classification and Regression

Support Vector Machines (SVM) are used in machine learning for both classification and regression tasks. They can handle linear and non-linear data by using a technique known as the kernel trick. This section explores their application in binary classification, multi-class classification, and support vector regression.

Binary Classification

In binary classification, SVMs are designed to separate data into two distinct classes. The main goal is to find the optimal hyperplane that maximizes the margin between the classes.

This is achieved by using support vectors, which are the data points closest to the hyperplane, ensuring the highest accuracy.

The hyperplane is determined by solving an optimization problem that focuses on minimizing classification errors while maximizing margin width. Binary classification with SVMs is effective in various applications such as email filtering and image recognition.

Multi-class Classification

Multi-class classification extends the binary approach to handle multiple classes. The most common methods are one-vs-one and one-vs-all strategies.

In one-vs-one, SVMs are trained to distinguish between every pair of classes, while in one-vs-all, an SVM is trained for each class against all other classes.

These strategies allow SVMs to perform well in situations where the data have more than two categories. Although computationally more demanding, SVMs are widely used in areas like document classification and handwriting recognition because of their precision and reliability.

Support Vector Regression

Support Vector Regression (SVR) adapts SVM for regression problems, which involve predicting a continuous output variable. Unlike SVM in classification, SVR seeks to fit the best line within a margin of tolerance, aiming to minimize the error within the specified threshold.

SVR uses a similar optimization process but focuses on finding a function that deviates from actual values within the allowable margin. This makes SVR suitable for financial forecasting and real estate valuation, where predicting continuous values precisely is crucial.

Kernel Methods in SVM

Kernel methods in Support Vector Machines (SVMs) allow the algorithm to solve non-linear classification problems efficiently. By using kernel functions, SVMs transform data into a higher-dimensional space where it becomes easier to separate with a hyperplane.

Understanding the Kernel Trick

The kernel trick is a key concept in SVMs that enables the transformation of data. Instead of calculating coordinates directly, the trick uses kernel functions to compute the inner products in this new space.

This is computationally efficient and allows SVMs to perform in high-dimensional spaces without explicitly computing the coordinates, thereby saving on both memory and computation time.

The kernel trick supports SVM’s flexibility in handling complex data distributions. It effectively manages features’ interactions, allowing SVMs to generalize better to unseen data.

Types of SVM Kernels

SVMs commonly use several types of kernels, each suited to different kinds of data.

  1. Linear Kernel: Ideal for linearly separable data. It is straightforward and computationally cheap.

  2. Polynomial Kernel: Extends linear models to account for interactions among features. The polynomial degree controls the flexibility, allowing SVMs to capture relationships of varying complexity.

  3. Radial Basis Function (RBF) Kernel: Popular due to its ability to model intricate patterns. It maps points into an infinite-dimensional space, providing a high degree of flexibility.

SVM users select these kernels based on the problem’s requirements, ensuring that the model fits the data well.

Custom Kernels

Beyond standard kernels, custom kernels can be designed to handle specific types of data or domain-specific problems. These kernels are tailored to incorporate unique properties of the data that standard kernels might miss.

By using domain knowledge, practitioners define custom kernels to emphasize relevant features while suppressing noise. This results in more accurate and efficient models. Custom kernels provide the flexibility to adapt SVMs for specialized tasks and enhance performance beyond the capabilities of generic kernels.

Feature Space and Dimensionality

A colorful 3D graph with multiple data points, showing the separation of classes using a hyperplane in a support vector machine

Understanding feature space and dimensionality is key to effective classification using support vector machines (SVMs). These elements determine how data is represented and processed and can significantly impact the accuracy of the classification model.

Working with High-Dimensional Spaces

In many applications, the feature space can be high-dimensional, meaning that it includes a vast number of features or variables. This is common in fields like neuroimaging, where data often involves many variables.

High-dimensional spaces allow SVMs to separate data more easily because they offer more flexibility in how data points can be arranged. However, having too many dimensions can introduce challenges, like the curse of dimensionality.

This issue can make it harder to find patterns because the data becomes sparse.

Regularization techniques are often used to manage high-dimensional spaces by reducing their complexity while maintaining model performance. This helps prevent overfitting, where the model performs well on training data but poorly on new data.

Selecting important features through dimension reduction can also improve model accuracy and efficiency in classifying data.

Feature Transformation

The transformation of features into a new space can significantly enhance the performance of SVMs. By mapping data into a higher-dimensional feature space, SVMs can find a hyperplane that separates classes more effectively.

Techniques like kernel functions are essential in this process, allowing SVMs to perform well even when the feature space is initially non-linear.

Kernel functions, such as polynomial or radial basis function (RBF) kernels, enable this transformation without explicitly computing in high dimensions. This results in efficient computation while maintaining the ability to handle complex data structures.

The transformation ensures that the data becomes more linearly separable, which is crucial for the SVM to perform accurate classification.

Careful choice and application of these transformations lead to improved performance and more accurate predictions in a variety of classification tasks.

Regularization and Overfitting

Regularization helps control overfitting by making adjustments to the learning process. Overfitting occurs when a model performs well on training data but poorly on new data. Regularization aims to improve the model’s ability to generalize its findings. This section explores how regularization is applied through the soft margin method and the role of the C parameter.

Understanding Regularization

In machine learning, regularization is a technique used to prevent overfitting by adding a penalty to the loss function. This penalty discourages extreme values in model parameters, which can make the model fit too closely to the training data.

By adjusting these parameters, the model learns to balance fitting the training data with maintaining the ability to perform well on unseen data.

Regularization methods include L1 (Lasso) and L2 (Ridge) regularization. L1 regularization can lead to sparse models by eliminating some coefficients, while L2 regularization shrinks the coefficients but retains them all.

The choice between L1 and L2 depends on the specific needs of the model and the nature of the data. Different types of problems may benefit from one method over the other.

Soft Margin and C Parameter

The soft margin concept in support vector machines introduces the idea of allowing some misclassifications to achieve better overall model performance. This is crucial for non-linearly separable data where a perfect separation might not be possible.

Instead of forcing a strict decision boundary, soft margins allow for some flexibility.

The C parameter is a regularization parameter that controls the trade-off between achieving a low error on the training data and maintaining a simpler decision boundary.

A high value of C prioritizes low training errors, potentially leading to overfitting. Conversely, a low value may increase the training error but lead to better generalization. Adjusting this parameter helps find the right balance for accurate predictions.

Implementing SVM with Python Libraries

Support Vector Machines (SVM) are powerful tools in machine learning used for classification tasks. Python libraries provide efficient ways to implement SVM, making it accessible for various applications. This section explores how to use Scikit-learn’s SVM modules and techniques for parameter tuning and optimization.

Scikit-learn’s SVM Modules

Scikit-learn is a popular Python library that offers accessible tools for implementing SVM.

The SVC module is widely used for creating SVM classifiers. It provides flexibility with parameters like kernel.

The kernel parameter can be set to linear, polynomial, or RBF, depending on the data’s nature.

Using sklearn, one can declare an SVM model using a few lines of code:

from sklearn.svm import SVC
model = SVC(kernel='linear')

Scikit-learn also supports various pre-processing and validation techniques, ensuring your SVM model is well-rounded.

The library integrates seamlessly with other data processing tools, allowing users to build a comprehensive machine learning pipeline efficiently.

Parameter Tuning and Optimization

Parameter tuning is critical in improving the performance of an SVM model. In Scikit-learn, this is often achieved using techniques like grid search and cross-validation.

Grid search allows for the exploration of different parameter combinations, while cross-validation tests the model’s accuracy on various data splits.

For example, using GridSearchCV in Scikit-learn:

from sklearn.model_selection import GridSearchCV
parameters = {'kernel':('linear', 'rbf'), 'C':[1, 10]}
svc = SVC()
grid_search = GridSearchCV(svc, parameters)
grid_search.fit(X_train, y_train)

Adjusting parameters such as C and the kernel type can significantly impact the classification results. Effective parameter tuning ensures that the SVM model generalizes well and maintains high accuracy across unseen data.

Model Evaluation and Parameter Tuning

Evaluating models and fine-tuning parameters are crucial steps in maximizing the performance of Support Vector Machines (SVM). These processes ensure models are both accurate and efficient, leading to better classification results.

Cross-Validation Techniques

Cross-validation is an essential method used to evaluate the performance of SVMs. It involves dividing the dataset into training and testing subsets.

The goal is to measure how well the model generalizes to new data.

K-fold cross-validation is a popular approach where the dataset is split into k equal parts. The model trains on k-1 parts and tests on the remaining part, rotating these parts until every subset is used as a test set.

This technique helps in identifying potential overfitting. Overfitting occurs when a model learns the training data too well, including noise, making it perform poorly on new data.

Strategies like stratified k-fold cross-validation further ensure that each subset is a good representative of the whole dataset by maintaining the class distribution.

Hyperparameter Optimization

Hyperparameters significantly influence SVM performance. These parameters include the kernel type, regularization parameter (C), and kernel-specific parameters such as the degree for polynomial kernels.

Choosing the right hyperparameters involves optimization techniques.

Grid search is a common method where a predefined range of parameters is tested to find the best combination. This exhaustive search can be computationally expensive but provides precise results.

Alternatively, random search randomly selects parameter combinations, offering a more efficient exploration of the parameter space with less computational cost.

Both methods rely on cross-validation to evaluate each combination, ensuring that the best hyperparameters not only fit the training data but also perform well on unseen data.

Practical Applications of SVM

Support Vector Machines (SVM) are powerful tools for various practical applications, especially in classification tasks. This section explores SVM’s applications in text classification, image and face detection, as well as biological and medical fields.

Text Classification

SVMs are highly effective for text classification tasks. This includes activities like spam detection and topic categorization. They work well with high-dimensional data, such as text, due to their ability to find optimal boundaries between classes.

In spam detection, SVMs help identify whether an email is spam or not by using a trained model that examines word patterns and their frequency. Outlier detection is another area where SVMs are applied to find abnormal data points that do not fit the usual patterns.

Image and Face Detection

In image analysis, SVMs are often used for image categorization and face detection tasks. They can classify images by learning from image data features and distinguishing between different objects or categories.

Face detection is a crucial application where SVMs excel by identifying and classifying facial structures effectively. They play a significant role in security and personal identification systems, making it easier to manage and verify identities efficiently.

Biological and Medical Applications

SVMs have important applications in the biological and medical fields. They are used for gene expression analysis, which involves classifying genes based on their contribution to various conditions.

These machines can also assist in diagnosing diseases by analyzing medical images or patient data to predict health outcomes. SVMs are essential in developing personalized medicine approaches by classifying patients based on their genetic data, leading to more effective treatments. Their ability to handle complex and vast datasets makes them suitable for these sensitive and critical applications.

Advanced Topics in SVM

Support Vector Machines (SVM) can tackle challenging problems using advanced techniques. This section explores SVM’s capabilities in non-linear classification and handling noisy and imbalanced data.

Non-linear Classification

SVMs can handle non-linear classification using kernel methods. Kernels allow SVMs to create a flexible decision boundary by transforming the data into a higher-dimensional space.

Common kernels include polynomial, radial basis function (RBF), and sigmoid. These kernels enable the SVM to find a hyperplane that can effectively separate data points that are not linearly separable in their original space.

In non-linear separation, choosing the correct kernel and its parameters is crucial. The RBF kernel is very popular due to its ability to fit complex data patterns. However, using a kernel function that is overly complex can lead to overfitting. Therefore, careful parameter tuning and cross-validation are necessary to balance the model’s complexity.

Working with Noisy and Imbalanced Data

Handling noisy data is another challenge SVMs can address using techniques like regularization. Regularization helps prevent overfitting by adding a penalty for large coefficients in the model.

C-SVM and ν-SVM are variations that incorporate such penalties. This technique aids in maintaining the model’s robustness against noise.

For imbalanced data, SVMs can use methods such as cost-sensitive learning. By assigning different weights to classes, the SVM can focus more on the minority class.

Strategies like resampling or synthetic data generation (e.g., SMOTE) are also effective. These methods adjust the training data to create a more balanced dataset, improving the model’s ability to recognize less frequent classes.

Comparative Analysis

SVMs are a popular choice in machine learning. This section compares SVM with other algorithms and discusses linear versus nonlinear SVM.

SVM vs. Other Machine Learning Algorithms

SVMs are known for their effectiveness in high-dimensional spaces and their use of a hyperplane to separate data into classes. They can outperform algorithms like logistic regression in handling datasets with clear margins.

Logistic regression, another machine learning algorithm, models binary outcomes based on a linear predictor function. While logistic regression works well for linearly separable data, SVMs have the edge in complex data with nonlinear relationships.

Misclassification is an important aspect to consider. SVMs aim to minimize this by finding a decision boundary with maximum margin. This makes them robust against overfitting, especially in high-dimensional space. Decision trees, in contrast, might struggle with variance in noisy data.

Linear SVM vs. Nonlinear SVM

Linear SVM is best suited for linear classification tasks. It identifies the hyperplane that separates data into distinct classes. This type is ideal when data can be divided with a straight line.

Nonlinear SVM uses kernel tricks to transform data into higher dimensions, making it capable of handling more intricate patterns. This flexibility allows handling data that isn’t linearly separable.

The choice between linear and nonlinear comes down to the nature of the data. Linear SVM is efficient and less computationally demanding. Nonlinear SVM, while more powerful in certain scenarios, requires more resources. Proper selection ensures better model performance and resource use.

Frequently Asked Questions

Support Vector Machines (SVMs) are a powerful tool for classification. This section answers common questions about SVMs, including their core principles, advantages, and use cases.

What are the core principles behind Support Vector Machines in classification tasks?

Support Vector Machines focus on finding the best hyperplane that separates classes in the data. The idea is to maximize the margin between data points of different classes. This leads to better classification by ensuring that future data points can be classified with confidence.

How does kernel selection affect the performance of a Support Vector Machine?

Kernel selection can greatly impact SVM performance. It determines how the input data is transformed into the required format. Choices like linear, polynomial, or radial basis function kernels can allow SVMs to handle different kinds of data patterns, ultimately affecting accuracy and efficiency.

What are the advantages of using Support Vector Machines for classification over other algorithms?

Support Vector Machines often excel at classification tasks with high-dimensional spaces. They are effective even when the number of dimensions is greater than the number of samples. SVMs also offer robust performance due to their margin maximization strategy, which reduces the risk of overfitting.

In what scenarios is a Support Vector Machine preferable for classification tasks?

SVMs are particularly useful in scenarios where data needs clear boundaries between classes. They are often chosen when the dataset is high-dimensional or when the relationships within the data are complex and non-linear. Their effectiveness shines in scenarios requiring heightened accuracy.

Can Support Vector Machines be effectively used for multi-class classification, and if so, how?

Yes, SVMs can handle multi-class classification through methods like “one-vs-one” or “one-vs-all.” These techniques involve breaking down a multi-class problem into multiple binary classifications, which the SVM can manage more effectively given its inherent binary nature.

What are some common methods for optimizing the parameters of a Support Vector Machine?

Common parameter optimization techniques include grid search and cross-validation.

Grid search systematically evaluates combinations of parameters to find the best settings. Meanwhile, cross-validation helps in assessing how the results of a model will generalize to an independent dataset. These approaches help in tuning SVMs for better performance.

Categories
Uncategorized

Learning About Python Tuples: A Quick Guide to Immutable Data Handling

Understanding Python Tuples

Python tuples are a fundamental data type that holds multiple items in a single variable. They are part of Python’s built-in data types, along with lists, sets, and dictionaries.

Tuples are known for their immutability, meaning once created, their elements cannot be changed.

A tuple is defined by enclosing values in parentheses, with elements separated by commas. For instance: (1, 2, 3). Since tuples are ordered, each element can be accessed using an index, starting from zero.

This order helps in retrieving elements systematically.

Key Features:

  • Immutable: Tuples do not allow modifications, which helps maintain consistent data.
  • Ordered: The sequence is preserved, making it possible to access items using indexes.
Feature Description
Immutable Cannot change elements after creation
Ordered Maintains the sequence of elements

Usage Examples:

  • Storing coordinates: (x, y, z)
  • Representing RGB colors: (red, green, blue)
  • Holding database records: (name, age, job)

Tuples are versatile and efficient, often used when data integrity is crucial and no modification of data is needed. Accessing tuple elements is straightforward, similar to lists, and they are highly valued for performance in look-up operations due to their fixed size.

Creating and Initializing Tuples

In Python programming, tuples are initialized using round brackets or the tuple() constructor. Understanding how to create a tuple, whether empty, nested, or using repetition and concatenation, can be essential for efficient data handling.

The Basics of Tuple Creation

Creating a tuple is simple and involves using parentheses to list items. For example, my_tuple = (1, 2, 3) initializes a tuple with three items. Even a single item can form a tuple, but it requires a trailing comma for correct syntax: single_item = (5,).

An empty tuple can be created using empty parentheses () or the tuple() constructor: empty_tuple = () or empty_tuple = tuple().

It’s important to note that tuples can hold various data types, including numbers, strings, and booleans.

Tuples can also be formed by packing, where values are packed into a tuple: packed_tuple = "apple", "banana", "cherry". Unpacking involves assigning tuple values to multiple variables: x, y, z = packed_tuple.

Advanced Tuple Initialization

Tuples can be constructed using the tuple() constructor, which converts an iterable like a list into a tuple: tuple_from_list = tuple([1, 2, 3]). This approach is useful for converting data types.

Nested tuples can be created by placing tuples inside other tuples, allowing for complex data structures: nested_tuple = ((1, 2), (3, 4).

Repetition and concatenation are techniques used to create and manipulate tuples. The * operator repeats elements: repeated_tuple = (1, 2) * 3 results in (1, 2, 1, 2, 1, 2). Concatenation with the + operator merges tuples: combined_tuple = (1, 2) + (3, 4) gives (1, 2, 3, 4).

Understanding these creation methods enhances the use of Python tuples in efficient programming.

Tuple Operations

Python tuples are simple yet powerful data structures. They offer benefits such as immutability and versatility in handling collections of data. When using tuples, one must understand how to access and manipulate them effectively through operations like slicing and unpacking.

Accessing Tuple Elements

Tuple elements can be accessed using an index. The index of a tuple starts at zero. For instance, in the tuple my_tuple = (10, 20, 30), my_tuple[0] retrieves the first element, 10.

Tuple items can also be accessed using negative indexing. Here, the last element has an index of -1. So, my_tuple[-1] would access the last element, 30.

Tuples are immutable, meaning once they are created, their elements cannot be changed or deleted individually. However, one can delete the entire tuple using del my_tuple.

Using slicing, specific sections of a tuple can be retrieved: my_tuple[0:2] would return a new tuple containing the first two elements, (10, 20).

Manipulating Tuples

While tuples are immutable, operations like concatenation and repetition allow for creating new tuples from existing ones. Concatenation joins two or more tuples: (1, 2) + (3, 4) results in (1, 2, 3, 4).

Repetition uses the * operator to repeat tuple elements: (5, 6) * 2 results in (5, 6, 5, 6).

Tuple unpacking is a useful feature where tuple elements are assigned to variables. For example, x, y = (7, 8) assigns 7 to x and 8 to y.

These operations enhance the ability to work efficiently with tuples in Python.

Tuple Functions and Methods

In Python programming, tuples have specific functions and methods that enhance their usage. These tools, which include built-in functions like len(), min(), and max(), as well as tuple-specific methods such as count() and index(), allow users to manipulate and gather information from tuples effectively.

Built-In Tuple Functions

Python provides several built-in functions to work with tuples.

The len() function is used to find the number of elements in a tuple. For example, len(my_tuple) returns the number of items stored in my_tuple.

Another useful function is min(), which returns the smallest element, and max(), which gives the largest element in a tuple.

Sorting is handled by the sorted() function. Although tuples are immutable, sorted() can create a new sorted list based on the tuple’s elements. It’s helpful for temporary sorting without changing the original tuple.

Tuple-Specific Methods

Tuples come with methods that specifically operate on their data.

The count() method helps in finding how many times a particular element appears. For instance, my_tuple.count(3) returns the number of times the value 3 appears in my_tuple.

Another method is index(), which provides the position of the first occurrence of a specified value. Using my_tuple.index('apple') will return the index where 'apple' first appears.

These methods enhance the ability to interact with tuples in Python, giving programmers powerful tools for data handling.

Immutability of Tuples

Python tuples are known for being immutable. This means once a tuple is created, it cannot be altered. No changes can be made to the size or contents of a tuple. This property makes tuples different from lists, which are mutable.

An immutable structure like a tuple offers advantages in certain situations. For example, because a tuple cannot be modified, it is safe to use in a multi-threaded environment, where data corruption from concurrent modifications might otherwise be a concern.

Feature Tuple List
Immutability Yes No
Modifiable No Yes

Tuples are also more memory-efficient compared to lists. This efficiency results from their fixed size and unchangeable nature. Thus, they can lead to performance improvements in Python programs.

When a programmer requires a sequence of items that should not change throughout the program, tuples are the ideal choice. This ensures the stability of the data structure during execution.

In terms of syntax, tuples can be easily created with parentheses and commas, like my_tuple = (1, 2, 3). Even though Python tuples are immutable, their elements can be accessed just like lists. For example, my_tuple[0] will yield 1.

It’s also important to highlight that while tuples themselves are immutable, they can hold mutable objects, like lists. This means the contents of these objects can change, but the structure of the tuple remains fixed.

Comparing Tuples with Other Data Types

When comparing tuples with other data types, it is important to understand how tuples differ in terms of mutability, structure, and usage. Each data structure in Python has specific characteristics that serve different purposes.

Tuples vs Lists

Tuples and lists are both sequence types used to store collections of items. The main difference is that a tuple is an immutable data type, meaning once it is created, its values cannot be changed. In contrast, a Python list is mutable, allowing elements to be added, removed, or modified at any time.

Performance is another key point. Since tuples are immutable, they are generally more memory efficient. This can lead to faster execution times when tuples are used in programs that do not require changes to stored data. For data that will remain constant, tuples are ideal.

In terms of syntax, tuples use parentheses ( ), while lists use brackets [ ]. This distinction is another quick way to recognize which type is being used in code.

Tuples vs Dictionaries and Sets

When comparing tuples to dictionaries and sets, the differences are focused on how data is organized and accessed. A tuple is an ordered sequence that maintains a specific order of elements, while a dictionary stores data in key-value pairs, focusing on quick access by keys.

Tuples can store heterogeneous data types, similar to dictionaries and sets. However, dictionaries, unlike tuples, require meaningful labels (keys) for accessing values. A set is a collection of unique items that is unordered. Sets do not support indexing, slicing, or other sequence-like behavior present in tuples.

Tuples excel at maintaining a defined order and ensuring data integrity, while dictionaries and sets are suited for dynamic and unordered collections where quick lookup and element uniqueness are essential.

Indexing and Slicing in Tuples

Indexing in tuples allows access to individual elements. Tuples, being a sequence, support zero-based indexing, meaning the first element is at index 0.

For example, in the tuple my_tuple = (10, 20, 30), my_tuple[0] returns 10.

Negative indexing provides a way to access elements from the end of the tuple. The last element is at index -1, the second last at -2, and so on.

With my_tuple = (10, 20, 30), my_tuple[-1] will yield 30.

Slicing helps extract a subset of elements from a tuple. This technique uses a colon : in the format [start:stop:step].

For instance, my_tuple[0:2] results in (10, 20). If the step is omitted, it defaults to 1.

Slicing keeps the tuple intact while providing a new view.

When using indexing or slicing, an IndexError can occur if trying to access an index out of bounds. For example, accessing my_tuple[3] in a tuple with only three elements raises an error.

Negative indexes are handy for slicing as well. For example, my_tuple[-3:-1] produces (10, 20). It’s a versatile way to manipulate elements without changing the original tuple.

Common Tuple Use Cases

Tuples in Python are quite versatile. One of the main uses of tuples is as a sequence of values. Unlike lists, tuples are immutable, which means their content cannot be changed after creation.

In Python programming, tuples are often used to store return values. Functions can return multiple results as a tuple, making it easy to work with several outputs at once.

A common use of tuples is to store pairs. For example, the divmod() function returns a tuple containing the quotient and remainder of a division operation. This is handy for calculations where both results are needed.

Tuples also serve as keys in a dictionary because they are immutable. This feature is vital when a combination of values needs to represent a unique key.

Tuples vs Lists

Feature Tuple List
Mutability Immutable Mutable
Syntax (1, 2, 3) [1, 2, 3]
Performance Faster Slower

Tuples find use cases in representing fixed collections. For example, representing coordinates in a game or app where the values do not change frequently.

Additionally, storing records where the fields are fixed like a database record (name, age, job).

Tuples make code more readable and efficient, particularly when working with sequence data that does not need modification. They provide a straightforward and clear way to manage structured data in Python.

Error Handling with Tuples

When working with tuples in Python, one must remember their immutable nature. This immutability means elements cannot be changed after the tuple is created. Attempting to do so results in errors.

An IndexError occurs when trying to access an element at an invalid position. For instance, if a tuple’s length is three and you try to access the fourth element, you’ll encounter this error. Ensure the index is within the bounds.

my_tuple = (1, 2, 3)
print(my_tuple[3])  # This will raise an IndexError

Insertion in a tuple isn’t possible due to its fixed size. A workaround is to convert the tuple to a list, perform the insert, and convert it back to a tuple. Here’s how:

my_tuple = (1, 2, 3)
my_list = list(my_tuple)
my_list.append(4)
my_tuple = tuple(my_list)

Check the tuple length before performing operations that might involve accessing elements by index. Use the len() function to determine how many elements the tuple contains.

Using these strategies helps avoid errors and enables safer handling of tuples. For more on tuple operations, you can explore resources like these tutorials on resolving tuple errors and troubleshoot common tuple problems.

Tuple Performance Considerations

A stack of colorful Python tuples arranged on a table for performance considerations

Python tuples are known for several performance benefits. Immutability is a key feature. Once created, tuples cannot be changed. This can lead to better memory efficiency because the system does not need to allocate extra space for potential changes.

Tuples generally use less memory than lists. They store only the elements without additional overhead. This compactness is particularly useful when working with large datasets.

Using tuples can also enhance performance in specific operations. Tuples can be constant folded, which means constants are precomputed, leading to faster execution times. This is because Python can optimize tuples more than lists in certain situations.

Speed can vary depending on tuple length. While accessing elements is quick, operations such as counting elements may slow down if the tuple is very large.

Despite this, tasks such as value swapping or using tuples as dictionary keys remain efficient.

In summary, the choice between tuples and other data structures can significantly impact the efficiency of your code. Learning how to utilize the strengths of tuples can be beneficial in optimizing performance, especially in cases where immutability and memory efficiency are priorities.

For more detailed information about tuple use and its benefits, you can refer to resources such as Python Tuples: A Comprehensive Guide for Efficient Coding.

Best Practices for Using Tuples in Python

Using tuples in Python offers several advantages, particularly in scenarios where the data should not change. Tuples are immutable, which means their items cannot be altered once written. This makes them suitable for situations where data integrity is essential.

Tuples support packing and unpacking, allowing multiple variables to be assigned at once. For example, x, y = (1, 2) assigns values to x and y. This can simplify code and enhance readability.

When dealing with data tables or records, nested tuples can be useful. A tuple can contain other tuples, making it a good choice for representing complex data structures like matrices.

Concept Description
Immutable Once created, the items cannot be changed.
Packing Assign multiple values into a tuple at once.
Unpacking Extract tuple values into separate variables easily.

Though tuples are immutable, they can store mutable objects like lists. Caution is needed when doing this to ensure the integrity of data when objects get altered.

The main methods associated with tuples are limited, reflecting their simplicity. count() and index() are useful for searching within a tuple. Tuples are straightforward collections, focusing on preserving exact data structure rather than complex manipulation.

Python developers should choose between tuples and lists based on their applications. Lists are better for data that requires frequent modification, while tuples excel in maintaining consistent data across an application or program.

Frequently Asked Questions

A stack of books with Python logos, surrounded by question marks and exclamation points

Tuples in Python offer a way to store multiple items in a single variable. They are known for their immutability and efficiency. Here, we address some common questions related to their practical use.

How can you illustrate the use of a tuple with a real-life example?

Tuples are often used to represent simple groups of related data. For example, a tuple can store the coordinates of a point in a 2D space, like (x, y), where x and y are specific values. Another common use is storing RGB color values as (red, green, blue).

What methods are available for manipulating tuples in Python?

Though tuples are immutable, various methods enable interaction with them. Functions like len() can be used to find the number of elements, and index() will determine the position of a specified value. It’s also possible to iterate over tuples using loops.

Can you explain the main differences between lists and tuples in Python?

One of the key differences is immutability. Tuples cannot be modified after creation, while lists can be changed. Additionally, tuples are typically faster than lists due to their immutability, making them ideal for data integrity and performance.

What are the steps to create and initialize a tuple in Python?

Creating a tuple is simple. Enclose the items in parentheses and separate them with commas, like (1, 2, 3). For a tuple with a single item, add a comma after the value, such as (1,). This ensures Python recognizes it as a tuple, not just a regular value.

How does one access elements within a tuple in Python?

Accessing elements in a tuple is similar to lists. Use indices inside square brackets. For example, tuple_example[0] retrieves the first item. Negative indexing starts from the end, so tuple_example[-1] gets the last item.

Why are tuples considered important in Python programming?

Tuples are crucial due to their immutability, which ensures the data remains unchanged. This characteristic makes them reliable for fixed data sets and keys in dictionaries.

Their simplicity and speed compared to lists add to their significance in efficient data handling.

Categories
Uncategorized

Learning about Pandas to Concatenate Multiple Dataframes: A Quick Guide

Understanding Data Concatenation in Pandas

When working with data in Python, Pandas is a powerful library that helps in handling and analyzing data efficiently.

One crucial aspect of data manipulation in Pandas is the ability to concatenate multiple DataFrames.

The concat() function in Pandas allows users to combine two or more DataFrames. This can be done either vertically, stacking one on top of the other, or horizontally, merging them side by side.

This flexibility is vital for managing large datasets that need integration from various sources.

Axis Description
0 Concatenates along rows
1 Concatenates along columns

To avoid confusion while concatenating, ensure DataFrames have consistent indices and column names.

Misaligned data can lead to unexpected behavior or loss of information in the resulting DataFrame.

Here’s a simple example of using the concat() function:

import pandas as pd

df1 = pd.DataFrame({'A': [1, 2], 'B': [3, 4]})
df2 = pd.DataFrame({'A': [5, 6], 'B': [7, 8]})

result = pd.concat([df1, df2], axis=0)

The example above shows how to combine DataFrames by stacking them vertically.

Exploring more about this topic, one can refer to resources like the Pandas documentation and guides from sites like GeeksforGeeks.

Setting Up Your Environment for Pandas

To get started with Pandas, ensure that the necessary software is installed on your computer.

The primary software needed is Python along with the Pandas library. You can install it using pip:

pip install pandas

Once installed, you can import Pandas into your Python scripts:

import pandas as pd

Creating a Pandas DataFrame is a fundamental operation. A DataFrame can be created from a dictionary or a list. Here’s a simple example:

data = {'Name': ['Alice', 'Bob'], 'Age': [25, 30]}
df = pd.DataFrame(data)

For a comprehensive coding experience, consider using an Integrated Development Environment (IDE) like Jupyter Notebook or PyCharm. These environments provide code completion and visualization tools.

If Jupyter Notebook is preferred, install it using:

pip install jupyter

Basic Packages

It’s beneficial to have other essential Python packages like NumPy and Matplotlib. They enhance the functionality and performance of Pandas, especially in handling large datasets and visualizing data.

  • NumPy: Provides support for large arrays and matrices.
  • Matplotlib: Useful for plotting and graphing.

Virtual Environments are helpful in managing dependencies and keeping project-specific configurations isolated. Create a virtual environment with:

python -m venv env

Activate this environment before installing packages:

  • Windows: .envScriptsactivate
  • Mac/Linux: source env/bin/activate

By setting up these tools, you create a robust environment for working effectively with Pandas and large datasets.

Basics of Pandas DataFrames

Pandas DataFrames are central to data manipulation in Python. A DataFrame is essentially a table, similar to an Excel spreadsheet, consisting of rows and columns. Each column in a DataFrame is a Pandas Series, which represents one-dimensional data.

A DataFrame can be created in various ways, such as from a dictionary or a list. For example:

import pandas as pd

data = {'Name': ['Alice', 'Bob'],
        'Age': [25, 30]}
df = pd.DataFrame(data)

Pandas DataFrames come with indices, which are labels for rows. By default, these indices are numerical and start at zero, but they can be set to any value. Indices help in selecting and organizing the data.

Pandas allows for easy data manipulation, such as selecting, merging, and organizing the data. This can be done through various methods like concat(), merge(), and others. These operations are fundamental when working with multiple DataFrames.

Key Features:

  • Flexible Data Structures: Combine data from different sources effortlessly.
  • Powerful Indexing: Access and manipulate specific data easily.
  • Efficient Data Handling: Manage large datasets with ease.

Understanding these basics helps in efficiently utilizing Pandas for data analysis. With these tools, users can manage datasets smoothly, making Pandas a powerful ally in any data-driven task.

Concatenating DataFrames Vertically

Concatenating DataFrames vertically in Pandas allows users to stack data from different sources into one table. By using the right functions, such as pd.concat, data from different DataFrames can be efficiently combined, even when columns don’t perfectly align.

Using Concat() for Vertical Concatenation

The pd.concat function is the primary tool for combining DataFrames vertically. It stacks DataFrames along rows when axis=0 is used, making it ideal for merging datasets. For seamless integration, setting ignore_index=True ensures that the resulting DataFrame has a reset index.

When the DataFrames have differing column numbers, gaps may occur, resulting in NaN values for missing data.

This method allows for flexibility, handling datasets with varying structures. To append new data frames continuously, concat offers a robust solution without altering existing ones.

Using pd.concat guarantees a structured and efficient approach to managing and analyzing larger datasets.

Handling Missing Values and NaN

Vertical concatenation often introduces missing values, represented as NaN, when DataFrames have different columns. Addressing these NaNs is crucial for data integrity.

The pd.concat method inherently manages such discrepancies by adding NaN where necessary.

Data analysts can choose specific strategies to deal with these missing values. Options include filling them with a default value using fillna(), or executing data cleaning steps to drop irrelevant columns.

Proper handling of NaN ensures the resultant DataFrame remains useful for further analysis. This practice also aids in ensuring that analyses are based on complete and meaningful data sets, reducing the risk of errors in computations.

Concatenating DataFrames Horizontally

When working with multiple DataFrames in Pandas, combining them horizontally is often necessary. This method involves aligning DataFrames side by side, which can be efficiently done using Pandas’ tools.

Specifying Axis in Concat() Function

To concatenate DataFrames horizontally, the pd.concat() function is used with axis=1. Setting axis to 1 tells the function to add columns instead of stacking rows. This is essential when the goal is to expand the DataFrame width-wise.

Using the function is straightforward:

import pandas as pd

df1 = pd.DataFrame({'A': [1, 2], 'B': [3, 4]})
df2 = pd.DataFrame({'C': [5, 6], 'D': [7, 8]})

result = pd.concat([df1, df2], axis=1)

This command results in a DataFrame combining all columns from df1 and df2. Choosing the correct axis is crucial for achieving desired alignment and data structure.

Dealing with Duplicates in Columns

When DataFrames have common columns, concatenating them might result in duplicate columns. This is a critical aspect of horizontal concatenation.

To handle this, it’s advisable to first inspect and potentially rename or drop conflicting columns before using pd.concat().

If there are conflicting columns, Pandas will append a suffix to distinguish them:

df1 = pd.DataFrame({'A': [1, 2], 'B': [3, 4]})
df2 = pd.DataFrame({'B': [5, 6], 'C': [7, 8]})

result = pd.concat([df1, df2], axis=1)

This situation can cause confusion in data analysis. To avoid this, you can rename columns using DataFrame.rename() or choose columns carefully:

df2 = df2.rename(columns={'B': 'B_1'})
result = pd.concat([df1, df2], axis=1)

Being aware of column names and managing duplicates helps maintain organized and clear DataFrames.

Advanced Concatenation Techniques

Working with multiple DataFrames often involves advanced techniques to effectively manage and merge data.

Two important strategies include using hierarchical indexing for organizing data and joining DataFrames that do not share the same indices.

Hierarchical Indexing and MultiIndex

Hierarchical indexing, also known as MultiIndex, allows for more complex data organization within a DataFrame. This technique enables the use of multiple index levels on both rows and columns, creating a tree-like structure. It provides a way to label data uniquely across these levels.

By employing a MultiIndex, DataFrames can represent higher-dimensional data in a two-dimensional table format. This is especially useful when dealing with multi-dimensional arrays or when needing to summarize data at varying levels of granularity.

Pandas supports creating a MultiIndex using tuples or by converting existing columns into an index. Advanced data operations like slicing or reshaping become more straightforward when a hierarchical index is in place.

This method is often employed in datasets requiring multiple categories of classification.

Joining DataFrames with Different Indices

Joining DataFrames with different indices can handle complex merging tasks where direct alignment is necessary.

The DataFrame.join() method in Pandas supports alignment based on both index and columns, allowing for customized merging strategies.

This method can perform different types of joins, such as left, right, inner, or outer, specified by the how parameter.

When dealing with varied indices, it’s crucial to understand how these different types of joins will affect the resulting DataFrame structure.

For instance, an outer join merges data by including all indices from both DataFrames, filling in missing values where necessary.

On the other hand, an inner join keeps only the intersecting indices from both sets, ensuring that only common elements are merged. Understanding these concepts can greatly enhance data management and analysis capabilities when working with DataFrames.

Understanding Join Operations

Join operations in Pandas are powerful tools for combining data from multiple DataFrames. These operations allow users to align and merge datasets based on common columns or indices, enabling the seamless integration of related data.

Exploring Inner and Outer Joins

Inner joins are used to find the intersection between two DataFrames. It returns rows with matching values in both DataFrames, excluding non-matching data. This join is useful when the focus is on common elements, ensuring only overlapping information is retained.

An outer join ensures a comprehensive union of both DataFrames, including all rows from each, with NaNs filling in the gaps where there’s no match. This type of join is beneficial when all potential data points need consideration, even if they don’t perfectly align.

Here’s a quick comparison:

Join Type Output
Inner Join Only common data
Outer Join All data, with NaN for non-matches

Left and Right Joins Explained

A left join keeps all records from the left DataFrame and adds matching records from the right DataFrame. If no match is found, the result is filled with NaN.

This method is useful when the priority is maintaining the full dataset of the left DataFrame.

On the other hand, a right join does the reverse. It maintains all values from the right DataFrame, appending data from the left only where matches occur.

It is key when the right DataFrame serves as the primary dataset.

Leveraging Keys and Indices in Concatenation

Keys and indices play a crucial role when using the concat() function in Pandas to join multiple DataFrames. They offer more control over how the data is structured after concatenation.

By specifying keys, one can add a level to the resulting DataFrame’s index, which can be particularly useful for tracking the origin of each DataFrame.

When concatenating n DataFrames, the ignore_index parameter becomes handy if there’s a need to reset indices.

Setting ignore_index=True results in a continuous index for the combined DataFrame, without considering the original indices.

Sometimes there is a need to merge DataFrames multiple times or in a specific order.

In such scenarios, using the reduce method from Python’s functools module combined with a concat() can be efficient.

This approach applies concatenation iteratively over a list of DataFrames.

For enhanced indexing control, the levels and keys arguments allow for detailed customization.

When the concat() function uses levels, it helps in creating multi-index DataFrames with defined levels based on the concatenated data.

The ability to use keys effectively becomes crucial when working with complex datasets. It ensures clarity and helps maintain data integrity, significantly aiding in post-concatenation data manipulation and analysis.

More detailed insights and examples on using keys and indices in concatenation can be found at SQLPey.

Merging DataFrames: Merge() vs Concat()

When working with pandas, combining dataframes is a common task. The merge() and concat() functions are essential tools, each serving different purposes.

Using Merge() for Complex Joins

The merge() function in pandas is highly versatile for combining dataframes based on common columns or indices. It resembles SQL join operations, allowing for complex relational data manipulations.

For instance, users can specify inner, outer, left, or right joins using the how parameter. This flexibility is critical when aligning rows from two dataframes based on shared keys.

The ability to align data across multiple columns makes merge() valuable when precise row matching is needed.

In addition, users can merge dataframes on their index by setting left_index=True and right_index=True.

More details and examples can be found on Real Python.

Comparison of Merge() and Concat()

While merge() is designed for joining dataframes based on shared keys, concat() is used for either appending or stacking dataframes. It supports operations along rows (axis=0) or columns (axis=1).

Choosing between these depends on the task. concat() can quickly stack data without needing a shared key.

Another difference is how they handle duplicates. merge() can filter rows based on duplicates or data overlap, while concat() will include all data by default.

This makes concat() ideal when simply extending a dataset. For detailed handling of different concatenation logic, pandas documentation offers more guidance.

Practical Examples and Use Cases

In data analysis, it is common to concatenate DataFrames. This means combining two or more data tables, either vertically or horizontally, depending on the need.

For example, if you have monthly sales data in separate DataFrames, you can stack them vertically to create a complete dataset for the year.

To use the concat() function, place the DataFrames in a list and call pd.concat(). This function allows control over how data is joined, such as deciding the column or row axis.

Here’s a simple example:

import pandas as pd

df1 = pd.DataFrame({'A': [1, 2], 'B': [3, 4]})
df2 = pd.DataFrame({'A': [5, 6], 'B': [7, 8]})

result = pd.concat([df1, df2])

Output:

A B
1 3
2 4
5 7
6 8

Using concat() is effective for merging datasets with similar structures. If the DataFrames have different columns, concat() can still align them by adding NaN in missing spaces.

When combining DataFrames with different indexes or needing to eliminate duplicates, one can also use the join or merge functions, depending on the specific task and data structure requirements.

To learn about concatenating DataFrames, you can explore resources like the Pandas concat() Function Tutorial.

This versatility makes concat() an essential method for data scientists dealing with large datasets across multiple sources.

Optimizing Performance for Large DataFrames

Multiple large data tables merging into one, symbolizing optimization and learning about Pandas to concatenate dataframes

Pandas offers efficient ways to handle large DataFrames. When merging or concatenating multiple DataFrames, performance is key. Using the right techniques can make a big difference.

Avoid Repeated Concatenations
Concatenating a list of DataFrames at once is more efficient than doing it one by one. For large data, using pd.concat([df1, df2, df3]) is recommended.

Index Management
The index plays an important role when merging. Always reset the index when needed, such as with df.reset_index(drop=True). This ensures alignment and can boost performance. Read more about tips from this article.

Optimized DataFrame Usage
When multiple DataFrames have to be merged, using efficient methods is vital. Consider using lambda and reduce approaches for cleaner code and performance gains.

Memory Management
Large DataFrames consume significant memory. Efficient memory usage can be managed by using appropriate data types. For instance, using int32 instead of int64 when the size allows. It reduces memory footprint, making operations faster.

Built-in Functions
Pandas provides built-in functions like concat() for combining DataFrames efficiently. These can be harnessed by understanding their nuances and applying tricks to speed up data analysis. Insights on these functions can be found in various resources, such as this guide.

Best Practices and Tips

Multiple pandas learning to concatenate dataframes in a classroom setting with a chalkboard and teacher

When working with multiple DataFrames in Pandas, it is important to follow best practices to ensure seamless data handling.

Use the Right Method:
Choose between concat() and merge() based on your needs. Use concat() to stack DataFrames along a particular axis. Use merge() when you need to combine DataFrames on a key or common column.

Handle Indexes Effectively:
While using pandas concat, set ignore_index=True if you do not want the old index to be retained. This helps in resetting the index of the new DataFrame, making it more readable.

Check DataFrame Structures:
Before concatenating, ensure that DataFrames have compatible structures. This means columns should be in the correct format and order.

Memory Management:
Large DataFrames can consume lots of memory. Consider optimizing your data types or processing data in chunks. This approach can prevent memory overflow.

Use Meaningful Column Names:
Avoid duplicate column names after a merge. Differently labeled columns result in easier debugging and data comprehension.

Test with Small DataFrames First:
Before applying operations on large datasets, practice with smaller examples to catch potential issues without consuming excessive resources.

Frequently Asked Questions

A panda mascot surrounded by multiple interconnected dataframes

This section addresses common questions about concatenating and merging DataFrames in Pandas. It covers methods for combining data vertically and horizontally, explains differences between operations, and suggests best practices.

How can I merge two DataFrames in Pandas based on a common column?

To merge two DataFrames using a common column, the merge() function is used. It combines DataFrames on specific key columns and offers various types of joins such as inner, outer, left, and right. For more information, refer to the Pandas documentation on merging.

What is the difference between join and merge operations in Pandas?

In Pandas, merge allows combining DataFrames based on key columns, much like SQL join operations. It can use multiple keys. The join method is specifically for DataFrame objects and connects DataFrames along their index. Learn more about these operations in this documentation.

How do you vertically concatenate two DataFrames with different columns in Pandas?

To vertically concatenate DataFrames with differing columns, use the concat() function. By default, it matches columns by name and fills in missing values with NaN. For a detailed explanation, see this guide.

Is there a way to concatenate multiple DataFrames horizontally using Pandas?

Yes, Pandas provides the concat() function to join DataFrames horizontally by setting the axis parameter as 1. This is useful for side-by-side data alignment. For more details on this process, examine this information.

What are the best practices for using a for loop to concatenate multiple DataFrames in Pandas?

When using a for loop to concatenate, append each DataFrame object to a list and then use pd.concat on the list. This approach is both efficient and scalable. More about this technique can be found in this Stack Overflow discussion.

How to combine two Pandas DataFrames with a different number of rows?

Combining two DataFrames with different row counts can be done with the concat() function.

This function aligns the DataFrames based on the index, and any extra data is filled with NaN by default.

For further exploration, check this guide.

Categories
Uncategorized

Learning About Version Control Within the SQL Workflow: A Comprehensive Guide

Understanding Version Control Systems

A computer screen displaying a SQL workflow with multiple branches and merges, alongside a version control system interface

Version control systems play an essential role in software development, helping teams manage changes to code and databases. These systems provide a structured way to track revisions, collaborate with others, and maintain consistency across various environments.

Importance of Version Control in Development

Implementing version control ensures that code changes are documented and reversible. This is crucial when multiple developers are collaborating on a project. With version control, every modification is tracked, making it easier to identify and fix errors.

For databases, version control aids in maintaining consistency across different production stages.

Version control also improves workflow by enabling developers to work on separate branches. This approach reduces conflicts when integrating code, leading to smoother deployment processes. In the context of SQL databases, it helps maintain the integrity of schema changes.

Overview of Common Version Control Systems

Several popular version control systems help manage changes effectively. Git is widely used due to its distributed nature, allowing developers to work offline and sync changes later. Git supports branching and merging, making it flexible for various workflows.

TFS (Team Foundation Server) by Microsoft offers both centralized and distributed version control options. It’s integrated with other Microsoft tools, which is beneficial for those using a Microsoft-centric tech stack.

Subversion is another option that uses a centralized approach, making it simpler for small teams.

Mercurial is similar to Git, offering a distributed version control system that emphasizes ease of use and performance. Each system has its strengths, and the choice depends on project requirements and developer preferences.

Version Control and SQL Databases

Incorporating version control with SQL databases helps manage changes and maintain integrity within collaborative environments. It addresses challenges specific to databases while providing significant benefits.

Challenges in Versioning Databases

Managing a SQL database with version control presents unique difficulties. One major challenge is maintaining the database schema as developers make changes. Unlike traditional software, database changes might involve evolving schemas and handling large sets of data.

Another difficulty is ensuring synchronization across different environments, such as development, testing, and production. It’s vital that these environments remain consistent to avoid errors. Many teams also struggle with tracking and merging database changes, which can lead to conflicts.

Proper planning and tools, like SQL Source Control, can help navigate these challenges, allowing smoother versioning processes.

Benefits of Version Control for Databases

Version control offers significant advantages when managing SQL databases. It ensures a clear record of database changes, promoting transparency and accountability. This record helps team members understand the history of changes, reducing confusion and miscommunication.

Moreover, using tools like VersionSQL allows easy rollbacks to previous states when issues arise, minimizing downtime. Teams can work collaboratively and concurrently, knowing that all modifications are tracked in real-time.

Version control also reduces the risk of data loss. In the event of failure, having a cloned repository means that the database can be restored promptly, safeguarding important data. Systems like distributed version control provide this full backup ability as explained in the version control system guide.

Setting up a Version Control Repository

A computer screen displays a SQL workflow diagram with a version control repository being set up. Multiple tabs open with tutorials and documentation

Effectively managing database changes is crucial for any development team. Implementing source control within your SQL Server workflow can streamline the process by ensuring consistent versioning of database changes.

Choosing the Right Version Control Repository

Selecting the right version control repository is a key step. Git is a popular choice due to its wide adoption and robust feature set. It allows teams to manage changes efficiently and supports distributed version control, which means team members can work independently.

When choosing a repository, consider ease of use, integration capabilities, and access control features. Some options to explore include GitHub and GitLab, which offer different plans and features suitable for teams of all sizes. An appropriate choice can significantly enhance collaboration and productivity.

Integrating Version Control with SQL Workflow

Integrating version control into your SQL workflow is essential for tracking and managing database changes. Tools like SQL Server Management Studio (SSMS) and Redgate’s SQL Source Control facilitate this process.

They allow databases to link directly to a version control system, enabling automatic updates and seamless collaboration among developers. This integration ensures all changes are recorded in the repository, providing a clear audit trail.

Additionally, creating state-based or migration-based scripts can aid in managing and deploying changes systematically. Implementing these strategies helps maintain the integrity of your database and reduces the likelihood of errors during development.

Branching Strategies for Database Development

Branching is an essential part of version control in database development. It helps manage database changes, such as added, deleted, or modified tables, by organizing work in parallel streams. Effective branching strategies ensure smooth integration of changes and minimize disruptions.

Branches and Their Role in Database Versioning

Branches enable teams to work on different features or fixes concurrently. In database development, branches allow for isolation of changes until they are ready for integration. This is particularly useful for managing changes like tables being added or renamed.

One common approach is using a Release Flow branching strategy. This strategy accommodates parallel development and automated releases. By using branches effectively, teams can streamline the deployment of changes and manage issues like table deletions or schema modifications without affecting the main database workflow.

Effective Branching Strategy Practices

A successful branching strategy often involves choosing the right approach, such as Git Flow, GitHub Flow, or Trunk-Based Development. Each has its strengths. For example, Git Flow is well-suited for projects with strict release cycles.

Implementing practices like regular merging of branches can help catch conflicts early. Using tools like SQL Source Control can automate processes such as integrating changes and managing branches, reducing manual tasks.

Effective practices also often include continuous integration to quickly test database changes and ensure stability before deploying them into production.

Integration with SQL Server Management Studio

Understanding how to integrate version control into SQL Server Management Studio (SSMS) can streamline database development workflows. By using specific tools and connecting to source control systems, teams can efficiently manage database changes and keep track of revisions.

Extensions and Add-ins for Version Control

SQL Server Management Studio supports various extensions and add-ins to facilitate version control integration. Tools like VersionSQL and ApexSQL Source Control allow users to connect SSMS directly to version control systems.

These extensions enable developers to track changes, commit updates, and manage rollbacks, all within the SSMS environment.

This seamless integration reduces the need for external applications to manage SQL files. Users can utilize features like branching, merging, and conflict resolution, enhancing collaboration among developers. The add-ins often provide a user-friendly interface, making it easier for teams to adopt version control practices without extensive technical knowledge.

Connecting to Source Control Systems

When using SSMS, developers can connect their databases to source control systems such as GitHub, GitLab, or Bitbucket. With tools like VersionSQL, users can paste their repository path directly into the SSMS interface.

This connects the database to the version control system and ensures that all changes are documented and reversible.

In the setup process, the database is linked in the Object Explorer pane of SSMS, simplifying the management of database versions. Commit messages and history logs are maintained, allowing tracking of who made specific changes and why. This ensures transparency and accountability within the development team, making it easier to collaborate on database projects.

Database Schema Management

Managing database schemas involves organizing, maintaining, and evolving the structure of a database. This process is crucial for ensuring consistent and reliable data management. Key areas include how schemas are tracked and how changes are implemented with version control.

Tracking and Managing Schemas

Effective schema management starts with tracking all changes made to the database. Tools like Liquibase are often used to automate this process, ensuring every alteration is documented.

By creating a record of each schema version, teams can easily identify and revert changes when needed. SQL scripts play a vital role by providing a clear blueprint of the current schema status.

Adopting a consistent strategy for schema management keeps development workflows efficient. This includes utilizing a compare tool to match the existing and target database states accurately, as explained in the field guide. Documentation and regular schema audits are fundamental to maintaining data integrity.

Handling Schema Changes with Version Control

Schema changes require careful handling to ensure data consistency and system reliability. Version control systems facilitate this by managing different schema iterations over time.

Developers typically use tools like DACPAC for deploying changes in SQL Server environments, minimizing disruptions.

When a change script is prepared, it captures the required modifications, making the implementation process straightforward.

Proper use of version control allows for easy rollback if a new implementation leads to issues. SQL Server Management Studio integrates these practices, offering functionality to streamline database management.

Implementing a structured approach to manage schema migrations ensures databases can evolve with application needs without compromising data quality. This structured method fosters a robust environment suitable for continuous development and integration.

Managing Static Data and Reference Data

Static data and reference data play important roles in database management. Unlike dynamic data, static data remains unchanged over time. It includes fixed information such as country codes or product categories. Reference data, on the other hand, provides a defined set of permissible values shared across systems, like currency types.

Key Considerations:

  • Consistency: Maintaining consistency in static and reference data is crucial. Any discrepancies can lead to errors and confusion.

  • Access Control: Implementing access control is essential to ensure that only authorized personnel can modify this data.

Using SQL Scripts:

SQL scripts help in managing static and reference data effectively. They can automate the creation, modification, and deletion of data entries. Scripts also ensure consistent updates across different environments.

Integrating Source Control:

Storing SQL scripts in a source control system helps track changes over time. This integration allows teams to monitor who made updates and when, providing a historical record of changes.

Dependencies:

Handling dependencies is vital to avoid conflicts. When one table’s data depends on another, special care must be taken to manage relationships. This ensures data integrity and prevents issues during updates.

Collaboration in Database Development Teams

Collaboration in database development teams is essential for effective project management.

Strategies like maintaining a single source of truth and resolving merge conflicts are crucial for smoother workflows and better productivity.

Strategies for Effective Team Collaboration

In a database development team, clear communication and structured workflows are key.

Using tools like Navicat Cloud can help teams share database objects and queries efficiently. This helps establish a single source of truth, allowing all members to refer to the latest version of their work.

Embracing DevOps practices can also enhance collaboration.

Teams can benefit from implementing a version control strategy that integrates both developers and database administrators. This ensures everyone follows consistent procedures for designing, testing, and deploying database changes.

Regular team meetings and using communication platforms further ensure everyone is aligned.

Encouraging team members to ask questions and provide feedback fosters an environment of open collaboration. A clear roadmap of tasks and responsibilities keeps everyone accountable and focused on shared goals.

Resolving Merge Conflicts

Merge conflicts can be a major hurdle for database teams. They occur when changes from different team members overlap or contradict each other.

To address this, it’s vital to adopt practices that minimize their frequency. One approach is using SQL tools with version control capabilities, like SQL Source Control, which allow tracking changes at a granular level.

Conflict resolution policies should be established, detailing how and who should handle conflicts.

Automated testing can be set up to identify issues early, allowing teams to correct conflicts before changes go live.

Regularly updating documentation and maintaining open communication channels is beneficial.

It ensures team members are aware of concurrent changes, reducing the chances of conflicting updates. By addressing merge conflicts proactively, teams maintain a consistent and reliable database environment.

Continuous Integration and Continuous Delivery

A computer screen displaying a SQL workflow with version control, surrounded by reference books and technical documents

Continuous integration (CI) and continuous delivery (CD) are key practices in modern software development, enhancing efficiency and reliability. They automate the build, deployment, and testing processes, ensuring that changes are integrated smoothly and deployed swiftly.

These practices are crucial for maintaining robust database systems with minimal manual intervention.

Automating Build and Deployment Processes

Automating builds reduces manual errors and enhances consistency.

In the CI/CD context, a build process begins when new code changes are committed to the version control system. This triggers automated scripts that compile the code and build the database, using tools that manage dependencies and configurations.

Continuous integration involves these automated builds, allowing developers to detect errors quickly. With every committed change, the system runs tests. This helps maintain a clean change history, ensuring each integration stage is validated.

Deployment scripts play a vital role in this automation.

Scripts are used to execute repeatable and reliable database deployments. They handle everything from schema updates to data migrations, ensuring that the right changes are applied to the database environment. This eliminates human error and speeds up the deployment process.

Ensuring Reliable Database Deployments

Reliable database deployments within a CI/CD pipeline mean less downtime and fewer errors.

By incorporating continuous delivery, organizations can roll out changes swiftly and confidently. Deployment processes are aligned with automated testing, ensuring each change is verified across different environments before reaching production.

The use of version control systems allows teams to track changes meticulously, maintaining a detailed change history. This transparency is crucial for debugging and auditing.

When scripts manage database deployments, they ensure consistency across devices and environments. This lowers risk and increases reliability.

In practice, integration and delivery principles ensure that deployments are prepared, tested, and executed efficiently. This approach not only enhances productivity but also improves software quality, ensuring that databases are always ready for the latest application features.

Source Control for Application and Database Code

A computer screen split into two sections, one displaying application code and the other displaying database code, with version control icons and buttons visible

Using source control for both application and database code is crucial in modern development workflows. It ensures all team members are synchronized with the latest changes, reducing errors and enhancing collaboration.

This section covers key practices for synchronizing and versioning both application and database code effectively.

Synchronizing Application and Database Changes

When working with both application code and database changes, keeping everything in sync is vital.

Developers often use integrated tools like Redgate SQL Source Control, which helps manage version control within SQL Server Management Studio. By doing so, teams can link specific database changes with their corresponding application updates, ensuring consistency across the project.

A unified repository is recommended, where both codebases coexist. This eliminates the risk of mismatches between application features and their underlying databases. Automation tools can further streamline this by enabling Continuous Integration and Continuous Deployment (CI/CD) pipelines that automatically deploy database changes along with application updates. Regular audits and reviews of these changes can prevent potential synchronization issues.

Best Practices for Application Code Versioning

To maintain an efficient development workflow, it’s important to follow best practices in application code versioning.

Prioritize a branching strategy that enables multiple developers to work simultaneously without conflicts. Git, a popular version control system, supports branching and merging, allowing developers to work on features independently before integrating changes.

It’s essential to write clear and descriptive commit messages. These messages explain why changes were made, which is crucial during code reviews. Regularly update and merge changes from the main branch to keep branches in sync. This practice minimizes conflicts and ensures that everyone in the team is working with the latest code.

Incorporating these strategies helps in maintaining a structured and organized codebase, which ultimately contributes to a more effective and error-free development process.

Versioning Strategies for Parallel Development

A computer screen split into two sections, each displaying a different version of a SQL workflow. Code changes are being tracked and merged in real time

In the world of software development, using version control is crucial, especially when several developers work on parallel tasks. Parallel development allows teams to work on different features simultaneously without interfering with each other’s progress.

Branching Strategies:
To manage this, development teams often use branching strategies. Common strategies include feature branching, where each feature is developed in its own branch, and release branching, which allows main code releases to remain stable. This keeps the integration process smooth.

Pull Request Workflows:
Pull requests are essential in versioning strategies. They ensure that changes are reviewed before being merged into the main branch. This is part of a broader workflow known as the Pull Request Workflow, which aims to control the build and deployment process efficiently.

Tool Usage:
Various tools can assist in these strategies. For example, Git’s branching system supports complex workflows needed for parallel development. Additionally, systems like ApexSQL Source Control integrate with SQL Server and help manage database projects.

Developer Coordination:
Every developer often works on a local, dedicated copy of the database to avoid conflicts. This setup helps maintain a streamlined development process where each branch or task does not disrupt others.

By using these strategies, development teams can effectively tackle multiple tasks and streamline their development processes. Defining clear workflows can significantly enhance collaboration and project management.

Database Builds and Deployment Automation

A computer screen displaying a SQL workflow with database builds and deployment automation, featuring version control tools and processes

Database builds and deployment automation play a crucial role in modern development workflows. By automating database builds and using scripted processes for deployments and ETL, development teams can ensure consistent and error-free updates.

Automating Database Builds

Automating database builds involves creating built-in scripts and tools to construct database environments quickly.

Tools like DVC (Database Version Control) can ensure version consistency, while SSDT (SQL Server Data Tools) helps integrate database tasks into the application lifecycle. This process allows for faster builds that are reliable and less prone to human error.

Automated database builds can be seamlessly integrated with application components to ensure that data layers are synchronized with application updates. Code review mechanisms help check for inaccuracies and maintain quality across builds. This integration ensures a consistent workflow, streamlining development from code creation to deployment.

Scripting Deployments and ETL Processes

Scripting deployments involves writing scripts that manage the deployment of database changes.

Using deployment scripts, teams can automate repetitive tasks like schema updates. These scripts not only reduce the chance of errors during deployments but also make rolling back changes easier if issues arise.

The flexibility of scripted deployments allows for quick responses to business and technical needs.

ETL (Extract, Transform, Load) processes benefit greatly from script automation.

ETL scripts can pull data from various sources, transform it into usable formats, and load it into target databases efficiently. Automating ETL processes increases data processing speed and accuracy, ensuring that business intelligence tools have access to timely and correct data. This efficiency is critical in supporting informed decision-making and operational effectiveness.

Frequently Asked Questions

A computer screen showing a series of FAQ topics related to version control in SQL workflow, with a person's hand using a mouse to navigate the page

This section addresses common questions about integrating version control into SQL workflows. Emphasizing practical integration methods and tools, it aims to clarify how teams can effectively manage and track database changes.

How can version control systems be integrated within SQL workflows?

Version control systems like Git can be smoothly integrated into SQL workflows by using tools that track changes to SQL scripts and schema.

For seamless integration, organizations often choose tools like VersionSQL. This approach ensures that every change is documented and revertible.

What are the best practices for database versioning and schema migrations?

Ensuring consistency in naming and structure is crucial.

Teams should adopt a migration-based approach alongside a version control framework. This method allows scripts to be executed in a sequence, ensuring compatibility and reducing errors. Regularly committing changes and collaborating with team members enhances this process.

What are the key benefits of using tools like Liquibase for database version control?

Liquibase offers several advantages for database version control.

It provides an automated way to track changes and simplify rollbacks and audits. The tool also supports many databases, making it versatile for various environments. It ensures that every change is well-documented and can be easily managed over time.

How can you manage database changes with version control in a team environment?

In a team environment, using distributed version control systems can be beneficial.

These systems allow each team member to work on their own copy of the database. Tools and strategies for a team setup can include SQL Source Control, which keeps everyone updated with the latest changes.

Can you describe the process of tracking and applying database schema changes across different environments?

Tracking changes across environments involves maintaining a consistent set of scripts. This ensures updates are applied in a controlled manner.

By using schema migration tools, teams can automate the deployment process, reducing the risk of errors in different databases. Documentation of changes is also essential to monitor progress.

What methodologies are recommended for maintaining SQL script versions in source control systems like Git?

Organizing scripts into folders and following a naming convention aids visibility and management.

Committing changes regularly and using a branching strategy can help manage development and deployment phases.

These practices, combined with regular code reviews, ensure the versioning process is efficient and reduces the complexity of managing SQL scripts.

Categories
Uncategorized

Learning Math for Data Science – Probability: Essential Concepts Explained

Foundations of Probability in Data Science

Probability forms a crucial part of data science. Practitioners use it to draw insights from data subject to chance. Understanding random variables and probability theory are essential for making inferences and predictions based on statistical analysis.

Understanding Random Variables

A random variable is a fundamental concept in probability. It assigns numerical values to the outcomes of a random event. It can be classified as either discrete or continuous, depending on the nature of its outcomes.

Discrete random variables have distinct, separate values like the number of heads in a series of coin flips. In contrast, continuous random variables can take on any value within a range, such as the exact height of students in a classroom.

Analyzing random variables involves working with their probability distributions. These distributions describe the likelihood of each possible outcome. For discrete variables, this could be a list or a table of probabilities. Continuous variables are described with probability density functions, which show how probability is distributed over a range of possibilities.

Exploring Probability Theory

Probability theory is the mathematical foundation enabling data scientists to quantify uncertainty and model complex phenomena. It involves concepts like conditional probability and independence.

Conditional probability measures the likelihood of an event occurring given that another event has occurred. Meanwhile, independence refers to cases where the occurrence of one event does not affect another.

Understanding these concepts is essential for tasks like hypothesis testing and building predictive models. Probability theory helps in assessing risks and evaluating the likelihood of different outcomes in uncertain environments.

By grasping probability theory, data scientists can better interpret statistical data. This understanding is further enriched through courses such as Probability Theory: Foundation for Data Science and Harvard’s Data Science: Probability.

Mathematical Tools for Probability

A table with a laptop, textbooks, and a calculator surrounded by scattered mathematical notes and equations

Mathematical tools such as calculus and linear algebra are essential for making sense of probability in data science. These tools help in analyzing complex datasets and developing predictive models.

Importance of Calculus

Calculus plays a crucial role in probability, especially when dealing with continuous random variables. It helps in finding probability distributions and computing probability density functions.

Through integration, calculus determines the area under a curve, which represents the probability of outcomes within a certain range.

Derivatives are also vital. They help in understanding how probability distributions change. In data science, partial derivatives are used to optimize models, enhancing their accuracy.

For continuous probability models, knowledge of calculus is indispensable for tasks like hypothesis testing and estimating parameters.

Leveraging Linear Algebra

Linear algebra is pivotal in handling data with multiple variables. It allows efficient computation and manipulation of large datasets using matrices.

Probability distributions can be expressed using vectors and matrices, making complex operations more manageable.

Matrix operations are used in data transformation and dimensionality reduction, such as in Principal Component Analysis (PCA). This helps in simplifying datasets while preserving essential characteristics.

Vectors describe directions and magnitudes, aiding in visual representations of data probability distributions. Understanding these linear algebra concepts is key for building robust data models and interpreting probabilistic outcomes.

Statistical Measures in Data Analysis

A person studying a textbook on data analysis, surrounded by charts, graphs, and mathematical equations

Statistical measures are essential tools that help analyze and interpret data. They include indicators like the mean, mode, and variance, which are key to understanding data patterns and distributions.

Central Tendency and Variability

Central tendency refers to the measures that identify the center of a data set. The most common measures are the mean, median, and mode.

The mean is the arithmetic average, providing a quick summary of a data set. The mode indicates the most frequently occurring value, which can be particularly useful in categorical data.

Variability describes how much the data points differ from the central value. This is assessed through measures like variance and standard deviation.

Variance shows the degree of spread in the data. The standard deviation, which is the square root of the variance, offers insight into the average distance of each data point from the mean. Together, these metrics highlight data consistency and uncover potential anomalies.

Distributions and Their Applications

Distributions describe how data points are spread out across values. The most common is the normal distribution, often depicted as a bell curve. This shape indicates that most data points are centered around the mean, with fewer points appearing as they move away.

The Central Limit Theorem is a fundamental concept related to distributions. It states that, given a large enough sample size, the distribution of the sample mean will be approximately normal, regardless of the shape of the population distribution.

This theorem is crucial for making inferences from sample data to a larger population. It underpins many statistical methods used in data science applications.

Understanding distributions aids in selecting the right statistical tests and making accurate predictions.

Programming for Probabilistic Analysis

Probabilistic analysis in data science involves programming tools to effectively analyze and visualize complex data sets. Python provides a robust platform for data analysis, while JavaScript enhances visualization through interactive elements.

Python’s Role in Data Science

Python plays a crucial role in data science due to its simplicity and powerful data analysis libraries. Libraries like NumPy and pandas allow for efficient data manipulation and statistical analysis.

Python’s syntax is clear, making it accessible for those new to programming. Tools such as SciPy and statsmodels further support probabilistic analysis by offering a range of statistical functions.

Python’s ecosystem is constantly evolving, providing extensive resources for tasks ranging from basic probability computations to complex machine learning models.

The integration of Jupyter Notebooks enhances Python’s capabilities by allowing users to write and execute code in a single interactive environment. This setup promotes exploration and explanation of data analysis processes.

Many data scientists prefer Python because of its versatility and the active community that continuously contributes to its development.

Integrating JavaScript for Interactive Visualizations

JavaScript is pivotal in creating interactive visualizations that help make data more comprehensible. Libraries like D3.js enable users to create dynamic, web-based graphics that respond to user input.

This feature is particularly valuable in presenting probabilistic data, allowing viewers to engage with models visually.

JavaScript works well alongside Python by facilitating the interactive display of data processed in Python’s ecosystem within web applications.

Frameworks like React and Angular enhance JavaScript’s capability to build complex front-end applications that visualize data dynamically.

These tools ensure that data presentation is not only informative but also engaging, thus improving the communication of intricate data insights. JavaScript’s ability to facilitate real-time data updates is crucial for developers aiming to create responsive and interactive data science applications.

Practical Learning Approaches

Engaging students in probability for data science requires innovative approaches that make learning interactive and practical. By focusing on creative teaching methods and enhancing practical experiences, educators can make these complex topics more accessible, especially for beginners.

Innovative Pedagogy in Data Science Education

Educators are now adopting innovative pedagogy to teach probability in data science. They focus on methods that engage and inspire students. These strategies include interactive online courses and gamified learning experiences. Such methods help break down complex concepts into smaller, manageable pieces.

Using real-world case studies as teaching tools can make topics more relatable. For instance, the Harvard Online Course uses the financial crisis of 2007-2008 as a case study. This approach helps students understand and apply probability theory in actual scenarios.

Emphasizing storytelling and real-life applications aids in retaining student attention and improving comprehension.

Optimizing Hands-On Learning Experiences

Hands-on learning experiences are crucial in making abstract mathematical concepts more concrete. By involving students in practical activities, such as simulations and coding exercises, they can better grasp complex theories.

Using platforms like Github, beginners can learn fundamental mathematics relevant to data science, enhancing their problem-solving skills.

Practical exercises should include guided tutorials that walk students through solving specific problems. Incorporating collaborative projects can foster a deeper understanding and encourage peer-to-peer learning.

This hands-on approach not only reinforces theoretical knowledge but also builds technical proficiency, preparing students for real-world data science challenges.

Courses and Curriculums

A chalkboard with mathematical equations and diagrams related to probability

Learning probability for data science often involves finding the right educational resources. Online platforms like Coursera and prestigious institutions such as MIT offer valuable courses that cater to different levels and learning goals.

Selecting the Right Online Courses

Choosing the best online courses is crucial for mastering probability in data science. Platforms like Coursera’s Mathematics for Machine Learning and Data Science provide specialized programs that focus on fundamental concepts like calculus, statistics, and linear algebra.

These courses are designed to be beginner-friendly and have flexible schedules, allowing learners to progress at their own pace.

Many courses are available for free, with options to pay for certificates. Update cycles are important, and courses like Probability & Statistics for Machine Learning & Data Science offer the latest content.

Visual aids and interactive tools are common to make complex topics easier to grasp quickly.

MIT’s Contribution to Data Science Learning

MIT stands out for its contributions to data science education. The institution offers rigorous coursework that often integrates real-world applications and interdisciplinary approaches.

Their open courses, available on platforms such as MIT OpenCourseWare, ensure that high-quality education is accessible to anyone, anywhere.

MIT courses often focus on critical thinking and problem-solving. These programs help learners build a strong foundation in probability and statistics, which are vital for data science.

The inclusion of hands-on projects and peer-reviewed assignments supports the practical application of theoretical knowledge, setting MIT apart as a leader in this field.

Advanced Probability and Machine Learning

Advanced probability is vital in understanding how machine learning algorithms function and enhance deep learning models. It helps in designing algorithms by making sense of uncertain data and in interpreting results effectively.

Probability in Machine Learning Algorithms

Probability forms the backbone of many machine learning algorithms, like Bayesian networks and Naive Bayes classifier. These tools use probability to predict outcomes, categorize data, and make decisions under uncertainty.

By calculating probabilities, algorithms can handle ambiguous data and incomplete information.

In Bayesian networks, probability helps build a network structure that models the relationships among variables. Each edge in a network has a probability associated with it. This structure allows for better prediction and analysis of data.

These networks are particularly useful in situations where data comes with inherent uncertainty, such as in medical diagnoses or financial forecasts.

Naive Bayes classifiers are another common application, where probability is used to classify data based on the likelihood of occurrences. They operate successfully in text classification and spam filtering, proving how effective simple probabilistic approaches can be in practice.

Understanding Deep Learning Through Probability

Probability plays a key role in deep learning by aiding in tasks such as dropout regularization and weight initialization.

In models, dropout is used to prevent overfitting by randomly ignoring certain nodes during training. This randomness is rooted in probability.

Recurrent neural networks (RNNs) and convolutional neural networks (CNNs) utilize probability to interpret data sequences and spatially-related data.

In RNNs, the use of probability ensures the model can handle varying input lengths and sequences, such as in speech processing.

DeepLearning.AI courses focus on these aspects by challenging learners to apply probability in deep learning models. Such knowledge is essential for understanding the mechanics of how models learn from data and adjust weights through probabilistic methods, enhancing model accuracy and efficiency.

Theoretical Versus Applied Learning

A chalkboard filled with mathematical equations and diagrams related to probability, surrounded by books and a laptop

In data science, understanding the balance between theoretical knowledge and practical application is crucial. Theory provides a foundation, while practical skills enable real-world problem solving in AI and data science.

Balancing Theory with Practical Data Science

Theory in data science involves grasping mathematical concepts, such as probability and statistics. It helps in understanding how algorithms work and why they behave a certain way. This foundation is essential for developing new methods or improving existing ones.

Applied learning focuses on using these theories to tackle real-world problems. Practitioners employ tools and software to implement models on actual datasets. A good data scientist needs both the understanding provided by theoretical concepts and the ability to apply these concepts practically.

Courses like Probability & Statistics for Machine Learning & Data Science emphasize this blend of skills.

Case Studies in Applied Probability

Applied probability can be seen in action through various case studies. Consider weather prediction, where models use historical data to forecast future conditions. Here, probabilistic models estimate the likelihood of different outcomes.

Another example is credit scoring in finance, where probability helps assess the risk of lending to individuals. These case studies highlight the importance of applying theoretical concepts in practical settings. By analyzing these examples, one can better appreciate the impact of probability on decision making in data science.

For further insight, articles like Theoretical Foundations of Data Science discuss the methods used to bridge theory and practice.

Building Mathematical Intuition

A chalkboard filled with mathematical equations and diagrams related to probability, surrounded by books and notebooks on data science

Understanding math is crucial for data scientists. It enhances their ability to apply math skills in machine learning and real-world applications. This section discusses essential techniques for developing math skills and how to bridge the gap between theory and practice.

Developing Math Skills for Data Science

Building math skills for data science requires a focused approach. Basic knowledge in calculus, linear algebra, statistics, and probability sets the foundation.

Calculus is important for optimization in algorithms while linear algebra is used for understanding datasets and transformations.

Statistics and probability are key for interpreting data and modeling uncertainty.

Online courses, like the one offered on Coursera, help learners master these areas.

Practicing problem-solving regularly helps solidify these concepts. Utilizing interactive tools and engaging in group discussions further enhances understanding.

Maintaining a consistent study schedule and tackling real problems ensure retention and application of knowledge.

Linking Conceptual Understanding to Real-world Applications

Connecting math to real-world applications involves critical thinking. Concepts learned must be applied to solve real-life data problems.

Data scientists often analyze vast datasets, requiring them to extract meaningful insights.

Probability theory, for instance, aids in making decisions under uncertainty, as highlighted in Mastering the Mathematical Foundations. Visualization techniques also simplify complex data.

Using scenarios like predicting market trends or classifying items using machine learning shows how math theory translates into practice. This approach not only builds deeper comprehension but also prepares learners for practical challenges in industries.

Data Exploration and Descriptive Statistics

Data exploration involves understanding and summarizing data sets using descriptive statistics and visual tools. These methods give insights into data distributions, trends, and variations. The process forms a foundation for making informed decisions and conducting further statistical analysis.

Descriptive Versus Inferential Statistics

Descriptive statistics summarize and organize data. They use measures such as mean, median, and mode to describe the center of a data set. They also measure spread, including range and standard deviation. This approach allows for an initial understanding of data without drawing broader conclusions.

Inferential statistics, on the other hand, involve predicting or inferring characteristics of a larger population from a sample. This involves complex methods like hypothesis testing or confidence intervals. By contrast, descriptive statistics focus on presenting raw data in an understandable form without making predictions.

Visual Representation of Data

Visual representation plays a crucial role in data exploration. It includes charts, graphs, and plots that make data easier to interpret.

Bar charts and histograms show frequency distributions, while scatter plots reveal relationships between variables.

Using visuals helps to identify patterns and outliers in the data. Tools like Excel and software like Python’s Matplotlib enhance data visualization capabilities.

Effective visuals transform complex data into intuitive insights, aiding decision-making processes. Engaging and accurate visuals are essential for anyone working with data exploration.

Statistical Learning and Regression Analysis

A person studying a math textbook with equations and graphs, surrounded by data science and regression analysis reference materials

Statistical learning involves using mathematical techniques to understand complex patterns in data. Regression analysis aids in predicting and explaining relationships within data, making it indispensable for data scientists.

Insights from Linear Regression

Linear regression is a foundational tool in statistical learning. It analyzes the relationship between dependent and independent variables by fitting a line to the observed data. This approach helps data scientists understand how changes in one or more predictors lead to changes in the response variable.

For example, by modeling sales data, businesses can predict future sales figures based on advertising expenses.

Linear regression uses the least squares method to minimize differences between predicted and actual data points, ensuring accurate predictions. This technique is widely used due to its simplicity and ease of interpretation, providing essential insights into data trends and relationships.

Predictive Modeling with Statistics

Predictive modeling uses statistical learning methods to forecast outcomes. By analyzing past data, data scientists build models to predict future events or behaviors.

This process leverages various statistical techniques, including regression analysis, to form precise predictions.

For instance, predictive models in healthcare might analyze patient records to forecast disease outbreaks.

These models often involve evaluating multiple variables and selecting the statistically significant ones that impact the outcome the most.

Tools like regression help in identifying key factors and adjusting for noise within data, leading to robust and reliable forecasts that support decision-making across various industries.

Frequently Asked Questions

Probability is crucial in data science and machine learning, forming the basis for many methods and decisions. Knowing the right concepts can guide data-driven decisions effectively. Fortunately, there are free resources available for those looking to enhance their skills.

What foundational probability concepts should data scientists understand?

Data scientists should grasp key concepts like independent and dependent events, permutations, combinations, and probability distributions. These are essential for interpreting data and making predictions in experiments and analyses.

Skills in probability questions can enhance problem-solving capabilities in data-related tasks.

How important is probability in machine learning and data analysis?

Probability is the backbone of machine learning and data analysis. It helps in dealing with uncertainty in data, making predictions, and testing hypotheses.

By mastering probability, data scientists can evaluate models and interpret results with confidence, allowing for more accurate decisions.

Can I learn mathematics for data science through free online courses?

Yes, numerous platforms offer free courses to learn mathematics for data science, including probability.

Websites like Coursera, edX, and Khan Academy provide structured courses that cover essential topics. These resources make it easier to gain a solid foundation without a significant financial investment.

Which resources are recommended for learning probability and statistics for data science?

To learn probability and statistics for data science, one can utilize textbooks, online courses, and interactive platforms.

Analytics Vidhya offers comprehensive questions and insights that help in building practical knowledge. Additionally, academic resources and tutorial websites can significantly enhance understanding.

How do I calculate probabilities for data science applications?

Calculating probabilities involves understanding basic math principles such as counting, conditional probability, and Bayes’ Theorem.

Tools and libraries in Python or R, like NumPy or SciPy, can be used to perform complex calculations and simulations effectively. This allows data scientists to handle various types of data scenarios.

What are the prerequisites for learning probability in the context of data science?

Before diving into probability for data science, you should have a good grasp of basic arithmetic, algebra, and a bit of calculus. Familiarity with data handling and analysis tools, such as Python or R, is also recommended. These skills form the foundation for understanding more advanced probability concepts and applications in data science.

Categories
Uncategorized

Learning T-SQL – Joins: Mastering Database Relationships

Understanding SQL Joins

SQL joins are crucial in combining data from different tables within a relational database. They enable retrieving related information, ensuring data integrity, and minimizing redundancy.

What are Joins?

Joins in SQL are operations that allow combining rows from two or more tables based on a related column. There are several types of joins, including inner joins, left joins, right joins, and full joins. Each type serves a different purpose depending on the table relationships.

  • Inner joins return records that have matching values in both tables.
  • Left joins return all records from the left table and the matched records from the right table.
  • Right joins are the opposite of left joins.
  • Full joins return all records when there is a match in either table.

These operations help streamline queries and ensure all relevant data is collected efficiently.

Importance of Joins in Relational Databases

Joins are vital in relational databases because they enable users to retrieve data from multiple tables conveniently. Without joins, users would need to manually combine data, which can be error-prone and inefficient. By using joins, databases maintain better data integrity and reduce redundancy.

For instance, a customer orders database might store customer details in one table and order details in another. Using an inner join, it is possible to easily combine this data to find out what each customer ordered.

This ability to connect and utilize multiple datasets is essential for accurate data analysis and reporting, making joins a fundamental concept in working with relational databases.

Types of SQL Joins

SQL joins are essential for combining rows from two or more tables based on related columns. Understanding different types of joins helps in retrieving the desired data effectively.

Inner Join

An inner join returns rows that have matching values in both tables. It’s one of the most commonly used join types, filtering out records without matches.

Outer Join

Outer joins include rows from one table even if there are no matches in the other table. They are divided into:

  • Left Join (or Left Outer Join): Includes all records from the left table and matched records from the right table.
  • Right Join (or Right Outer Join): Includes all records from the right table and only the matched records from the left table.
  • Full Join (or Full Outer Join): Combines results of both left and right joins. All records from both tables, matched or unmatched, are included.

Cross Join

A cross join returns the Cartesian product of two tables, meaning every row from the first table is combined with every row from the second table. This can result in large datasets.

Full Join

The full join creates a set that includes all records from both tables and fills in NULLs for missing matches on either side. It ensures that no data is lost from either table, making it comprehensive for certain queries.

The Inner Join

An Inner Join is a powerful tool in T-SQL that combines rows from two or more tables based on a common column. This operation selectively matches and displays rows where a specified condition is met, making it essential for database queries.

Syntax of Inner Join

The syntax for an Inner Join leverages the SELECT statement to specify data from multiple tables. It typically follows this structure:

SELECT columns 
FROM table1 
INNER JOIN table2 
ON table1.common_column = table2.common_column;

Here, both tables are linked by the common column through the join condition, which defines how the tables relate to one another. This condition ensures that only matching rows from both tables appear in the result.

To illustrate, consider two tables: Customers and Orders. To find customers with orders, the query might look like this:

SELECT Customers.Name, Orders.OrderID 
FROM Customers 
INNER JOIN Orders 
ON Customers.CustomerID = Orders.CustomerID;

Using Inner Joins in Queries

Inner Joins are often used to filter and retrieve data based on relationships between tables. When a query includes an Inner Join, it only returns rows where the join condition finds matching entries from each table.

In practice, this means that only entries from table2 that have a corresponding entry in table1 will be included. This is particularly useful when working with large databases, ensuring data consistency and relevance.

For example, using Inner Joins can help identify which products have been sold by linking sales tables with product information tables. This allows companies to analyze sales data effectively.

The flexibility of Inner Joins also means they can be combined with other SQL functions to perform complex queries, making them a vital part of database management and analysis tasks.

Understanding Outer Joins

Outer joins in T-SQL are used to combine rows from two or more tables based on a related column, including unmatched rows. This process is essential for retrieving comprehensive datasets without losing data due to missing matches.

Difference Between Left, Right, and Full Outer Joins

Left Outer Join: This join returns all rows from the left table and the matched rows from the right table. If there is no match, null values fill the columns from the right table.

Right Outer Join: This join works like the left outer join but in reverse. It returns all rows from the right table and only the matched rows from the left table.

Full Outer Join: This type combines the results of both left and right joins. It returns all records when there is a match in either left or right table records. If there are no corresponding matches, null values appear in unmatched columns.

Handling Null Values in Outer Joins

Dealing with null values is crucial when using outer joins since they are placeholders for missing data.

It is common to use functions like ISNULL() or COALESCE() to replace nulls with default values, ensuring data integrity and improving readability. Handling nulls carefully can be important in calculations and data analysis, preventing errors caused by unexpected null values. When counting results, using conditions like IS NOT NULL helps exclude rows with nulls, providing more accurate counts and summaries.

Cross Joins and Their Use Cases

Cross joins are used in T-SQL to combine rows from multiple tables, creating a dataset with every possible combination of those rows. Understanding when to use this type of join can be beneficial in certain scenarios, especially when generating large datasets for analysis.

Defining Cross Join

In SQL, a cross join generates a Cartesian product. This means every row in the first table is paired with every row in the second table. If one table has 4 rows and another has 3 rows, the result is a combined table with 12 rows. Cross joins do not require a relationship between the tables; they simply pair each row from one table with all rows from another.

Cross joins are useful for creating large test datasets. They can help simulate data for testing queries or for analytical purposes. It’s important to be aware that this join can lead to very large datasets, as the number of resulting rows is the product of the number of rows in each table.

When to Use Cross Joins

Cross joins are particularly valuable when an analyst needs to explore potential combinations of items from two separate datasets. For instance, a store might want to evaluate all possible price combinations of different products. In this case, a cross join would enumerate every product with every price point available.

Additionally, cross joins can be used for generating matrix-style reports, comparing elements, or populating set scenarios in simulations. However, they can be computationally expensive, especially with large tables, so their use should be carefully planned to ensure performance is not impacted.

Using a cross join can be strategically advantageous when exploring exhaustive combinations or generating data sets for thorough testing. It’s crucial to handle these joins with a clear objective and awareness of the resulting dataset’s potential size.

Advanced Join Techniques

Advanced join techniques in T-SQL enhance the ability to fetch data efficiently and solve complex queries. This section explores strategies like using multiple joins to combine tables, non-equi joins for conditions beyond equality, and self joins for referencing the same table.

Multiple Joins in a Single Query

When dealing with multiple joins, it’s crucial to understand the sequence. Each join is performed in the order specified, impacting performance and result accuracy. Using different join types—INNER, LEFT, RIGHT—can change how tables relate. It’s essential to apply the right join clause to meet query needs precisely.

For example, joining three tables might start with TableA and TableB using an INNER JOIN, followed by TableC using a LEFT JOIN. Order affects how data is retrieved and processed.

Handling multiple joins requires careful planning to maintain efficiency, especially with large datasets. Structuring these joins well ensures the query runs smoothly and retrieves the correct data.

Non-Equi Joins

A non-equi join uses conditions other than the equality operator to join tables. It’s ideal when relationships between tables are not based on simple key equivalency. For instance, joining on a range of values using conditions like >, <, >=, or <=.

These joins are powerful for cases where records in one table need to match a range in another. Consider a pricing model where items fall within certain price brackets. A non-equi join can link the items table with the price bracket table based on pricing conditions.

This ability to handle conditions beyond direct matches makes non-equi joins versatile in various scenarios.

Self Joins Explained

A self join is a technique where a table joins with itself. Useful for hierarchies or finding relationships within the same dataset, it uses aliases to differentiate between instances of the table. For example, in an employee table, a self join can help find employees and their managers by joining the table on the manager ID.

The self join’s strength lies in its ability to uncover connections within a table that would be difficult to express otherwise. By setting up the right conditions in the join clause, such as matching employee IDs with manager IDs, valuable insights can be gained about relationships and hierarchies within a single dataset.

Practical Aspects of SQL Joins

SQL joins are essential for combining data from different tables based on related columns. They help filter data efficiently in databases. Understanding how to optimize SQL join queries can greatly improve database performance.

Using Joins to Filter Data

Joins are crucial in SQL for merging data based on relationships between tables. They enable users to select specific data by combining rows from two or more tables based on a common attribute.

For example, an INNER JOIN retrieves records with matching values in both tables, making it perfect for filtering data where exact matches are needed. LEFT JOIN and RIGHT JOIN include all rows from one table and matched rows from the other, useful for identifying missing or unmatched data in tables.

Example:

SELECT customers.name, orders.amount
FROM customers
INNER JOIN orders ON customers.id = orders.customer_id;

This query filters data to show only customers who have made purchases.

Optimizing SQL Join Queries

Optimizing join operations is vital for improving the performance of SQL queries. Efficient indexing is one technique that speeds up query execution by reducing the time needed to find rows.

Choosing appropriate join types is also important. For instance, using INNER JOIN over a LEFT JOIN when possible can cut down unnecessary data processing.

Analyzing execution plans in SQL Server helps understand query performance. This step identifies bottlenecks so adjustments can be made.

Developers can also use query hints to instruct the database engine on how to execute the join operations more effectively.

Tips for Optimization:

  • Use indexes on columns involved in joins.
  • Avoid using SELECT *, specify needed columns.
  • Regularly update statistics on tables.

These strategies ensure SQL join queries are both effective and efficient, contributing to smoother database operations.

Working with Complex Joins

Complex joins in SQL can involve combining data from several tables or using subqueries to retrieve specific results. These methods require understanding join syntax, the FROM clause, and using table aliases to make queries more readable.

Joining Multiple Tables

Working with multiple tables often involves using different types of joins, including INNER JOIN, LEFT JOIN, and RIGHT JOIN. Each join type has its specific role in combining data efficiently.

When working with multiple tables, it’s crucial to specify the correct join conditions in the FROM clause. This ensures the appropriate rows are selected.

Table aliases can simplify lengthy queries, especially when tables have long names. Providing each table a short alias improves readability and reduces potential errors. For instance, using t1 and t2 as table aliases can make a query easier to write and understand.

Using Subqueries with Joins

Subqueries can further refine the data retrieved by joins. They act as a filter or additional search condition in a primary query. Subqueries are often used in the WHERE clause or the JOIN condition to narrow the dataset.

Working with subqueries requires careful attention to the query logic, as nesting subqueries can introduce complexity. Using table aliases here can also make it easier to trace which parts of the subquery are linked to the main query.

Combining subqueries with joins allows for a more flexible and powerful approach to querying relational databases.

Best Practices for SQL Joins

When using SQL joins, it’s crucial to establish clear join conditions. This ensures that rows are accurately combined based on matching values across tables. Proper conditions avoid incorrect or incomplete result sets.

Helpful skills for writing SQL joins include understanding different join types, such as INNER, LEFT, RIGHT, and FULL. Each type serves a different purpose in how rows are combined.

Consistently using aliases for table names can improve readability. For example, instead of SELECT a.id, b.name FROM employees a JOIN departments b, the alias clarifies which table each column belongs to.

Another best practice is optimizing query performance. Ensuring tables are properly indexed speeds up the joining of large datasets and avoids slow query times.

Besides performance, using LEFT JOINs sparingly can prevent unexpected NULL values in result sets. It’s best to analyze whether LEFT JOINs are essential or if another join type is more suitable.

Regular testing is essential to verify the accuracy of joins. This includes checking if all necessary rows are included and filtering out duplicates when necessary.

By focusing on these practices, SQL join operations become more efficient and effective, resulting in precise data retrieval.

Learning Resources and Tutorials

For those eager to enhance their SQL skills, a mix of online resources and structured reading can prove invaluable. Various platforms and books cater to different learning styles, from beginners to advanced users, providing ample opportunity to practice SQL joins effectively.

Online Tutorials and Courses

Several online platforms offer comprehensive courses on T-SQL and joins. Websites like Coursera and Udemy provide courses taught by experienced professionals. These courses often include interactive exercises, which are crucial for understanding how to implement joins in real-world scenarios.

Codecademy is another excellent platform that allows learners to practice coding directly in their browsers.

Free resources, such as W3Schools, offer tutorials focused on SQL joins. They are particularly useful for beginners who want to grasp the basics quickly and practice with examples.

Additionally, YouTube channels dedicated to SQL often feature in-depth tutorials, providing an informal learning approach.

Recommended Books for Practicing SQL Joins

Books remain a valuable resource for learning SQL joins, offering structured explanations and examples.

One recommended book is “Microsoft SQL Server T-SQL Fundamentals” which helps in understanding the logic behind T-SQL and effectively writing code.

For those looking for a concise guide, “Sams Teach Yourself Microsoft SQL Server T-SQL in 10 Minutes” introduces joins and other SQL features in short lessons.

The Pro T-SQL Programmer’s Guide also provides a deep dive, offering insights into advanced join techniques for developers. These books are well-suited for data analysts seeking to enhance their skills and improve their practical application of SQL joins.

Sample SQL Join Scenarios

Learning how to use joins in SQL is essential for working with related data spread across multiple tables. Each scenario demonstrates a practical example of joining tables to solve real-world problems. This enhances a user’s ability to query databases effectively.

Joining Books to Authors Tables

In libraries and bookstores, data is often stored in separate tables. One table might list books with attributes like “title” and “author_id”, and another table may contain author details with identifiers like “author_id” and “name”.

A common task is to display each book along with the author’s name.

This requires an inner join on the “author_id” column, which both tables share. This approach combines data from both tables to produce a list of books along with respective author names, useful in catalog displays or inventory systems.

Analyzing Customer Purchases from Multiple Tables

Understanding how customers purchase products is crucial for analyzing sales data. In this scenario, one table holds customer details using a “customerid”, while another table captures purchase information with the same ID.

An inner join can be applied to connect customer records to their purchases. This method enables businesses to track buying preferences, frequency of purchases, and customer value.

If there is a need to see all customers, even those without purchases, a left join would be suitable. It ensures all customers appear in the results, regardless of their purchase activity, providing a complete picture of customer engagement.

Building an Employee Directory with Joins

Company directories often include data from various databases. An employees table typically stores core information about employees such as names, positions, and employee IDs. Additional tables may store data about departments or contacts, also indexed by employee IDs.

To create a detailed employee directory, a designer would perform joins on these tables. For instance, joining the “employees” and “departments” tables could show each employee along with their assigned department. This setup allows for complete, accurate listings in web or mobile apps used within organizations. Format the directory with columns for easy readability, ensuring all important data points are included.

Frequently Asked Questions

T-SQL joins are essential for combining data from multiple tables. Understanding how to use different types of joins helps in writing efficient queries. This section covers common questions related to using joins in T-SQL, including examples and best practices.

What are the different types of joins available in T-SQL?

T-SQL offers several types of joins, including INNER JOIN, LEFT JOIN, RIGHT JOIN, FULL JOIN, and CROSS JOIN. Each has its own use case, depending on how tables need to be connected and what data should be included in the results.

Can you provide examples of how to use INNER JOIN in T-SQL?

An INNER JOIN selects records that have matching values in both tables. For instance, to retrieve employee names along with their department names, an INNER JOIN can be used between the employee and department tables on the department ID.

How can you perform a LEFT JOIN in T-SQL and when should it be used?

A LEFT JOIN returns all records from the left table and matched records from the right table. It is useful when needing all entries from the main table, even if there is no corresponding match in the related table. For example, use a LEFT JOIN to list all customers and their orders, including those with no orders.

What is the purpose of a CROSS JOIN, and how does it differ from other join types?

A CROSS JOIN returns the Cartesian product of two tables, meaning it combines each row from the first table with every row in the second table. This type of join is different because it does not require any condition for matching rows and can generate large result sets.

In T-SQL, how can you join multiple tables, such as three or more?

To join multiple tables, T-SQL can chain multiple joins together using multiple JOIN clauses. Ensure that each JOIN has a proper condition, such as a foreign key. This way, data is correctly aligned across all tables, such as joining customer, order, and product tables to view detailed sales data.

What are the best practices for using self-joins in T-SQL?

Self-joins are used to join a table with itself. They often require aliases to distinguish the two instances of the same table. They are helpful for hierarchical data, such as employee-manager relationships.

Best practices include using clear alias names and proper filtering conditions. This helps avoid large, unmanageable result sets.